JetWooBuilder
Creating Product Archive Template
From this block you’ll be able to learn how to create the Product Archive template to use for the Shop page or any other product layouts displaying related products, cross-sells or products in the shortcode.
Please, note, that here you create the template that defines the looks of one element in the layout of the products.
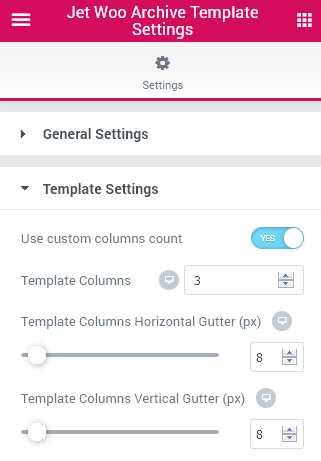
To change the number of columns in which the products are displayed, please, navigate to Archive template settings in the bottom left corner of the editing page and open Template Settings block. Here specify the number of columns in Template Columns.
Preparing for Adding New Product Archive Template
First, please, make sure that you’ve added at least several products to your site. If not, please, add them in Products > Add New in WordPress Dashboard.
Make sure that you’ve added to your products such properties as:
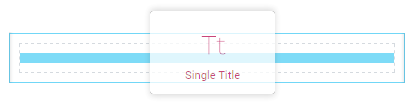
Product Title (needed for dynamic Title widget);
Price / Sale price (for dynamic Price and Add to Cart widgets);
Thumbnail image (for dynamic Thumbnail widget);
Stock quantity (for Stock Status widget);
Categories / Tags (for Categories and Tags widgets);
Excerpt (for dynamic Excerpt widget);
Rating (for Rating widget).
For more detailed information check this documentation part.
Creating New Product Archive Template
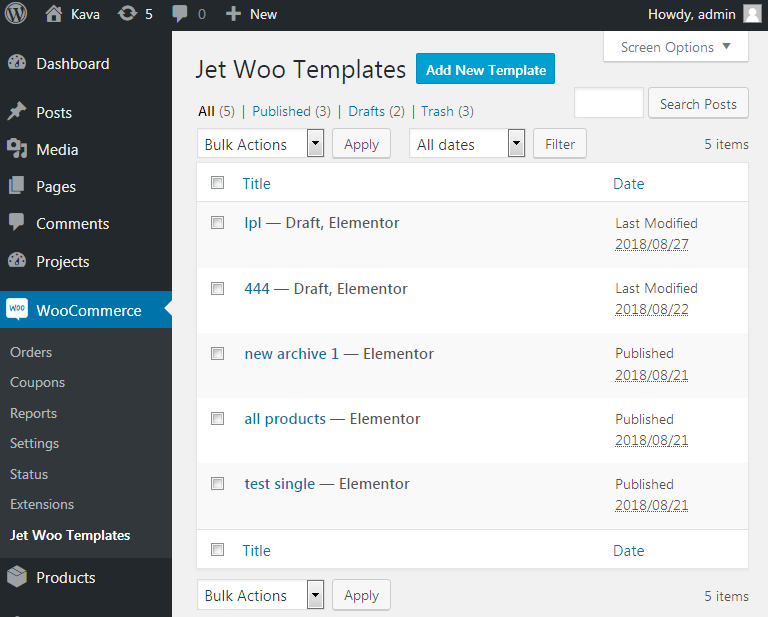
- After everything is prepared you have to navigate to WooCommerce > Jet Woo Templates and here click Add New Template button.
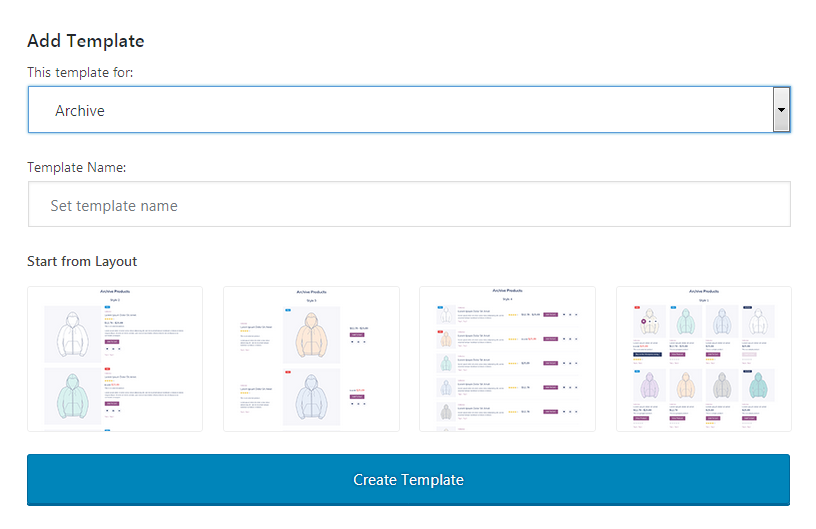
- The button opens the popup window showing the set of pre-designed Archive/Single Product pages. You can easily select one of them to use. Or you can start creating the Archive template from scratch.
- Also, in this popup window you’ll have to specify:
- The template name - here you you have to type in the title of the template you’re creating;
- This template for - in this dropdown you need to select Archive in order to start creating Archive template.
- After everything is done click Create Template button.
Adding Content to Product Archive Template
- Once you’ve created a template and navigated to Elementor editing page by clicking on Edit with Elementor button, the standard Elementor editor opens.
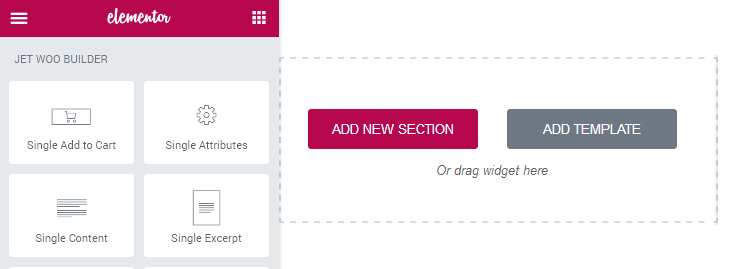
- You can create any page structure you need by adding the sections, add columns to the sections, duplicate sections and columns, add templates you’ve already created, and use now only the widgets added by JetWooBuilder, but also any other widget you want to place to the template, which is available in the Elements block.
-
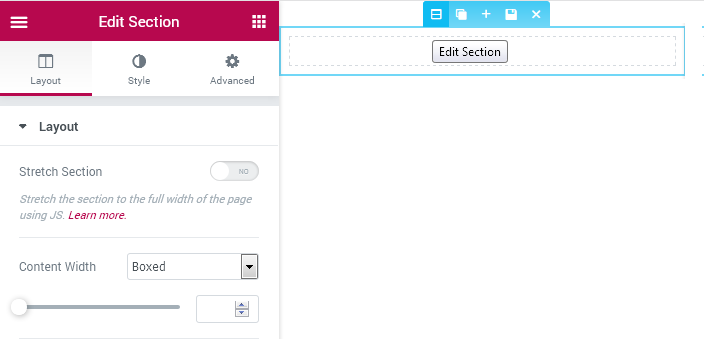
To add a new section click Add New Section button. Click Edit Section option in order to set the content width, section background style, paddings and margins, etc.
-
Select the preferable columns structure for the section. You can also drag the column borders in order to set the custom columns width. You can also edit the columns width, set the content position, etc, by editing the column.

-
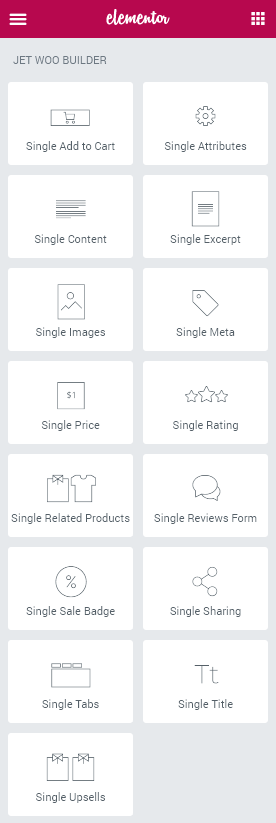
After that navigate to Elements list and here scroll down to see JetWooBuilder widgets.
-
Drag and drop the widgets to the columns in order to place them on the page.
- To access Jet Woo Archive Template Settings click the Settings option located in the bottom left corner. Here you can change the general settings and the specific template settings for the newly created template.
General Settings
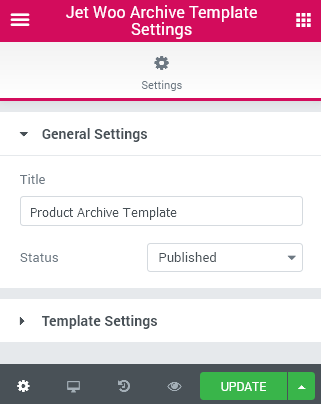
- Title - here you need to specify the title to apply for the Archive template. After that you’ll be able to select this template from the dropdown using its title.
- Status - here you can select one of the statues for the template (draft, pending review, private or published).
Template Settings
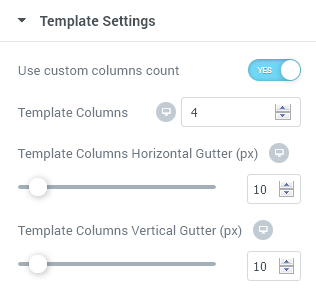
- Use Custom Columns Count - enable this option in order to enable the custom count for the columns in the archive template (you can change the columns count and then you won’t have to use bootstrap to add or remove the columns and change the layout).
- Template Columns - here you can specify the number of columns to use for this template and change the number for different devices.
- Template Columns Horizontal Gutter - here you can specify the size of the horizontal gutter between the columns in px and make it responsive.
- Template Columns Vertical Gutter - here you can set the vertical gutter value in px and make it responsive.
After everything is done please click Save (Update) button. Now the template is saved and ready for use!
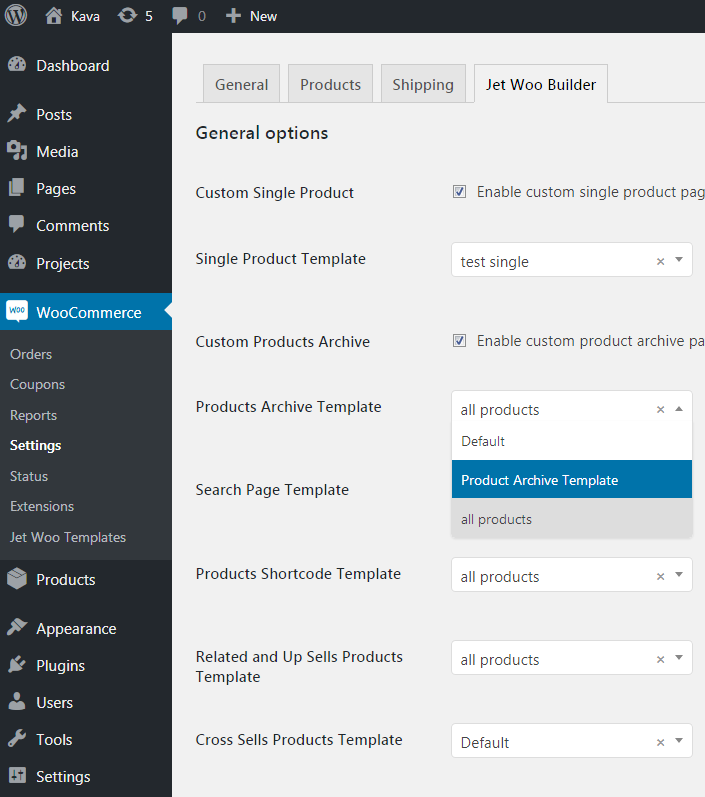
Assigning Product Archive Template to Shop
In order to assign the Product Archive to the specific page, please, navigate to WordPress Dashboard and here open WooCommerce > Settings > Jet Woo Builder block.
Check Enable custom archive page option to allow using the newly created custom archive template.
Select the newly created template in Products Archive Template dropdown.
Save the changes by clicking Save button.
After that you’ll see the products archive displayed on your default Shop page.