Vendy Pro theme installation
Template Preparation
After downloading the template from your account you should unzip the template package on the computer.
There you'll find the theme zip archive, sources folder, and documentation folder with the installation instructions as well.
Please, unzip the template package on computer and then upload the delori-main-v1.zip archive from the theme folder to Shopify.
Note: You may follow the simple instruction steps described in this guide How to install the theme.
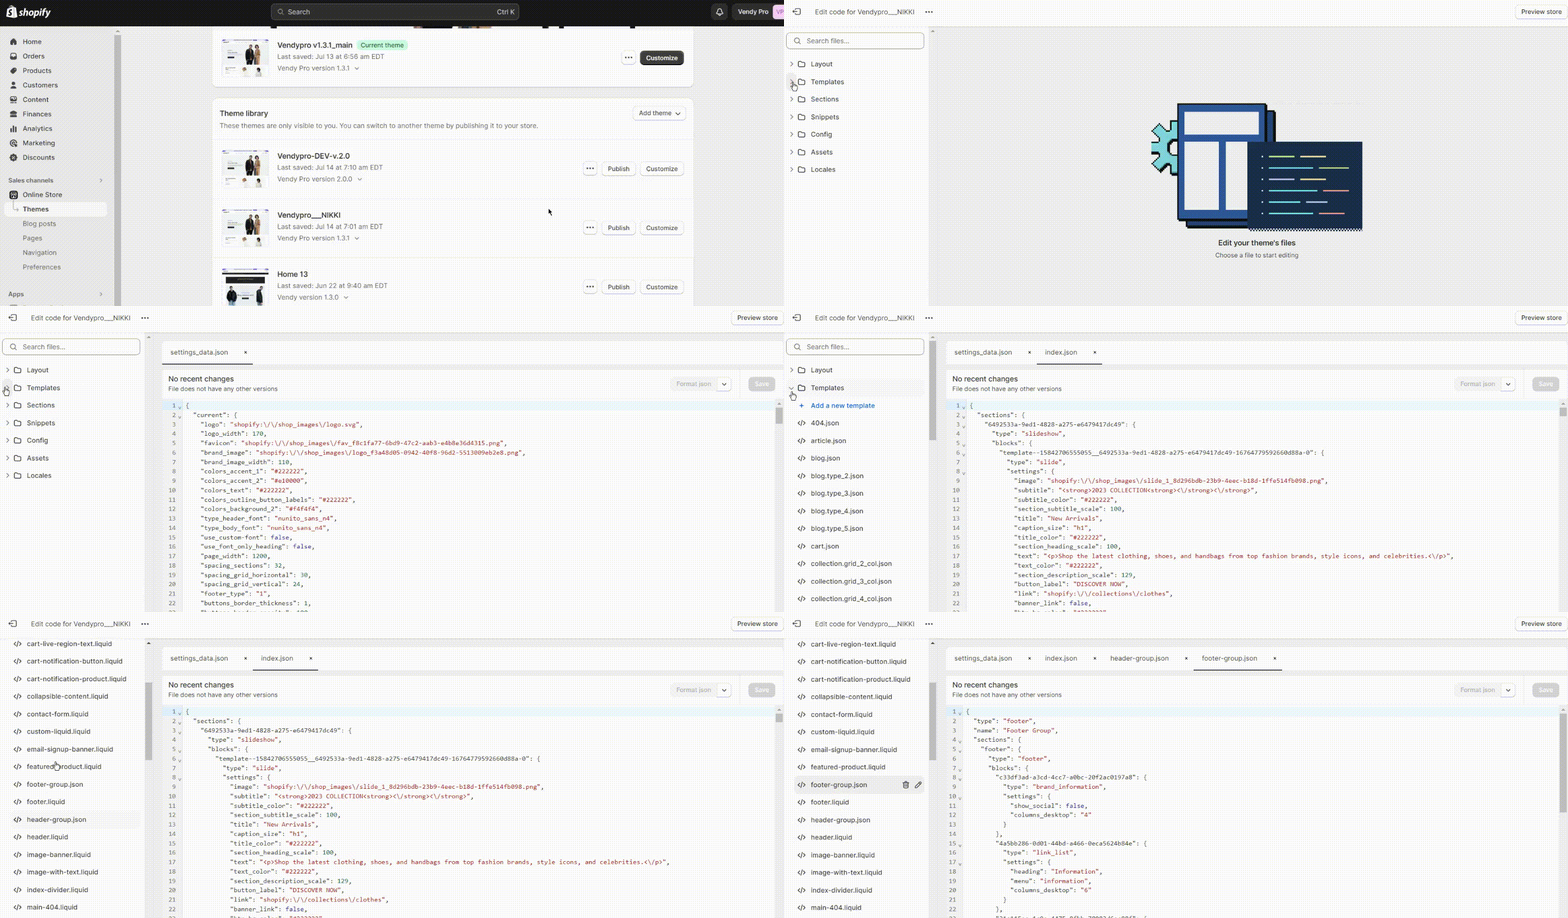
In order to get the needed homepage layout of the Delori theme, you should duplicate Delori main theme in the admin panel and then replace the code of config/settings_data.json and template/index.json files fr om the Layouts folder. Select home_1 or the needed skin folder and copy files code inside:


Logging into account
Register your account at shopify.com (if you are already registered, log into your account by adding /admin to your domain name in your browser address bar and entering your email and password).

Preparation
First, you should unzip the downloaded template package archive on your computer.
The theme skins are located in the template package -> theme.
Shopify theme installation
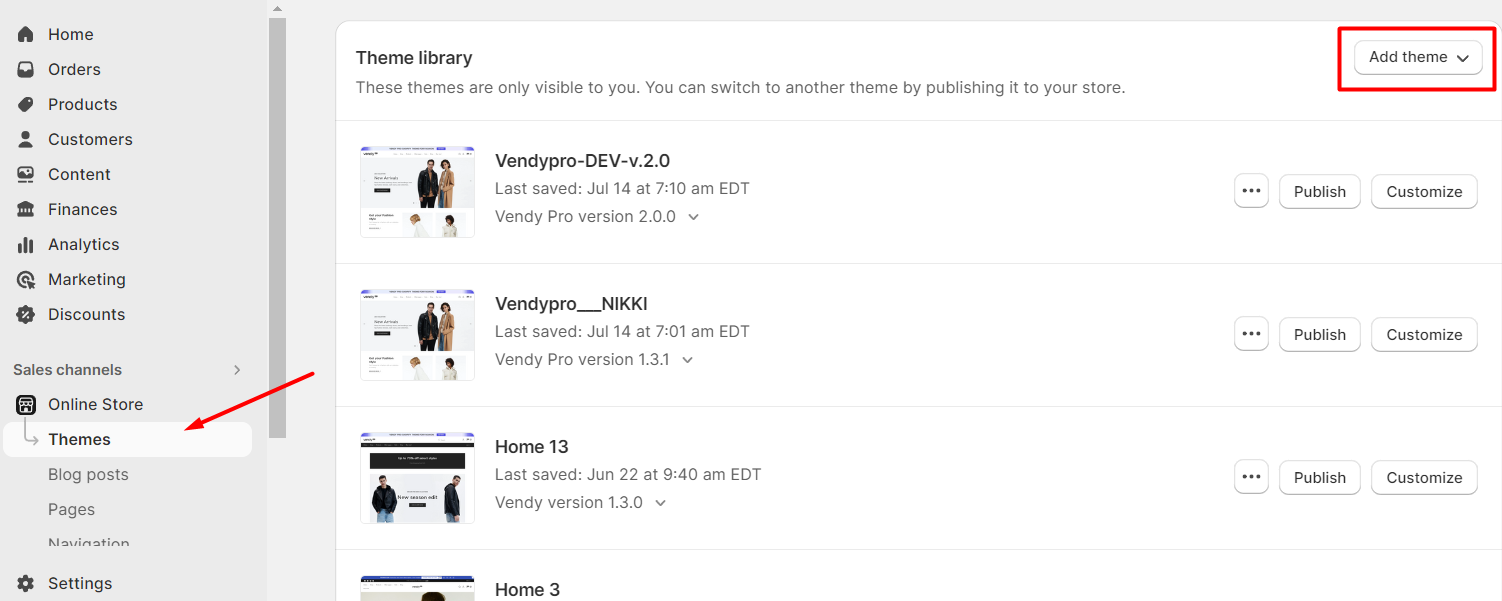
- Navigate to Themes. It contains a default Shopify theme. Click Upload a theme button in the upper right corner.
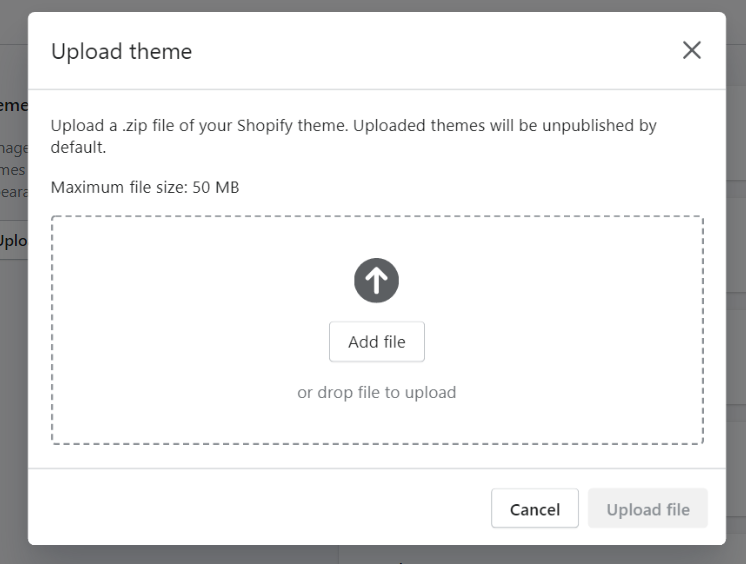
- Click Browse in the pop-up window and open the template folder on your computer.
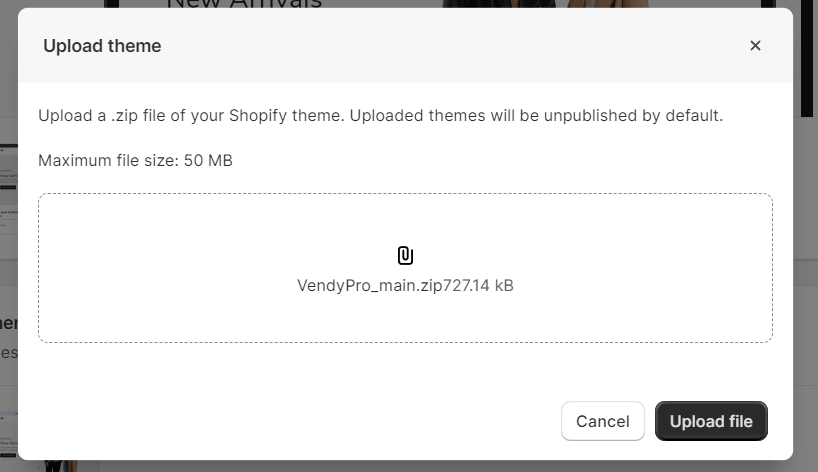
- To install the Vendy Pro main theme, select "VendyPro-main.zip" and upload it to Shopify.

- Click Upload button. In a few seconds the new theme will show up in the list of the available
themes for your online store.
Theme activation
- Click Publish theme button at the bottom of your new theme.

Congratulations! You have successfully installed a Shopify template. Now it is ready to work. You can open your online store in the browser and check how it looks.
How to Install a Shopify 2.0 Theme after Theme Package Update?
In order to update Online Store 2.0 theme follow the steps below:
- Install the latest version of the theme in the preview.

- Click on the ‘edit code‘ of the main (published) theme.
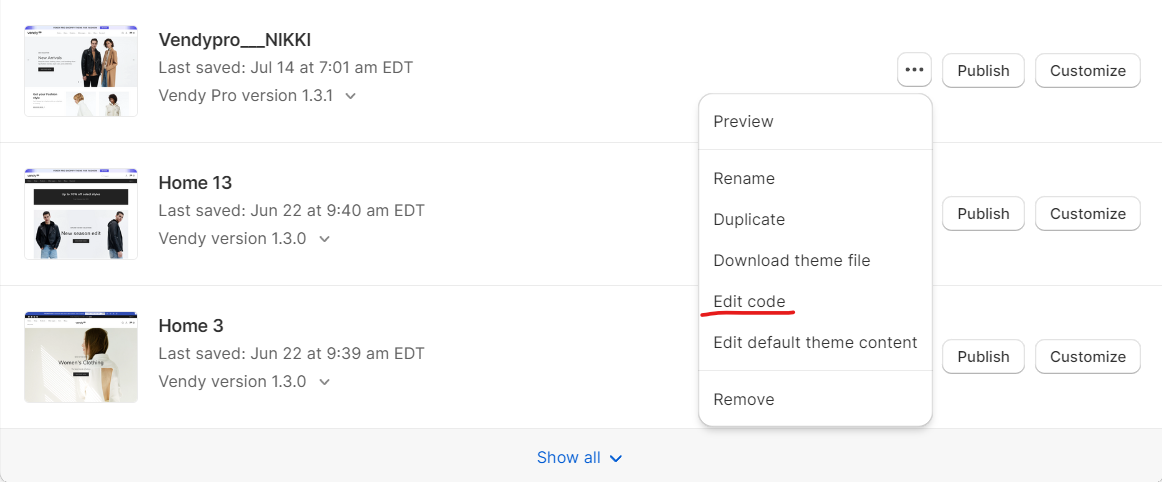
- Replace the code in the following files:
- config/settings_data.json
- templates/index.json
- sections/footer-group.json
- sections/header-group.json
- If you intend to install another home layout, use the files from the Layouts folder. If you want to install an existing skin, use the files from the Skins folder.
- Now, choose the desired home layout (e.g., home_2 or any other layout) from the layout folder, or select a skin from the skin folder.
- Copy the code from the chosen layout or skin files and insert them into the corresponding files mentioned in step 2 within your admin panel.
- Save the changes in the admin panel.
- After completing these steps, you can go to the theme preview and make sure that the settings have been saved and displayed correctly.
- If everything goes well, you can publish a new topic.
