Delori
Header Group
Header area is a content block that you can see at the upper part of every page of an online store. Header typically consists of a name of a store, logo, main website navigation menu and shopping cart sign.
Header is customizable content. By changing the header options you will have different designs.
Header Settings
In your Shopify admin panel go to Customize Theme > Header section. Here you can set the Header Layout Settings.

Header
- Page width or Apply full width - control how the content in the header area is displayed in terms of its width and alignment.
- Color scheme - choose the color scheme from the available ones.
Note: You can add/change the color scheme going to Theme settings -> Color.
Header transparent overlap
- Transparent header (only home) - create a visually appealing and modern aesthetic, allowing the content to flow smoothly underneath the header on the homepage.
- Enable inverse header color elements.
Logo
- Edit your logo in theme settings - set additional settings for logo.
- Desktop logo position - set the logo position from the available: top left, top left inverse part bottom, top center, top center/fullwidth menu, middle left, middle center, middle left/ center menu.
Menu
- Main menu - ability to change main menu or remove it.
- Desktop menu type - choose the type of the header menu from the available: dropdown menu + mega menu, or drawer menu.

- Sticky header - the "sticky" behavior helps improve user navigation and provides easy access to important links and menu options, regardless of where the user is on the page. The following options for sticky header are available: none, on scroll up, always, always reduce logo size.
- Show separator line - a barely noticeable line that will separate the header section from the main page when scrolling.
Search component
- Search style - ability to display search as a toggle or a row.
Country/region selector
- To add a country/region, go to your market settings.
- Enable country/region selector - enable or disable country selector.
Configure currencies with shopify documentation Official documentation.
Language selector
- To add a language, go to your language settings.
- Enable language selector - enable/disable language selector.
- Move localization selectors to topbar block - the placement of language or region selection options in the top navigation bar of an online store.
Icons text on desktop
- Show account text - enable/disable the "Log in" text next to the account icon.
- Reverse account text - enable/disable the "Log in" text before the account icon (the Show account text option must be enabled).
- Show wishlist text - enable/disable the "Favorites" text next to the wishlist icon.
- Reverse wishlist text - enable/disable the "Favorites" text before the wishlist icon (the Show wishlist text option must be enabled).
- Show search text - enable/disable the "Search" text next to the search icon.
- Reverse search text - enable/disable the "Search" text before the search icon (the Show search text option must be enabled).
- Show cart text - enable/disable the "Shopping bag" text next to the cart icon.
- Reverse cart text - enable/disable the "Shopping bag" text before the cart icon (the Show cart text option must be enabled).
Mobile layout
Mobile logo position - you can optimize the logo position for mobile layout setting it in the center or on the left.
Spacing
Bottom margin - set the bottom margin spacing on mobile.
Social icon style - choose the style of the social icons: color, standard, circle, or square.
Section padding
Top padding - set the top padding spacing on mobile.
Bottom padding - set the bottom padding spacing on mobile.
Header Components Settings
Your Shopify store name is the text logo that is shown at the front end of your site. Let us show you how to manage it.
In your installed theme you will see the following options:
Main Logo
- Logo Type — set your Image logo and Text logo for your online store;
- Logo Width — set a logo width;
- Logo Height — set a logo height.
Retina Logo Information
You are able to Upload the desired image from your computer or select image from your library. Select Upload image or Select from the library from the Update dropdown.
Also, you can use logo image inverted that is recommended for header position on over content.
Select Change to modify the image logo. Click Edit to make some changes, or click Remove to delete the logo.
Write a brief description of this image to improve search engine optimization (SEO) and accessibility for visually impaired customers.
You can also set here the Logo text and Logo slogan for your Shopify store.
Additional Content
Here you can set and manage additional Shopify content for header area including: currency, search, header account, wishlist, shopping cart options.
See the picture below.
- Currency;
- Search;
- Header Account Login;
- Wishlist;
- Shopping Cart;
- Search.
Currency Configuration
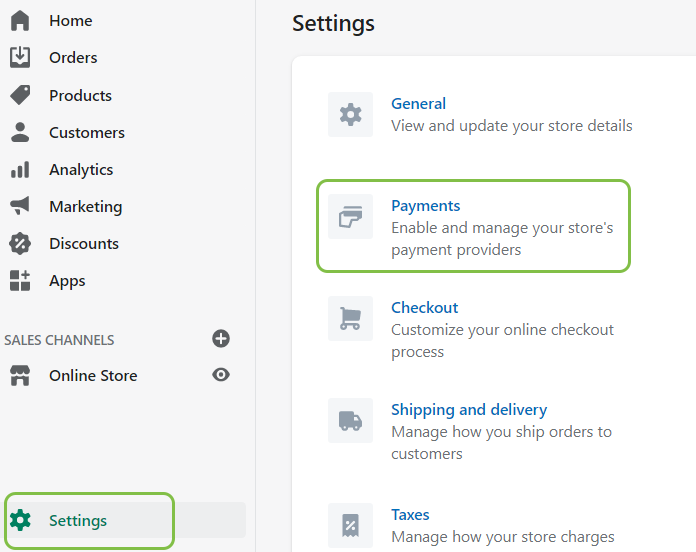
1. Please, click the Settings options at the bottom of the left sidebar. You will be forwarded to the page with the store settings. You need General and Payments tabs.
2. Scroll down to the Store currency block, select default currency of your store and click "SAVE" button.
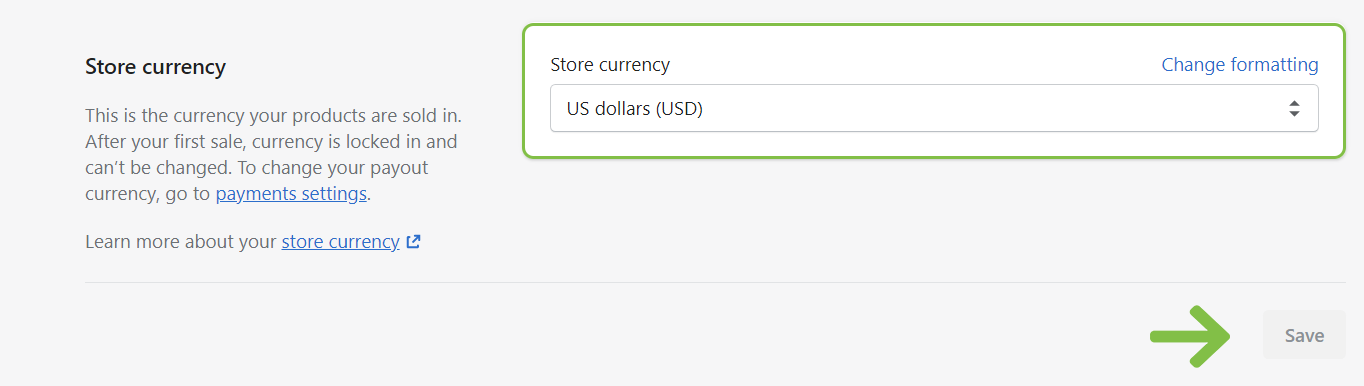
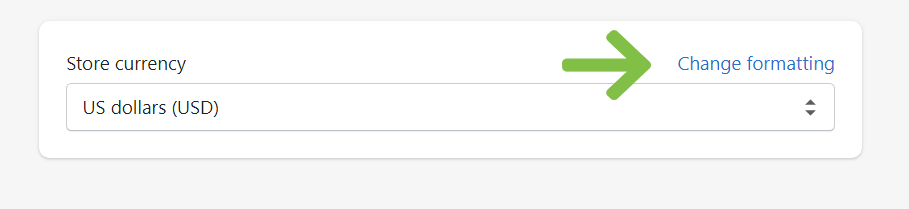
3. Click the Change formatting to manage the appearance of the default currency.
Currency selector
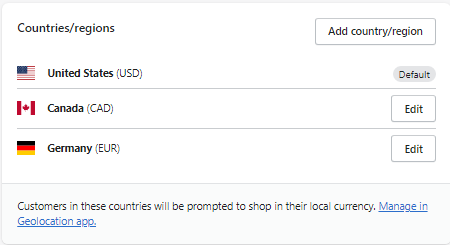
If you want to add more currencies, choose Payments -> Currencies -> Manage. Scroll down to the Countries/Regions section.
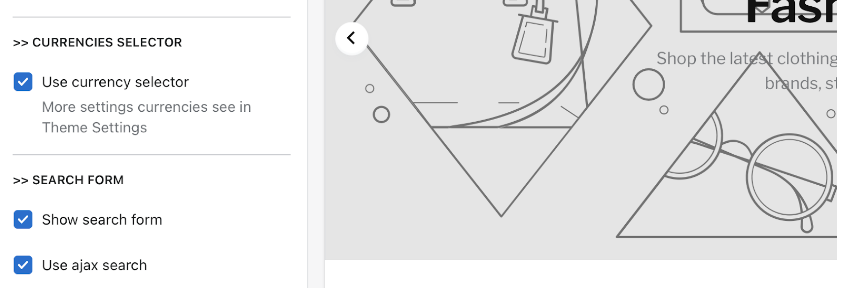
After that, navigate to the Online Store -> Themes -> Customize tab. Choose Header and scroll down to Currencies Selector. There you can enable it for your website.
Search Form
Search Form is aimed to help the customer look for something on your store with ease in order to increase conversion rates. Searching is one of the basic activities that your customers often do when they surf your store especially when your online store includes many items.
- Show search form — enable/disable search form on the frontend;
- Use ajax search — enable/disable option with the following view styles:
- - only icon;
- - only text;
- - text+icon;
- - icon+text.
Account/Login Form
Shopify account/login form displays login and registration forms on the website.
- Account Links — enable/disable search form on the frontend:
- - only icon;
- - only text;
- - text+icon;
- - icon+text.
Wishlist
Shopify Wishlist option is as an important feature in conducting business online. With this functionality, the customers can add to wishlist bucket the desired products and purchase them in the future.
You can enable or disable Wishlist option on your Shopify store.
Shopping Cart
Shopping Cart is like a bridge between the shopping and buying process. Shopping Cart allows customers to select the desired products, review them, make modifications or add extra items if needed, and purchase them.
- shopping cart form — enable/disable search form on the frontend:
- - only icon;
- - only text;
- - text+icon;
- - icon+text.
Megamenu
With the mega menu, you can make the navigation through your store smooth and organize your content properly. By creating a compound menu in the dropdown form, you will give visitors immediate access to any category on your site.
Mega Menu in Shopify
Mega menus allow you to display several menus across your store’s main navigation from one dropdown. The website allows customers to easily navigate through your store by displaying all of your products and collections.
Here is a great tutorial on how to build the basics of store navigation on Shopify. To get a grasp of the upcoming tutorials, please first visit their tutorial if you have no prior knowledge of website navigation.
Display Mega Menu
To showcase a Mega Menu on your Shopify store, you'll initially have to implement certain modifications within the Navigation section.
1. Go to Online Store -> Navigation and chose a menu to edit.
2. Add a new menu item or edit an existing one.
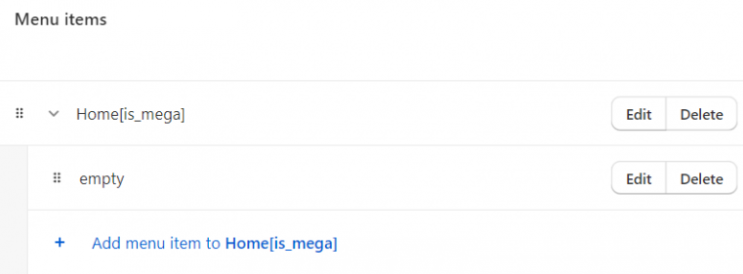
3. Add [is_mega] to the name field and hash sign (#) to the link field.
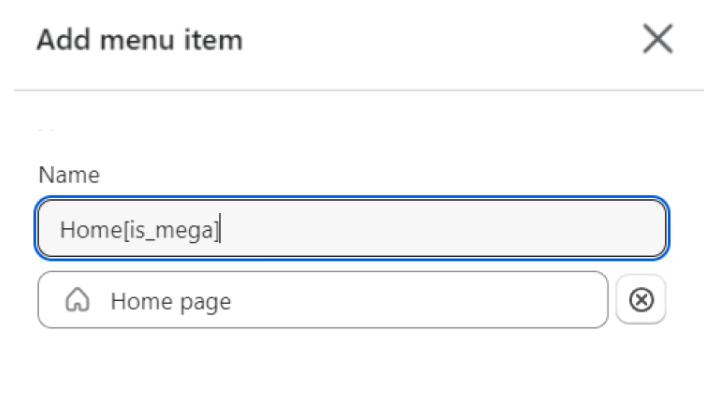
Note: Creating a Mega menu is possible only when you include a menu item labeled with [is_mega] within the Navigation.
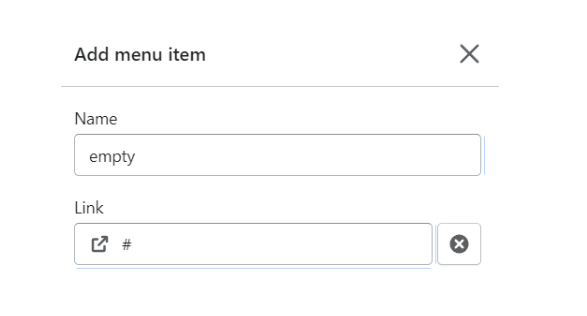
4. Add a new menu item, type “empty” in the name field, and hash sign (#) in the link field.
5. Drag the empty item to the right to make it a submenu item.
6. Go to Online Store -> Themes -> Customize.
7. Choose and add a new block to the header.
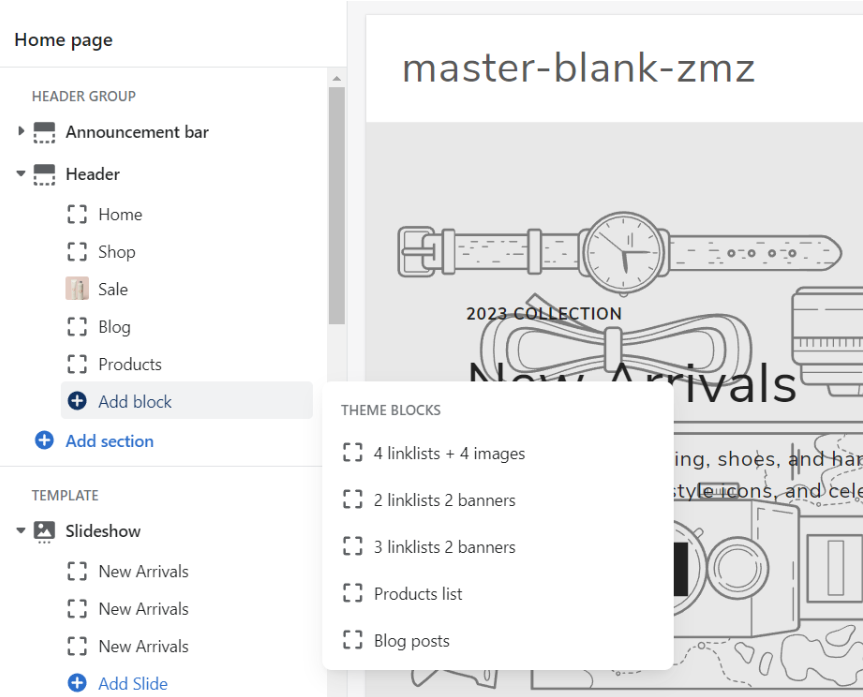
8. Go to edit the block you chose and type your menu title in the for item field.
Now, you can assign an item to any menu item in the navigation marked with [is_mega].
Display Simple Menu
To showcase a Simple Menu on your Shopify store, you'll initially have to implement certain modifications within the Navigation section.
Here's a step-by-step guide on how to do it:
- In the Shopify admin, go to "Online Store" in the left-hand sidebar and then click on "Navigation."
- Click the "Add menu" button to create a new menu. Give your menu a name, like "Main Menu" or "Header Menu."
- Click the "Add menu item" button. Enter the name of the menu item. This is what will be displayed on the menu. Enter the URL for the page you want the menu item to link to. This could be a collection page, product page, blog post, or any other page on your site.
- Organize Menu Items:
- You can create sub-menus (dropdown menus) to organize your menu items further. Click and drag a menu item slightly to the right under another menu item. This will make it a sub-item of the one above it.
- To rearrange menu items, simply click and drag them to the desired position within the menu.
- To edit a menu item, click on it in the menu editor.
- To delete a menu item, click "Delete" button.
- Before making your changes live, it's a good idea to preview them using the "Preview" button. If everything looks good, click the "Save" button again to publish your menu to your online store.
Compare Products
Customers can use product comparison features to compare similar products with products of different values. Your customers will be able to find the right product for all their needs this way.
You can use this feature to get your customers curious about the differences between the options you offer.
In your Shopify 2.0 store, you may compare products by color, size, materials, or any other option that can be managed.
Note: only 3 options are allowed to set for the Product Comparison.
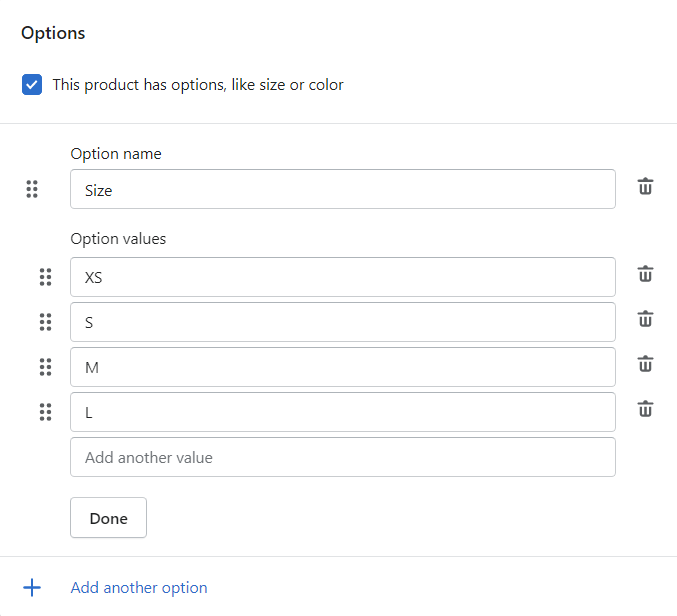
In order to create the options for product comparison, in your Shopify admin panel navigate to Products section. Choose the product you want to add the options to. Click to edit.
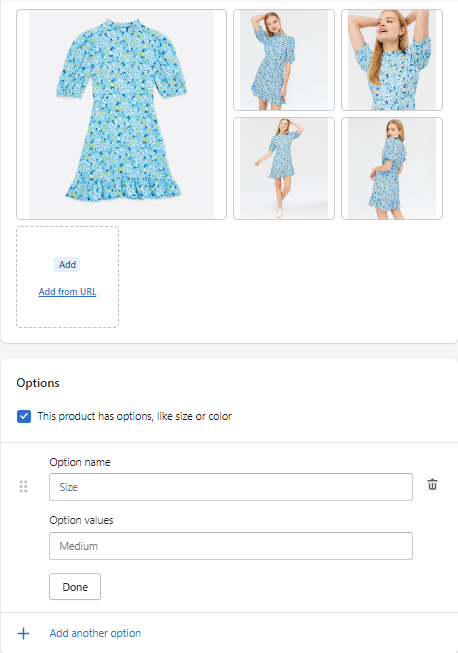
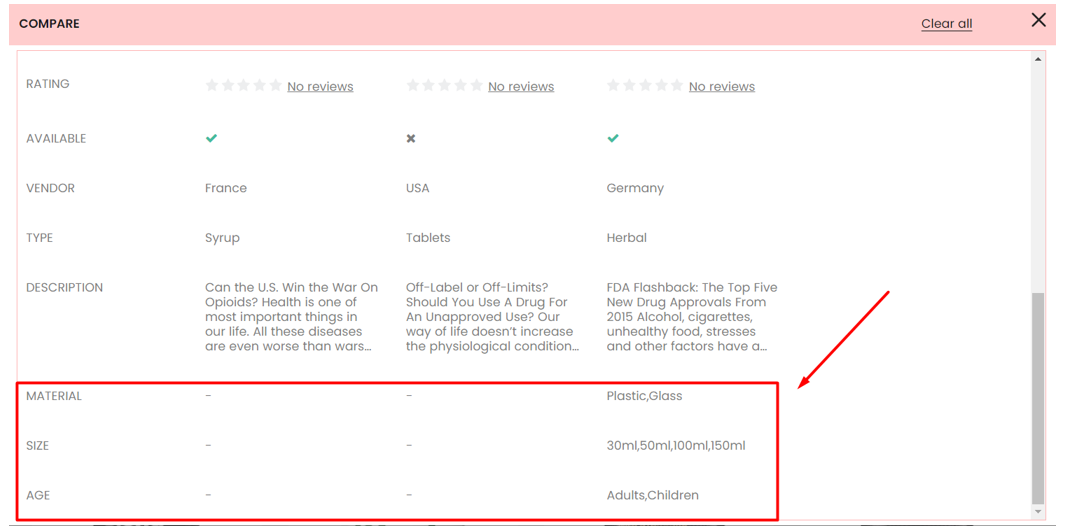
The Compare Products settings:
- Option name - choose the product comparison option from the drop-down list (size, color, material, style);
- Option values - set the correspondent option value.
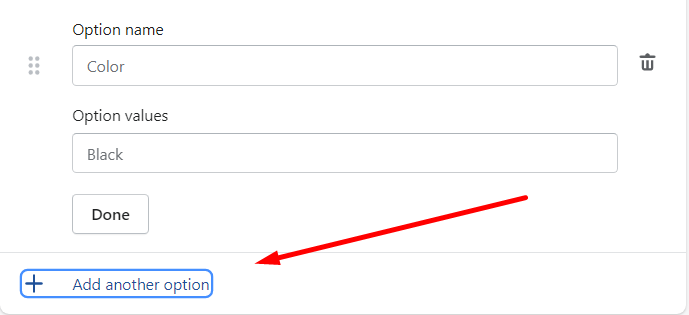
If there is no needed option, you can create the new one. Click Add another option button.
Note: the option name must match together with its translation.

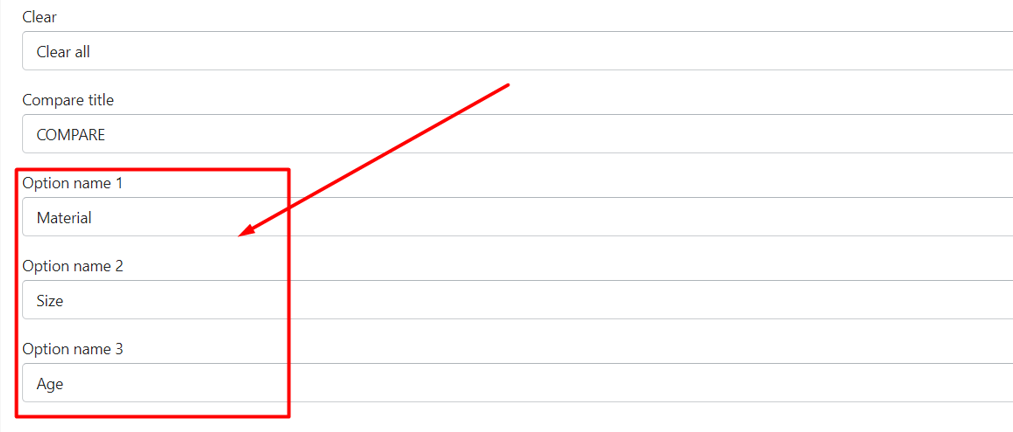
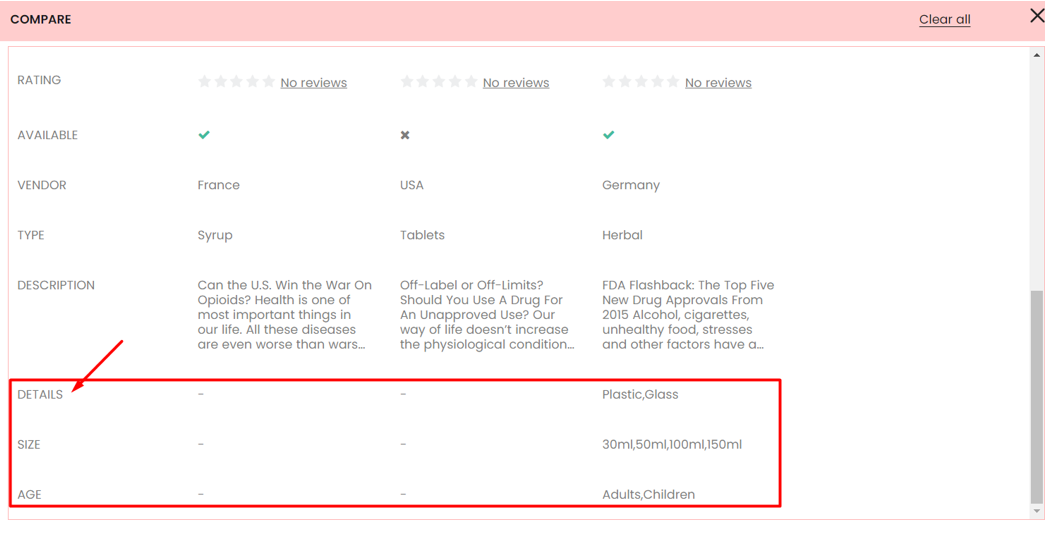
The options names in the comparison table can be renamed to other names that are more suitable for the user's opinion.