JetProductGallery Documentation
JetProductGallery Quick Guide
Here you can learn more about the way one can use the JetProductGallery widgets. It explains the process of adding the product gallery to the Single Product page template in details.
Adding Images to Display with the Gallery
First, make sure you've added the images to the product gallery and have set the featured image for the product. To do it, please, open the WordPress Dashboard, and here proceed to products page.
Open one of the existing products for editing, or create a new one. Then, scroll the page down and locate Product Gallery block. Here you need to upload the images that display all the benefits and strong sides of the product.
Creating New Single Product Template
After all the information about the product is filled we can create a new Single Product page template. Follow the steps described below to learn how this can be done.
Let’s navigate to WooCommerce > JetWoo Templates in the Dashboard.
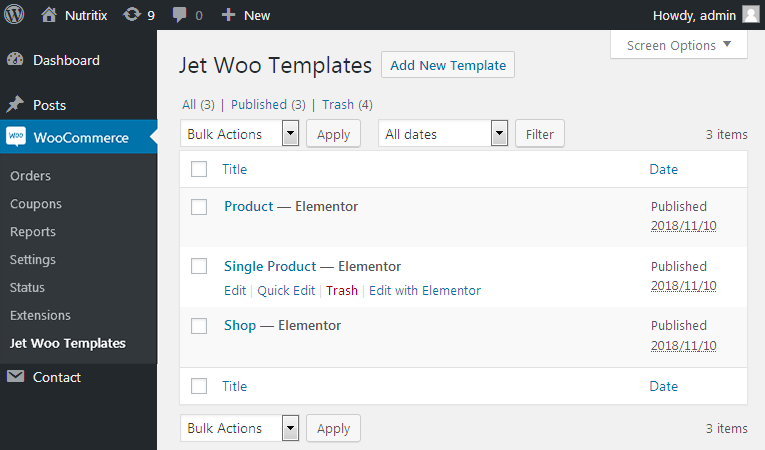
Here click Add New Template button.
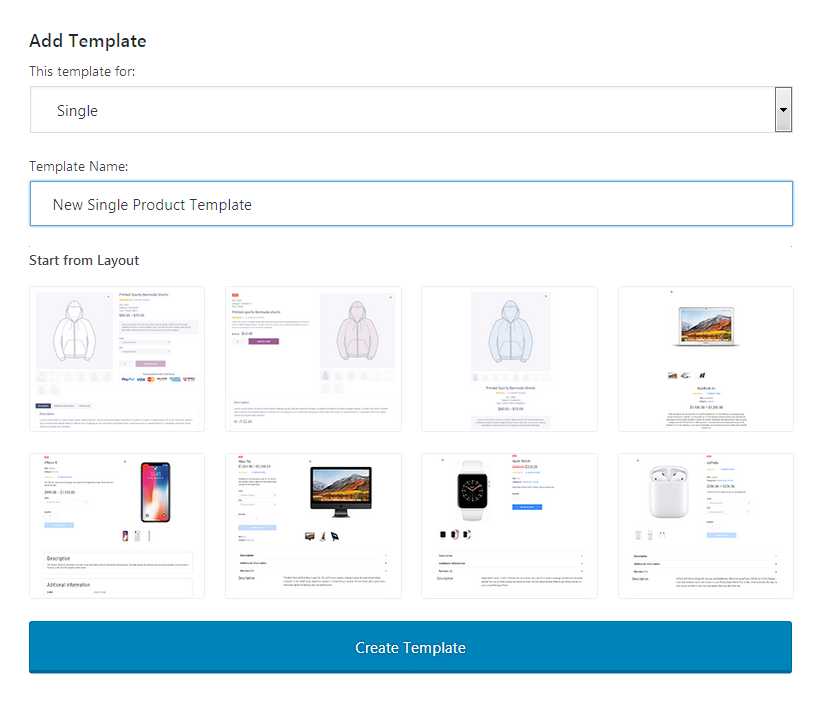
The button opens the popup window showing the set of pre-designed Archive/Single Product/Category/Shop pages. You can easily select one of them to use. Or you can start creating the Single Product template from scratch.
- Also, in this popup window you’ll have to specify:
- The template name - here you have to type in the title of the template you’re creating;
- This template for - in this dropdown you need to select Single in order to start creating Single Product page template.
After everything is done click Create Template button.
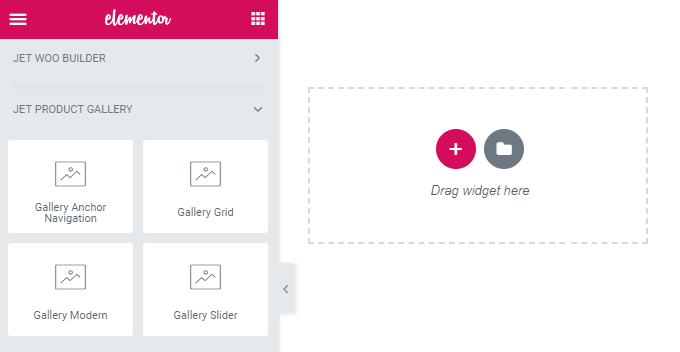
- Once you’ve created a template and navigated to Elementor editing page by clicking on Edit with Elementor button, the standard Elementor editor opens.
- You can create any page structure you need by adding the sections, add columns to the sections, duplicate sections and columns, add templates you’ve already created, and use now only the widgets added by JetProductGallery, but also any other widget you want to place to the template, which is available in the Elements block.
-
To add a new section click Add New Section button. Click Edit Section option in order to set the content width, section background style, paddings and margins, etc.
-
Select the preferable columns structure for the section. You can also drag the column borders in order to set the custom columns width. You can also edit the columns width, set the content position, etc, by editing the column.

- After that navigate to Elements list and here scroll down to see JetProductGallery widgets.
- Drag and drop the widgets to the columns in order to place them on the page.
- After the page is built click Update button to preserve the changes.