Open the PrestaShop admin panel and go to Preferences > Store Contacts.
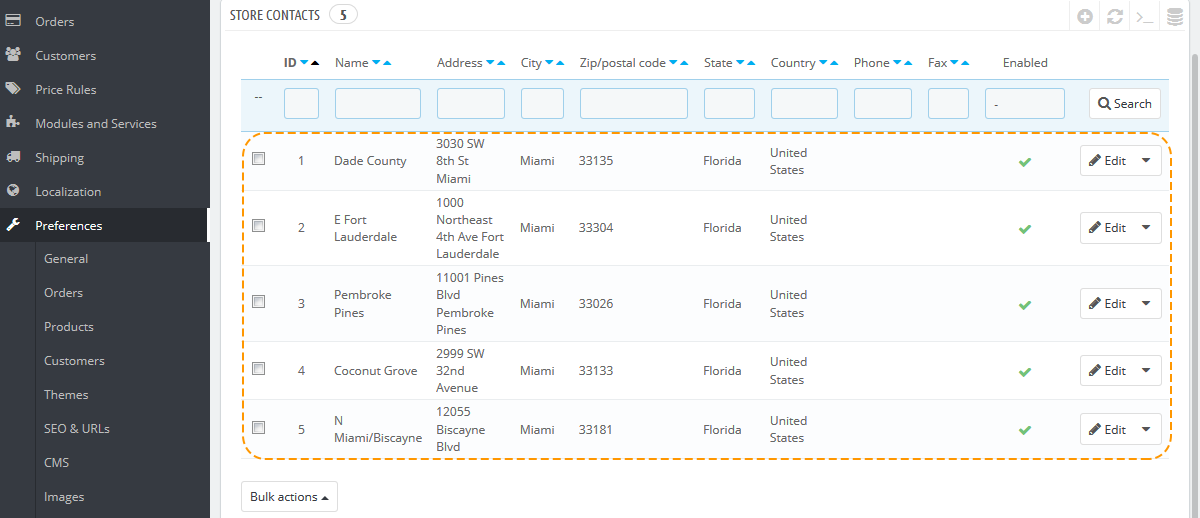
First you'll see the list of stores in Store Contacts section. Here you can enable/disable, add/delete or edit each store.
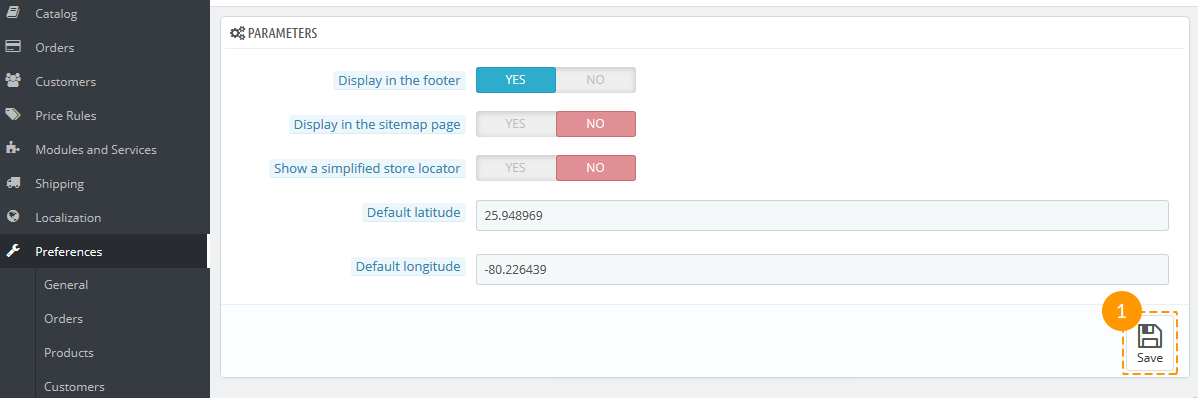
Store mapping
Below the list of stores there's a Parameters section where you can edit the main settings concerning the mapping of your store. Change them according to your needs and press 'Save' button (1).
How to change store name
In Contact Details block you can change the main info about your store - its name (1) and other contact details. Don't forget to press the 'Save' button (2) after editing.
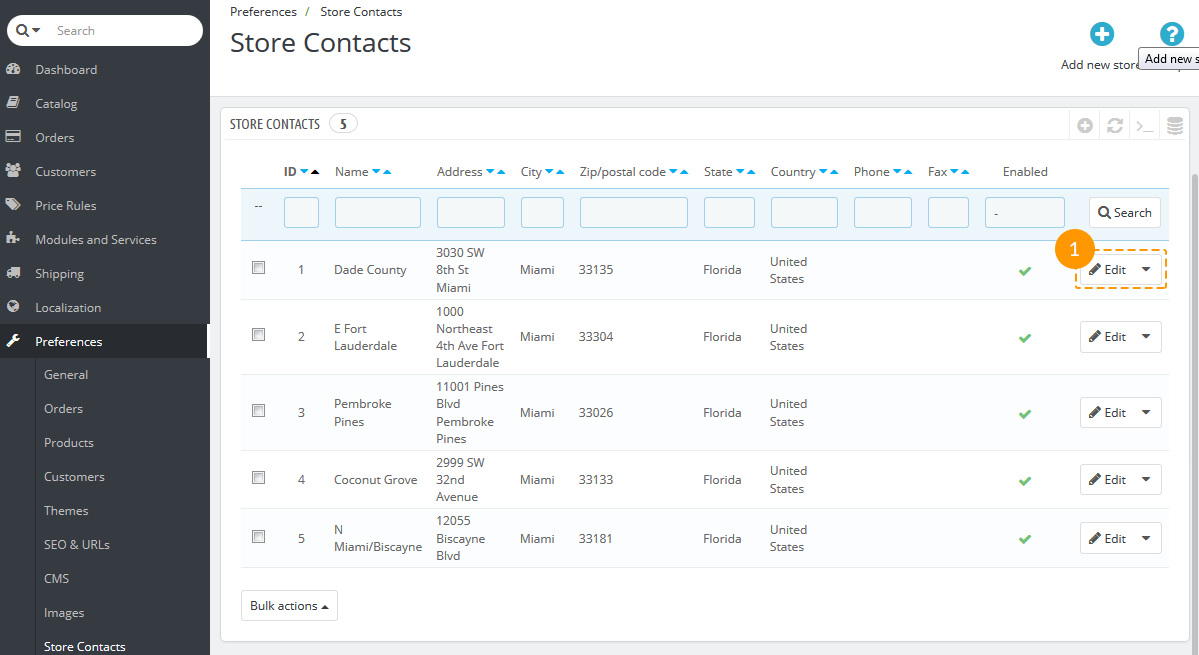
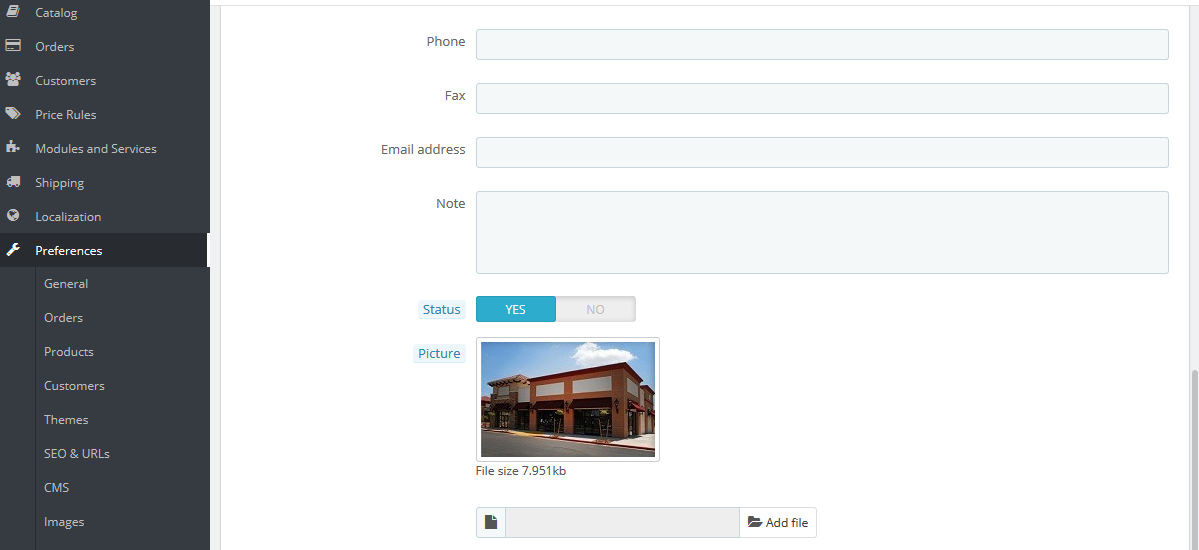
To edit the info on one particular store, choose the store you want to edit in Store Contacts and click 'Edit' (1).
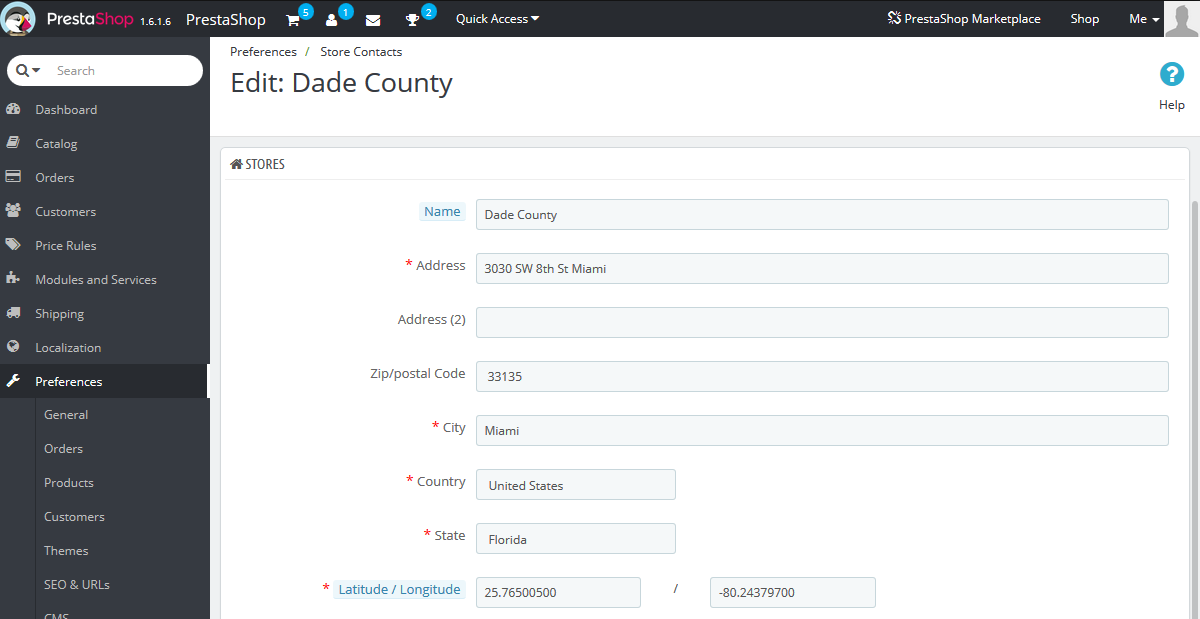
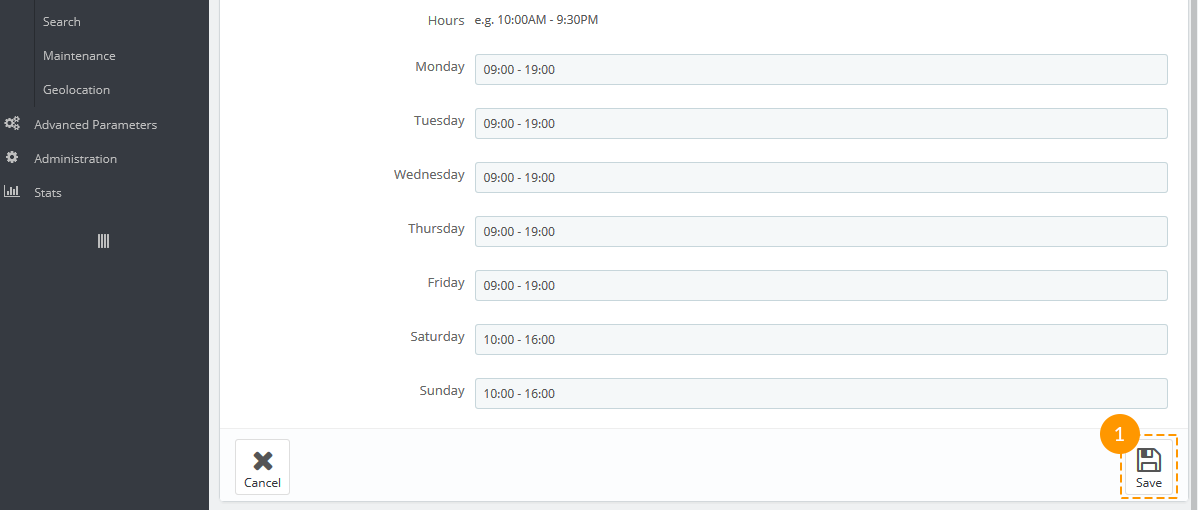
Here you can edit all info concerning your store contacts (such as store's name, address, status, picture, working schedule etc.)
After it's done, click the 'Save' button (1).
How to edit slider
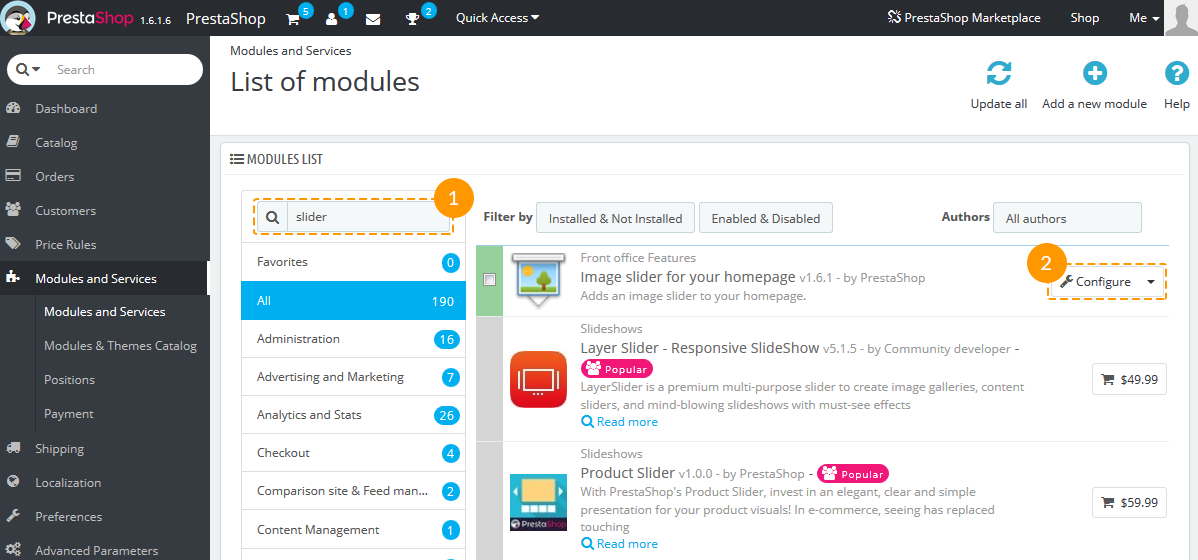
First find the Image slider for your homepage module in Modules list of Modules and services menu tab of your PrestaShop store (1) (it is located in the Front Office Features modules section). Then press the 'Configure' button (2) to edit the module.
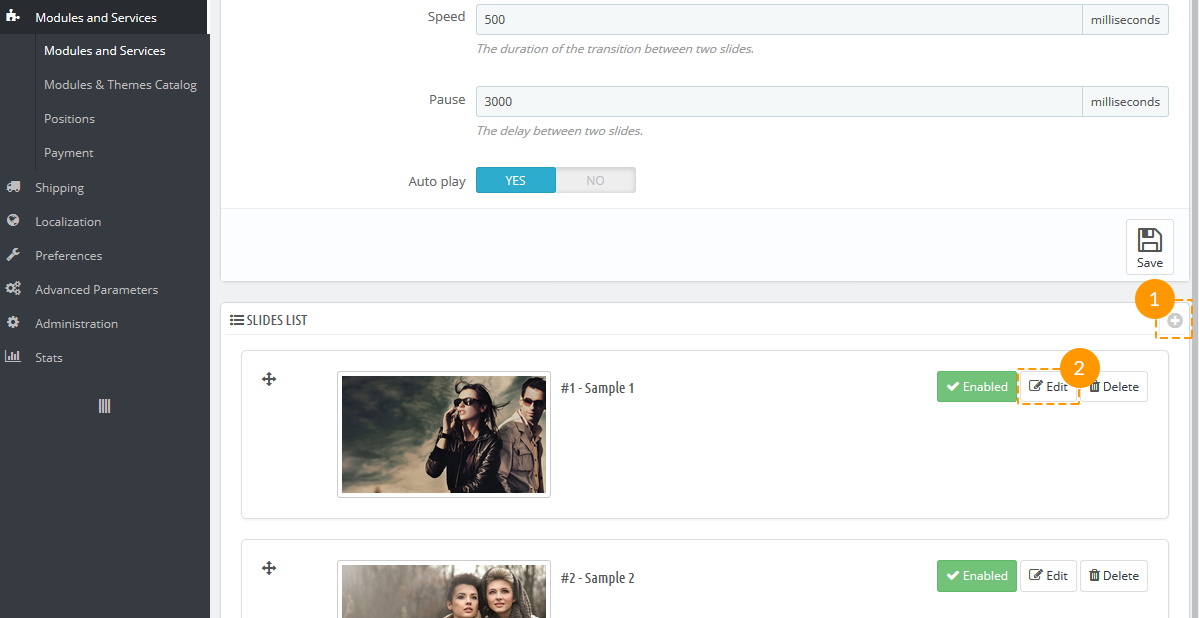
On the screen that appears next you'll be able to set the main properties of your slider like maximum width of images, speed of changing slides, the delay between two slides and autoplay option. After you've changed it, press the 'Save' button (1).
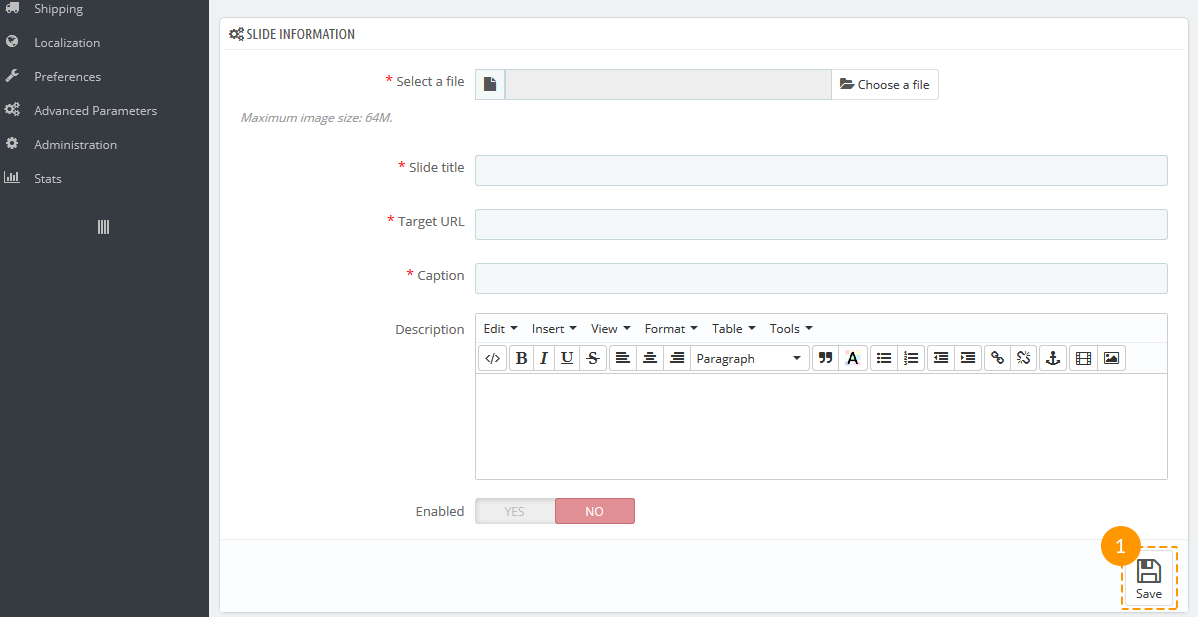
To add a new slide find the '+' button in the top right corner of Slides list section (1) and click it. If you want to edit the existing slide, click the 'Edit' button (2).
Further process is quite simple. In 'Slide Information' section fill all the required fields and 'Save' (1) it.
How to manage the Theme Configurator module
This tutorial is going to show you how to manage the Theme Configurator module on your Prestashop 1.6 template.
The module handles a lot of things on your theme. Mainly, it enables you to switch some features on and off (social sharing buttons, top banner, payment logos, etc.), and perhaps more importantly, it lets you easily add/change images on your home-page.
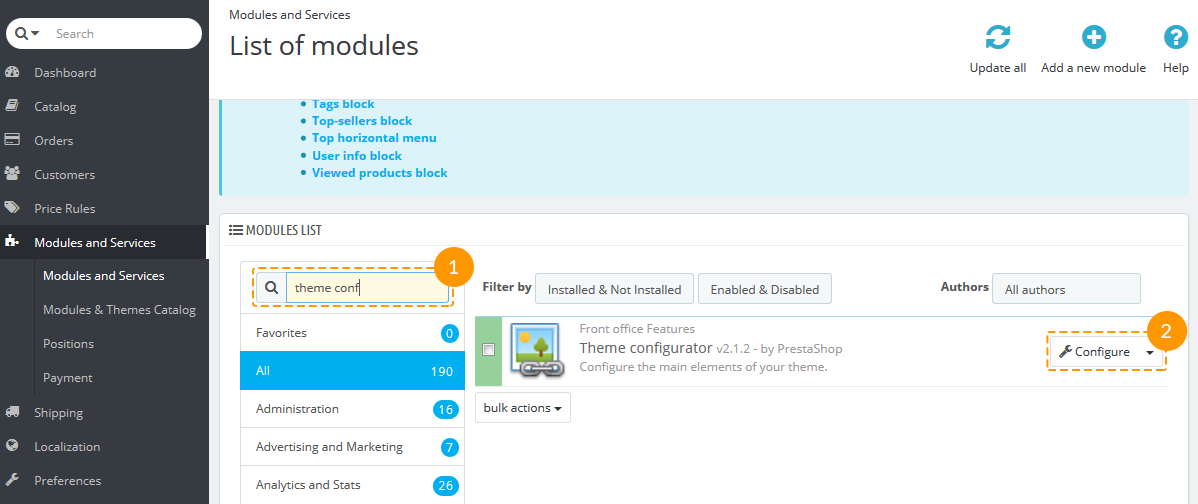
Log into your Prestashop admin panel and go to Modules and services (1) -> Modules and services (2).
Then find 'Theme Configurator' module in Modules list (1). It will show up in the right column. If it is not installed yet, click its 'Install' button.
Once the module is installed, the 'Install' button will be changed to the 'Configure' button (2) which you need to click to configure the settings.
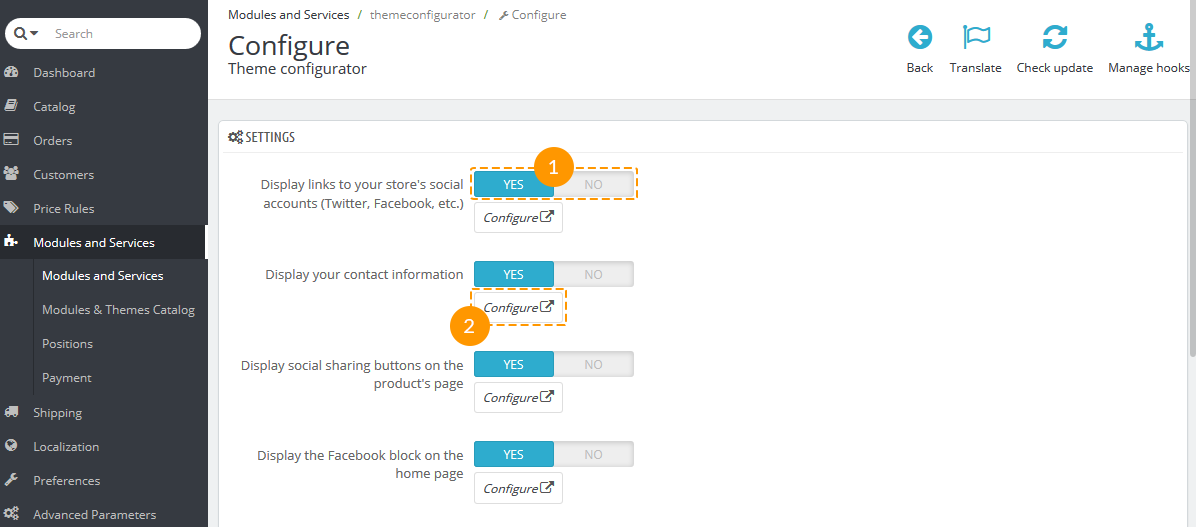
On the settings configuration page, you can see different blocks which you can switch on and off by clicking 'Yes' and 'No' buttons (1). Click 'Configure' (2) to configure the settings of a particular block:
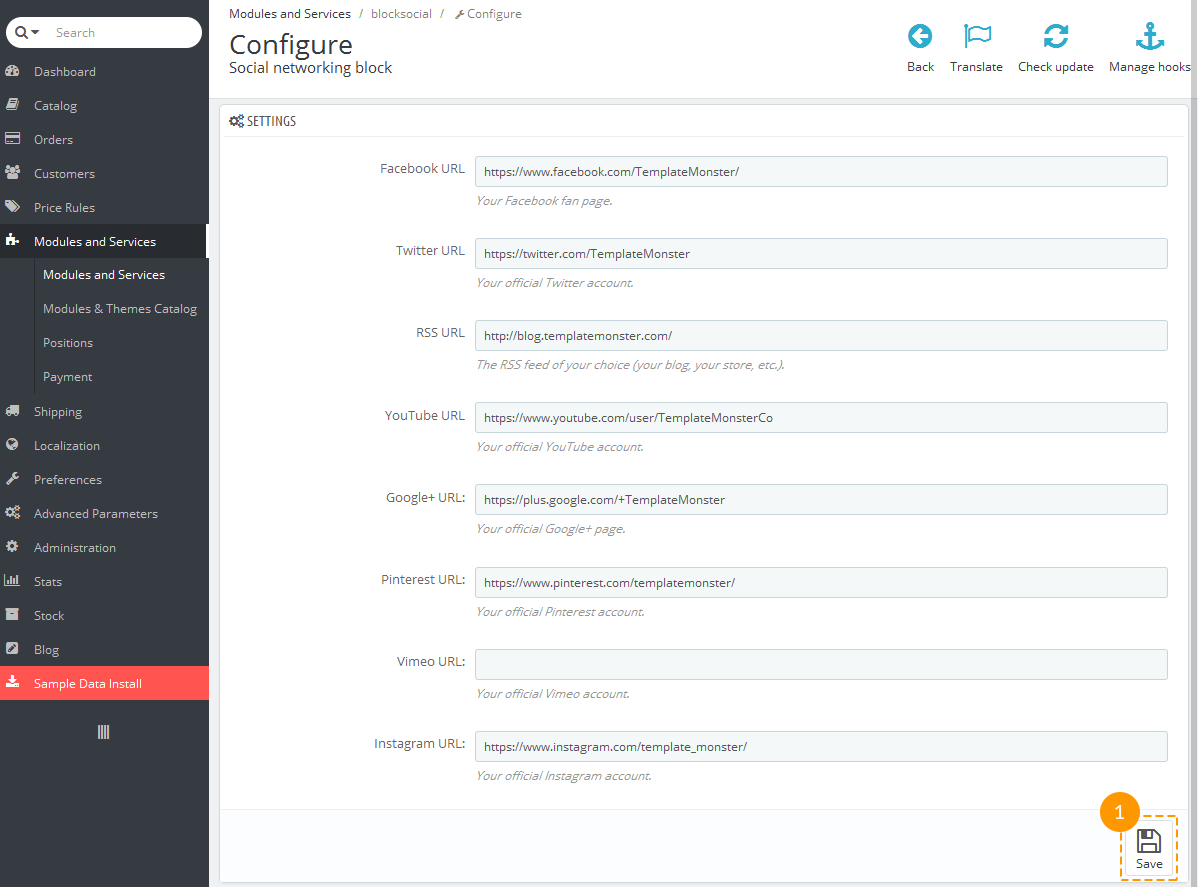
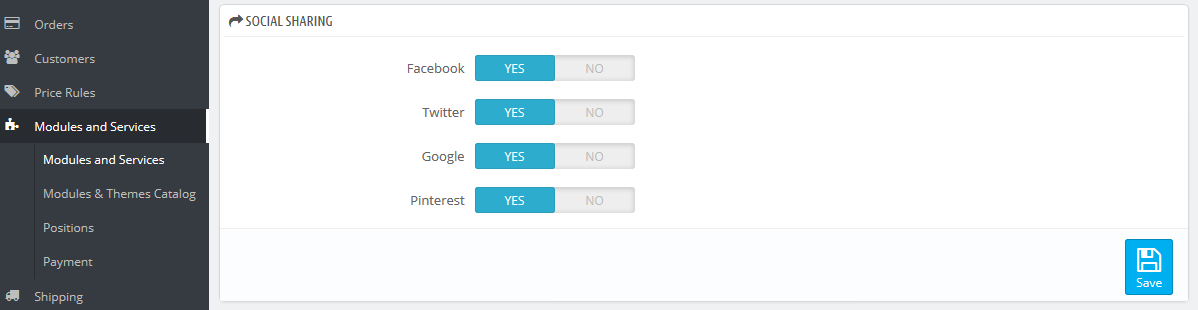
Display links to your store's social accounts: enter web addresses for the icons you want to display in this block and click 'Save' (1) when you are done.
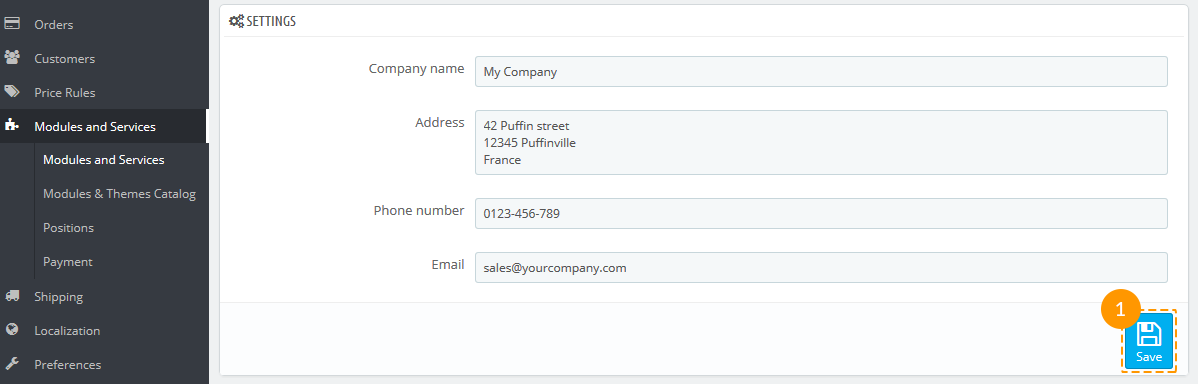
Display your contact information: enter your company name, address, phone number and email in the corresponding fields and click 'Save' (1).
Display social sharing buttons on the product's page: displays Facebook, Twitter, Google, Pinterest buttons on your product pages.
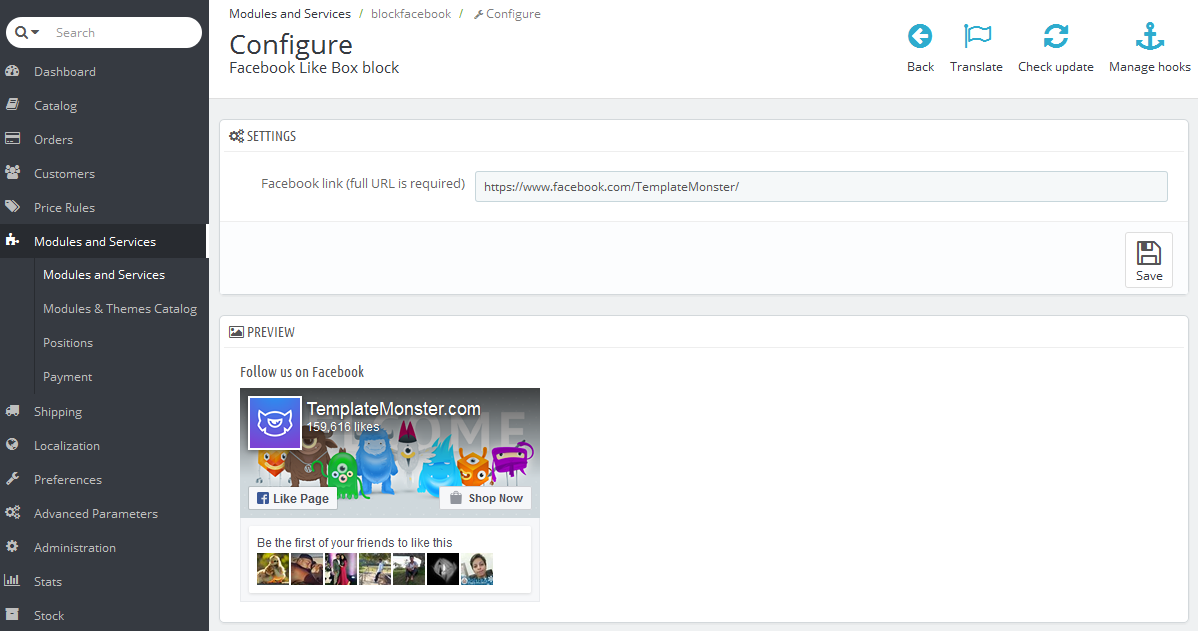
Display the Facebook block on the home page: displays 'Follow us on Facebook' block.
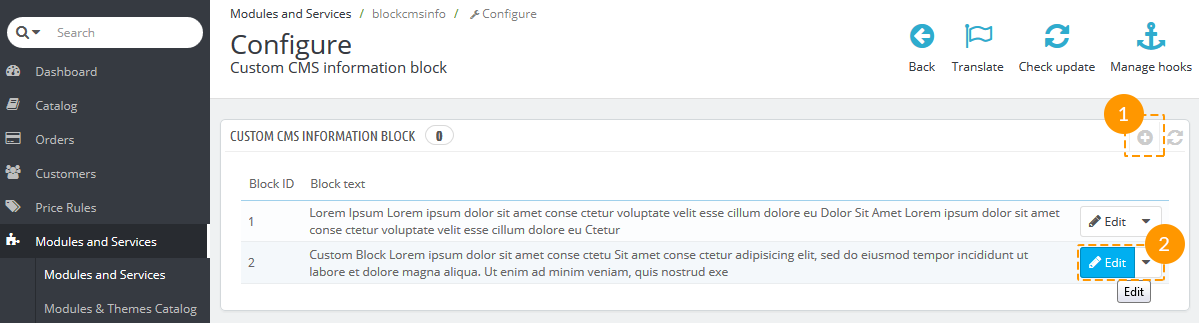
Display the custom CMS information block: allows you to add one and more info blocks for each language of your site. On the configuration page, click '+' at the top right (1) to add a new custom CMS block. Enter your text in the text field and click 'Save'. Or click 'Edit' (2) to change any block.
Display quick view window on homepage and category pages
Display categories as a list of products instead of the default grid-based display
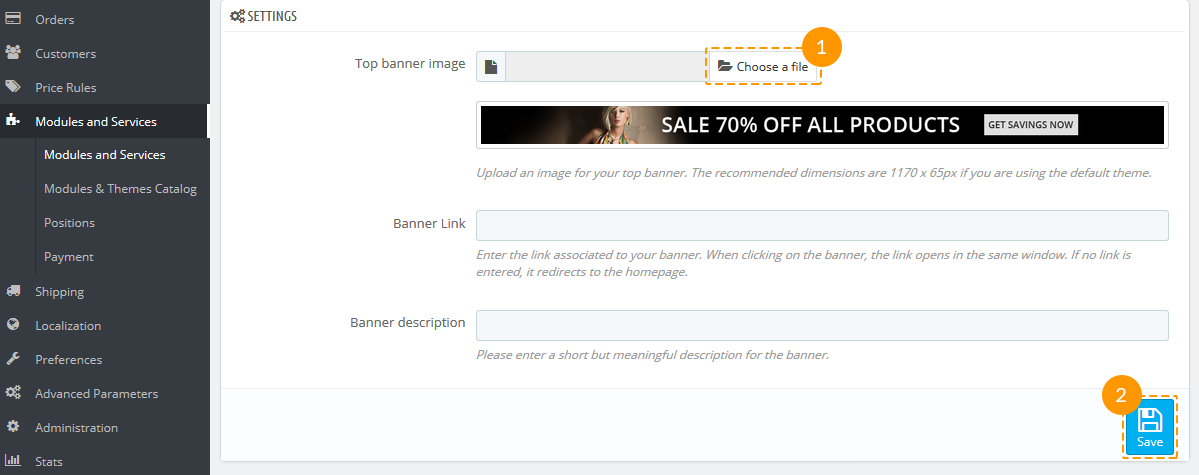
Display top banner: Click the 'Configure' button. In 'Settings' you can choose another banner (1), change its link and description. After editing click 'Save' button (2).
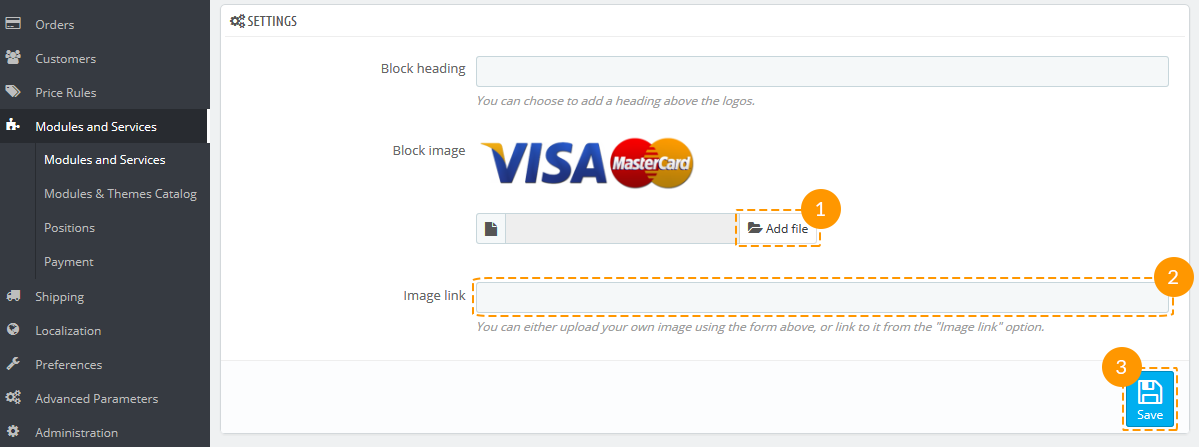
Display logos of available payment methods: allows you to upload your image and add a title/link for the payment logos on the product page. Click 'Add file' (1) to upload your own file for the payment logo or insert a link with the image to 'Image link' field (2). Then click 'Save' button (3).
Display Live Configurator: only you can see it on the Front Page of your site when enabled.
Display subcategories
Scroll down to change/remove/add html content items. The default items that initially come with this module can be removed only when the Theme Configurator module is disabled or you can just unpublish them by unchecking 'Active' on the item configuration page. Enter the item title, hook it to one of the positions suggested (home, top, left, right, footer), click 'Browse' in order to upload an image, manually enter the image width/height values in pixels, specify the URL this item will be pointed to and enter your content in the 'HTML' filed. Then click 'Save'. If you are running a multilingual site, click the corresponding language tab and repeat the same adjustments for it. Click the 'Add Item' button to add a new item.
Open the front end of your site to see the changes.
How to add or remove some links in Permanent links block
The following tutorial is going to show you how to add or hide some links in header in PrestaShop 1.6.x templates.
The header links of the PrestaShop template are defined by the Permanent links block module. Usually it looks like on the screen below (1).
If you want to add an element to it or remove it, you should edit the 'themes/theme_name/modules/blockpermanentlinks/blockpermanentlinks-header.tpl' file located in your PrestaShop installation on your hosting server.
Open the file using any code editor. The menu is created as an unordered list. Each menu element is wrapped into <li> </li> tags. The code will look like this:
a href="{$link->getPageLink('sitemap')|escape:'html'}" - is the URL to the
page
{l s='sitemap' mod='blockpermanentlinks'} - is the code for displaying the
button name
To add a link to the Best Sellers page (http://yourdomain.com/best-sales.php), you should add the following line of code to the themes/theme_name/modules/blockpermanentlinks/blockpermanentlinks-header.tpl file.
Note: If you want to change the name of the new button or add its translations, you can do it in
Localization -> Translations menu of your back end.
To add a link to some CMS page, you should get the link to the page first. Let's add the link to About Us page. You should edit the themes/theme_name/modules/blockpermanentlinks/blockpermanentlinks-header.tpl file and add the following line of code:
If you want to hide any of these links, you can delete the <li> </li> item or simply comment it in your code (like in the example below) in order to show it back when you need to.
Save the changes and check your website front end to see how you modified the header menu.
Modules installation
Each template is provided with some specific module settings. To make the modules appear the same as on the demo preview, you will need to configure them. All modules can be configured in the PrestaShop admin panel.
In your PrestaShop admin panel, select Modules and Services > Modules and Services from the main menu.
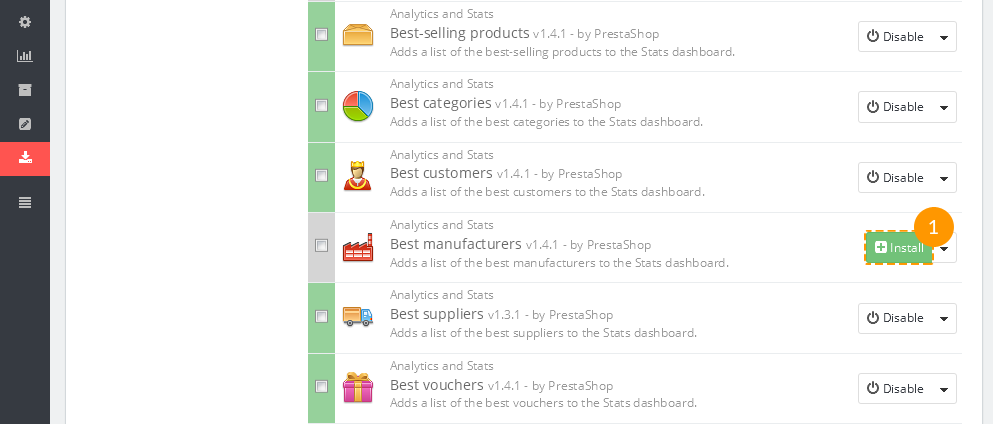
On the Modules page you can see the list of available PrestaShop modules. You may need to install some of them.
To install a module, locate it in the list and click the 'Install' button.
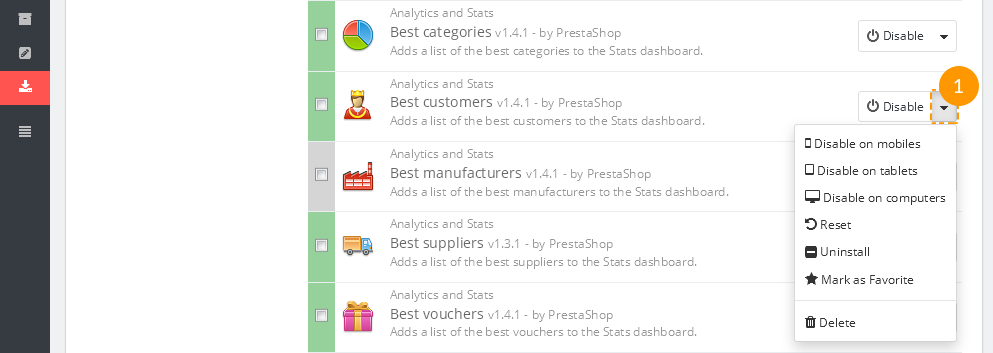
Using the module links you can activate/deactivate them (Enable | Disable links), reset their settings to default (Reset link), delete a module (Delete link) or configure it (Configure link).
After activating the necessary modules, you need to assign them to correct positions.
In PrestaShop admin panel, select Modules and Services > Positions from the top menu. To place a module in the required position, just drag it up or down in the modules list.
Configuring images
In PrestaShop you can use predefined image dimensions for product images, category images, manufacturers, etc.
For example, images of the 'home' dimensions are usually used for the product images on category listings, 'large' for main product image on the product info page.
To configure product image dimensions, open your PrestaShop admin panel, go to Preferences > Images and set the image dimensions as described on Configuration Page at the template live demo.
How to unminify .css file using the Sublime Text Editor
Preparation
Before you proceed, please check the tutorial below on how to download and install the Sublime Text Editor and
Sublime Text Plugin that is responsible for the unminify process:
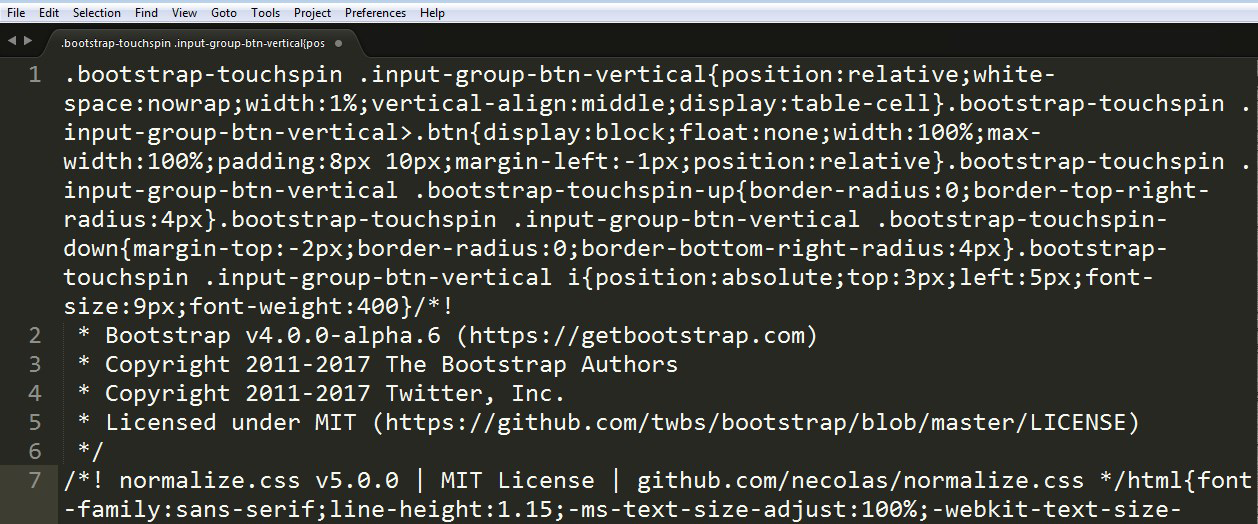
Open the .css file in Sublime Text Editor (choose the .css file you need to
unminify, click the right mouse button on it and select Open with Sublime Text option (1)):
You can see the code is minified:
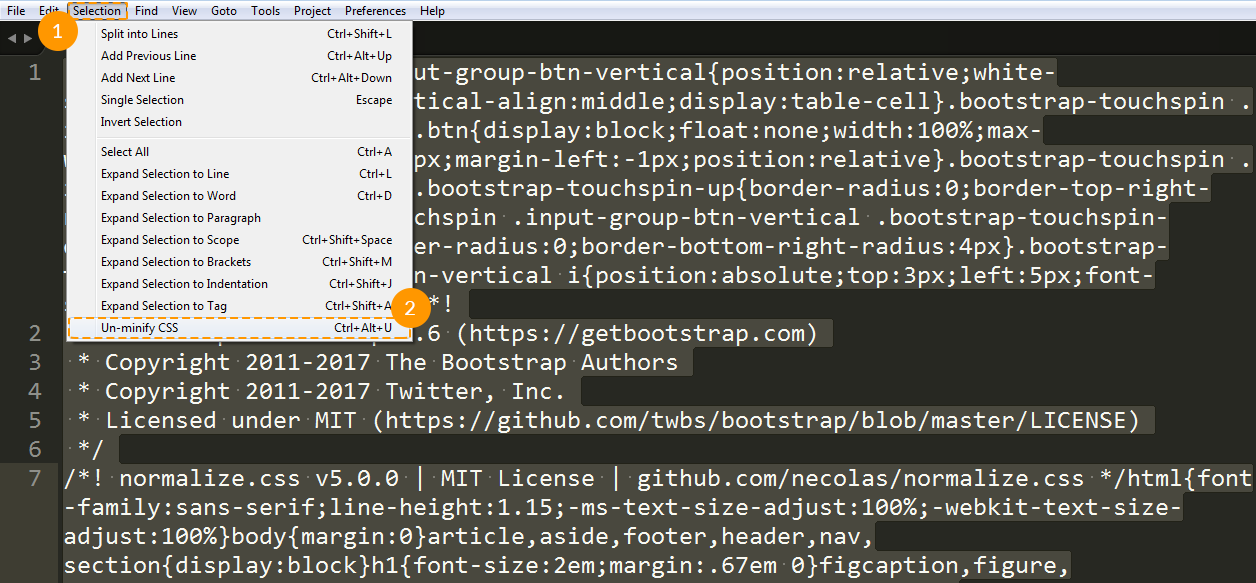
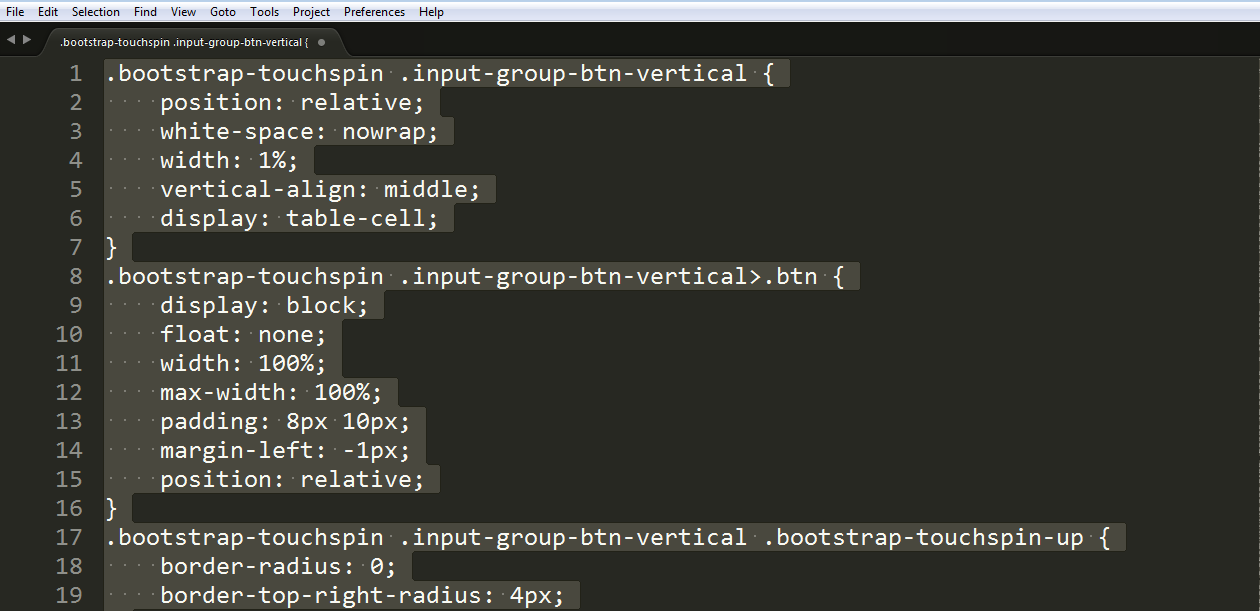
To unminify the code, select it all by clicking Ctrl+A. In top menu panel choose the Selection
tab and select there
Un-minify CSS option. Or simply click Ctrl+Alt+U: