Site Maintenance Documentation

Site Maintenance Settings
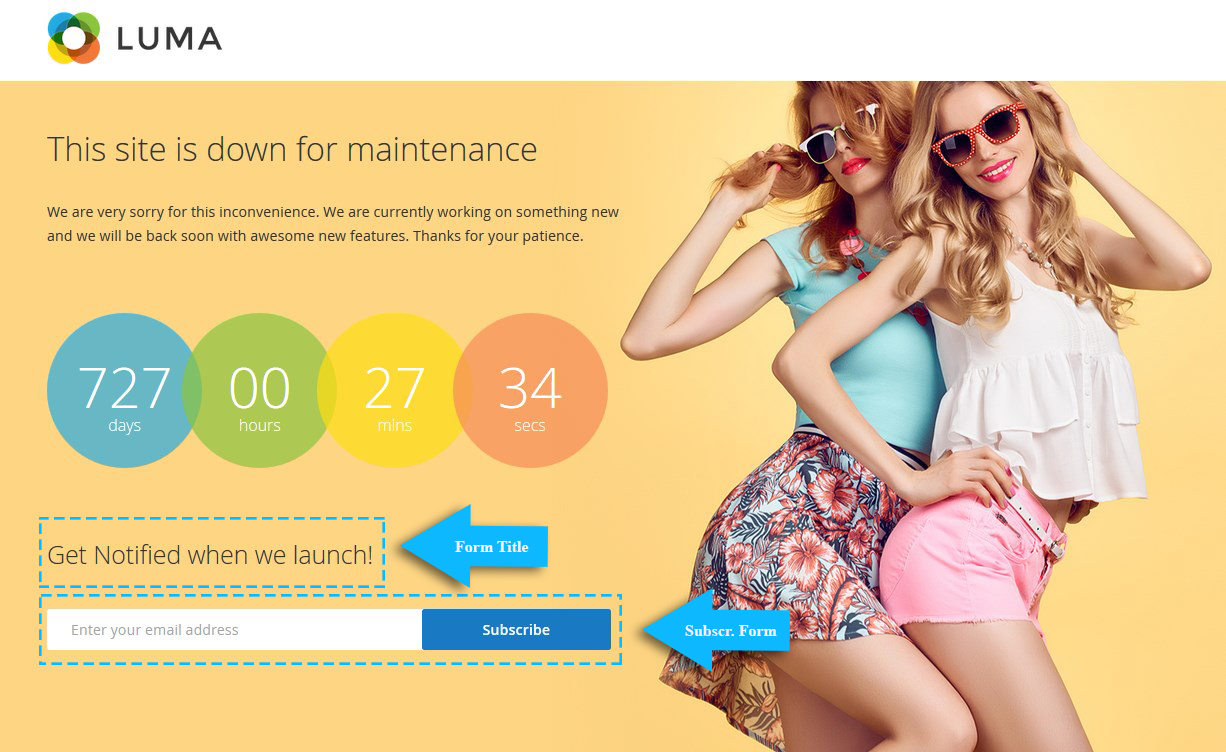
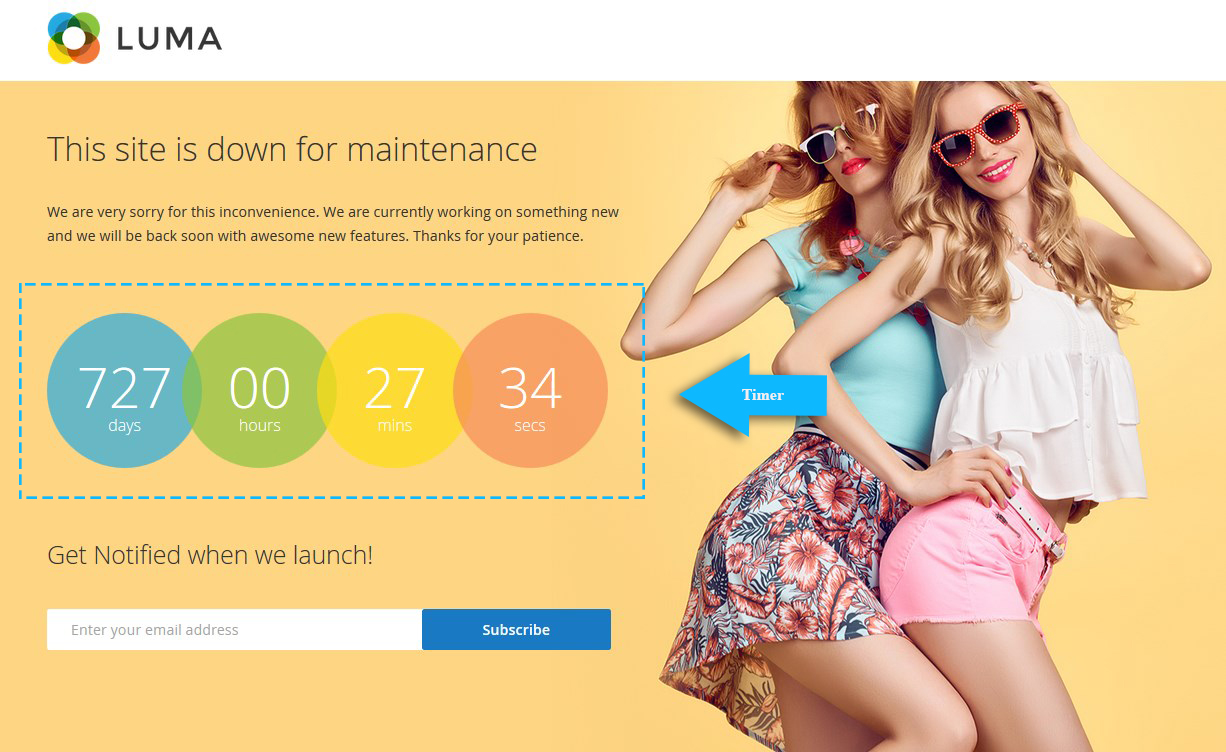
Note, we've used aditional CSS classes to style the "Site under Maintenance" Live-Demo page.
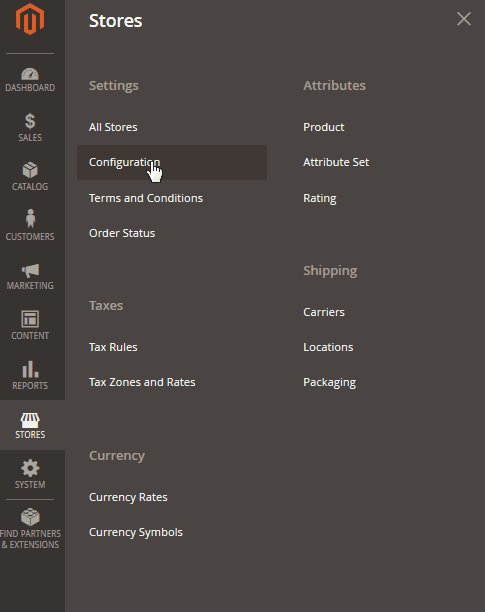
Access the Module Settings
To set up the module, navigate to Stores > Configuration and in the section on the right select TEMPLATEMONSTER > Site Maintenance.
You'll find three sections there:
- Page configuration;
- Timer section;
- Form settings.
* Expand the tab to access each section setting.
1. Page configuration
This section serves for setting up the appearance of the page and contains a set of important settings.
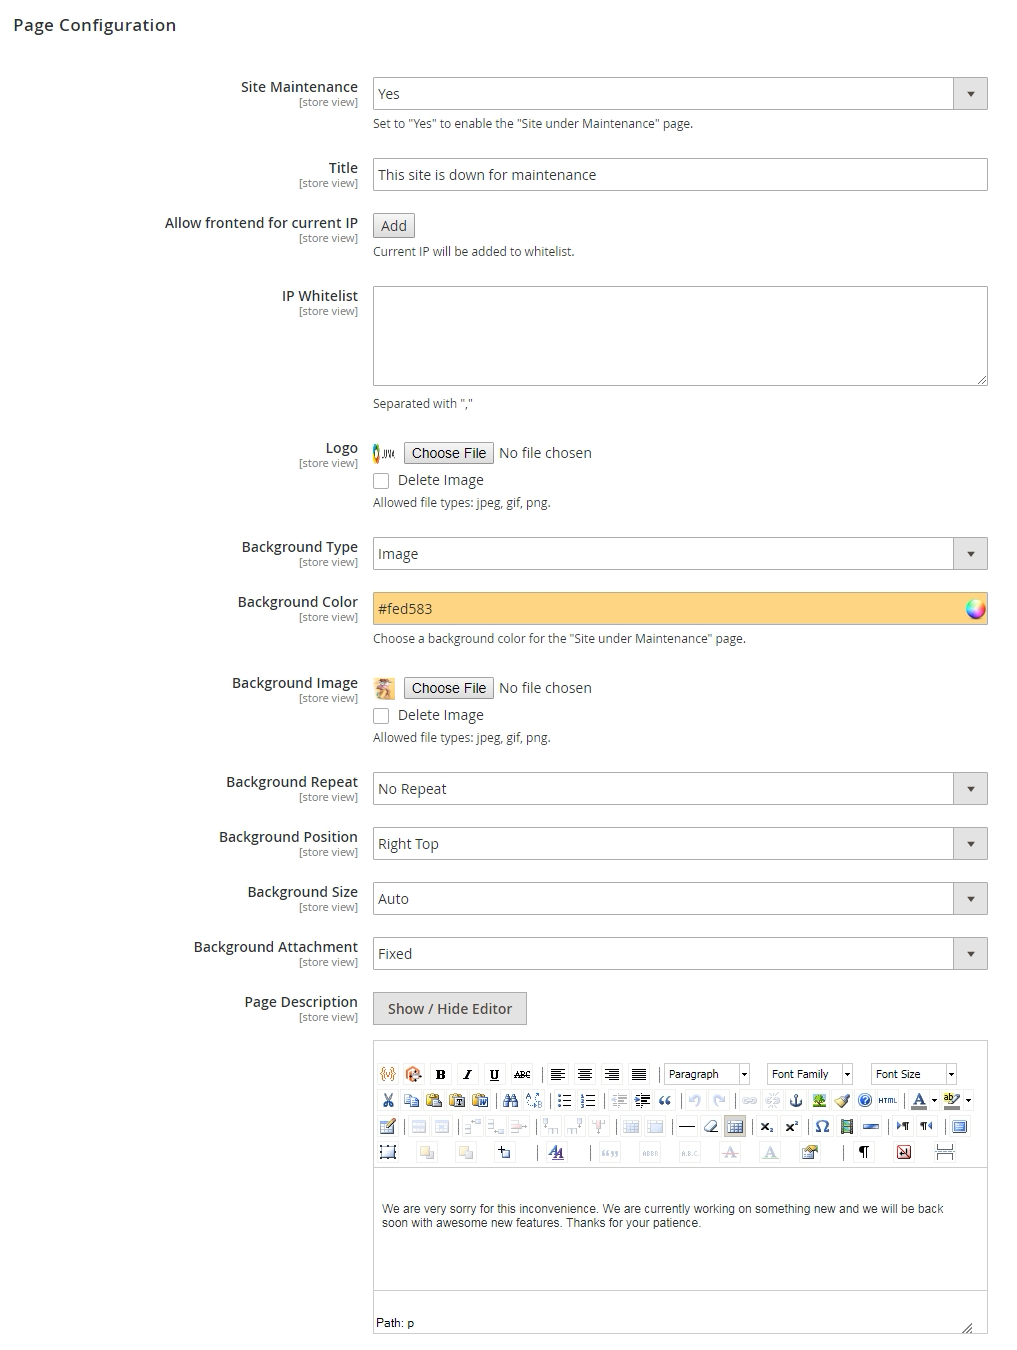
Let's take a look at the available options:
| Site Maintenance | - | set to "Yes" to enable the "Site under Maintenance" page for your store. |
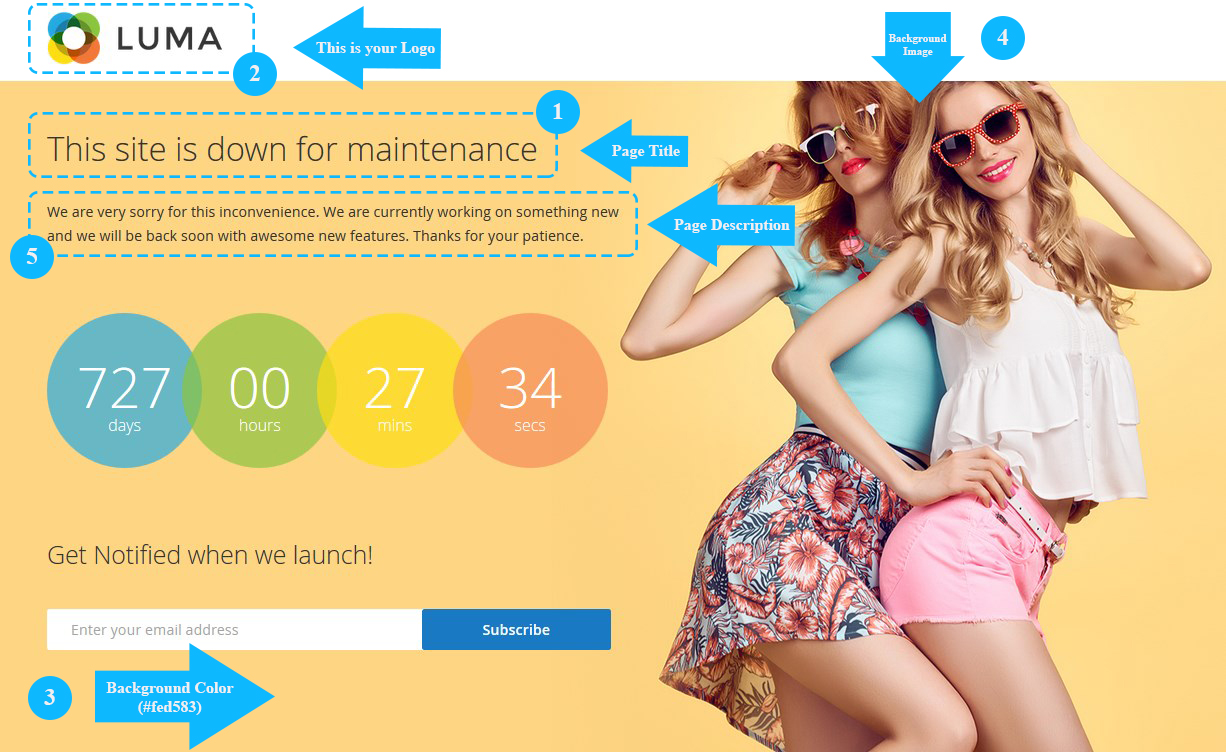
Title (1) *see image below |
- | the page title. It also serves as a heading in the page contents. |
| Allow frontend for current IP | - | with the help of this button, you can automatically add your IP to the whitelist and gain access to the frontend, bypassing the maintenance page. |
| IP Whitelist | - | in this field, you can add the IP addresses of the clients, who need to get access to the website frontend, bypassing the maintenance mode. * Note, the IPs should be separated by commas ",". |
Logo (2) *see image below |
- | you can add the page logo. Press Choose File button and browse the image file on your computer. To delete the uploaded image, check the Delete Image checkbox and press the Save Config button. To replace the previous Logo with the new one press the Choose File button and upload the new image for the page Logo. Allowed file types: jpeg, gif, png. |
| Background Type | - | you can select the background type for the page. There are two available options: Image and Color. Depending on what option you choose, you'll see more settings. If you select Color, you'll see the Background color option. If you select the Image type, you'll see additional settings. |
Background Color (3) *see image below |
- | the background color for the page. |
Background Image (4) *see image below |
- | the image that is displayed on the background of your page. Press Choose File button and browse the image file on your computer. To delete the uploaded image, check the Delete Image checkbox and press the Save Config button. To replace the previous Backgroud Image with the new one press the Choose File button and upload the new image for the page background. Allowed file types: jpeg, gif, png. |
| - | css-properties for managing the background in the image form. | |
Page Description (5) *see image below |
- | the field for the page content management. You can either use the WYSIWYG-editor, or work with html-code. |
2. Timer section
This section is responsible for display and setup of the timer on the Maintenance page.
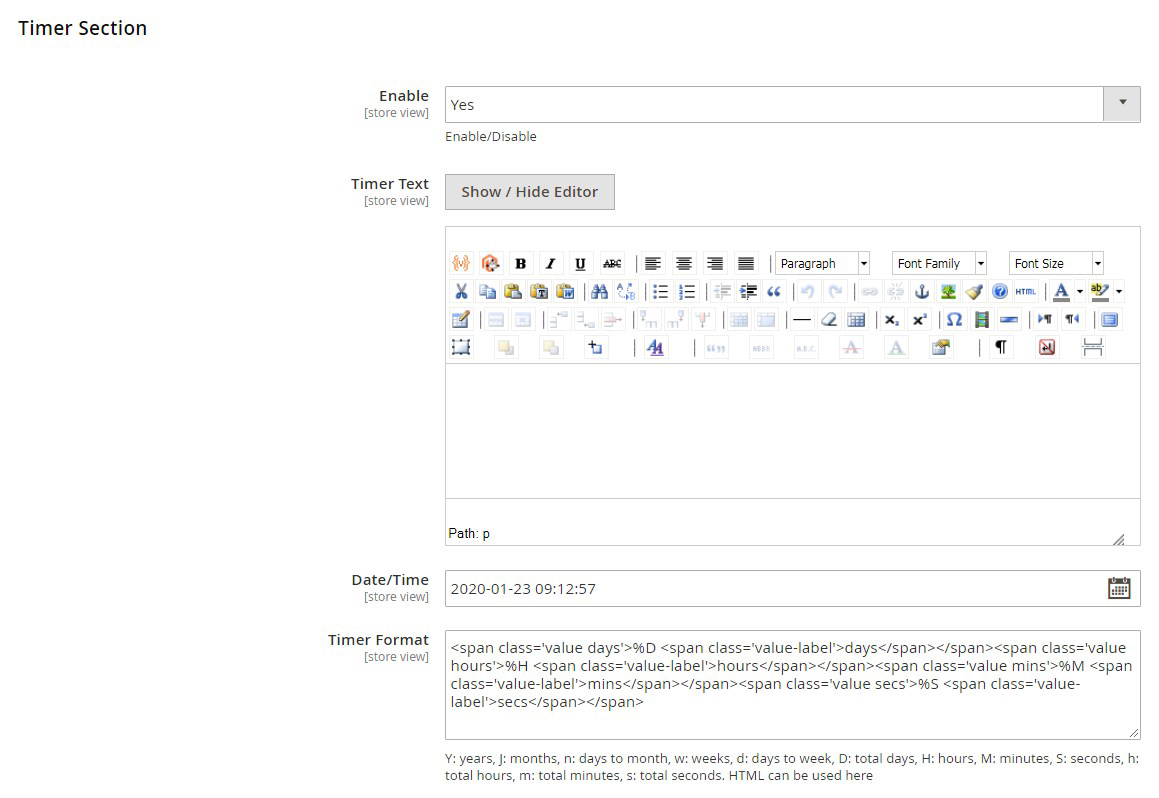
Let's take a look at the options of this section.
| Enabled | - | set to "Yes" to show the timer on the "Site under Maintenance" page. |
| Timer Text | - | allows you to display text before the timer with the help of WYSIWYG-editor or html-code. |
| Date/Time | - | you can set up the end date of the service work. Tap the calendar and then, choose the date. |
| Timer Format | - | the field to format the timer output. You can find the more detailed information on formatting the timer output on the plugin official website. %D days %H:%M:%S Y: years, J: months, n: days to month, w: weeks, d: days to week, D: total days, H: hours, M: minutes, S: seconds, h: total hours, m: total minutes, s: total seconds. HTML can be used here. |
3. Form settings section
This section is responsible for displaying and setting up the subscription form.
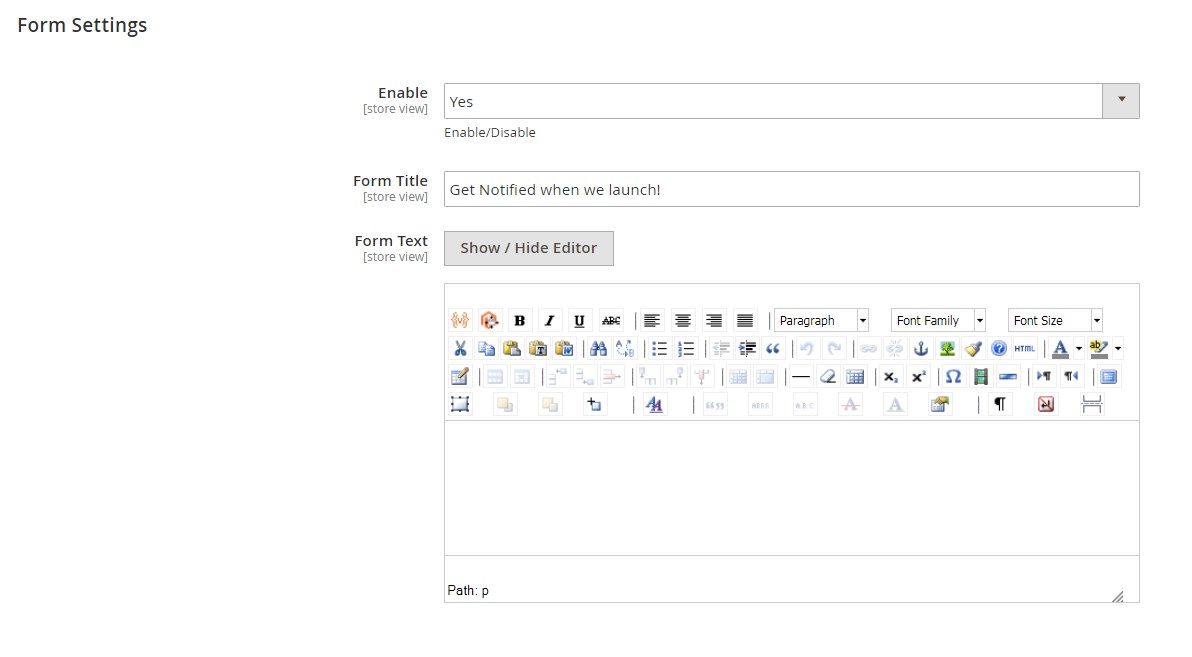
Let's take a look at the options of this section.
| Enabled | - | set to "Yes" to show the subscription form on the "Site under Maintenance" page. |
| Form Title | - | the title of the block with the form, which will be displayed in above the form. |
| Form Text | - | allows displaying some text before the subscription form with the help of the WYSIWYG-editor or html-code. |