imPresta
Template installation
If you don't want to spend your time installing the template, don't hesitate to order installation service using our live-chat.
Import theme
Note: this method does not provide sample data installation.
Template preparation
Before you proceed, please make sure you have already downloaded the template and extracted the files from the
When the files are extracted, you can proceed to uploading the template.
Installation
Log into your PrestaShop admin panel and navigate to Preferences -> Themes. At the top of the page click Add new theme button (1).

Click Add file button (1) in Import from your computer section. Navigate to previously unzipped template package and open themeinstallator folder.
Select your theme .zip file and click Save (2).

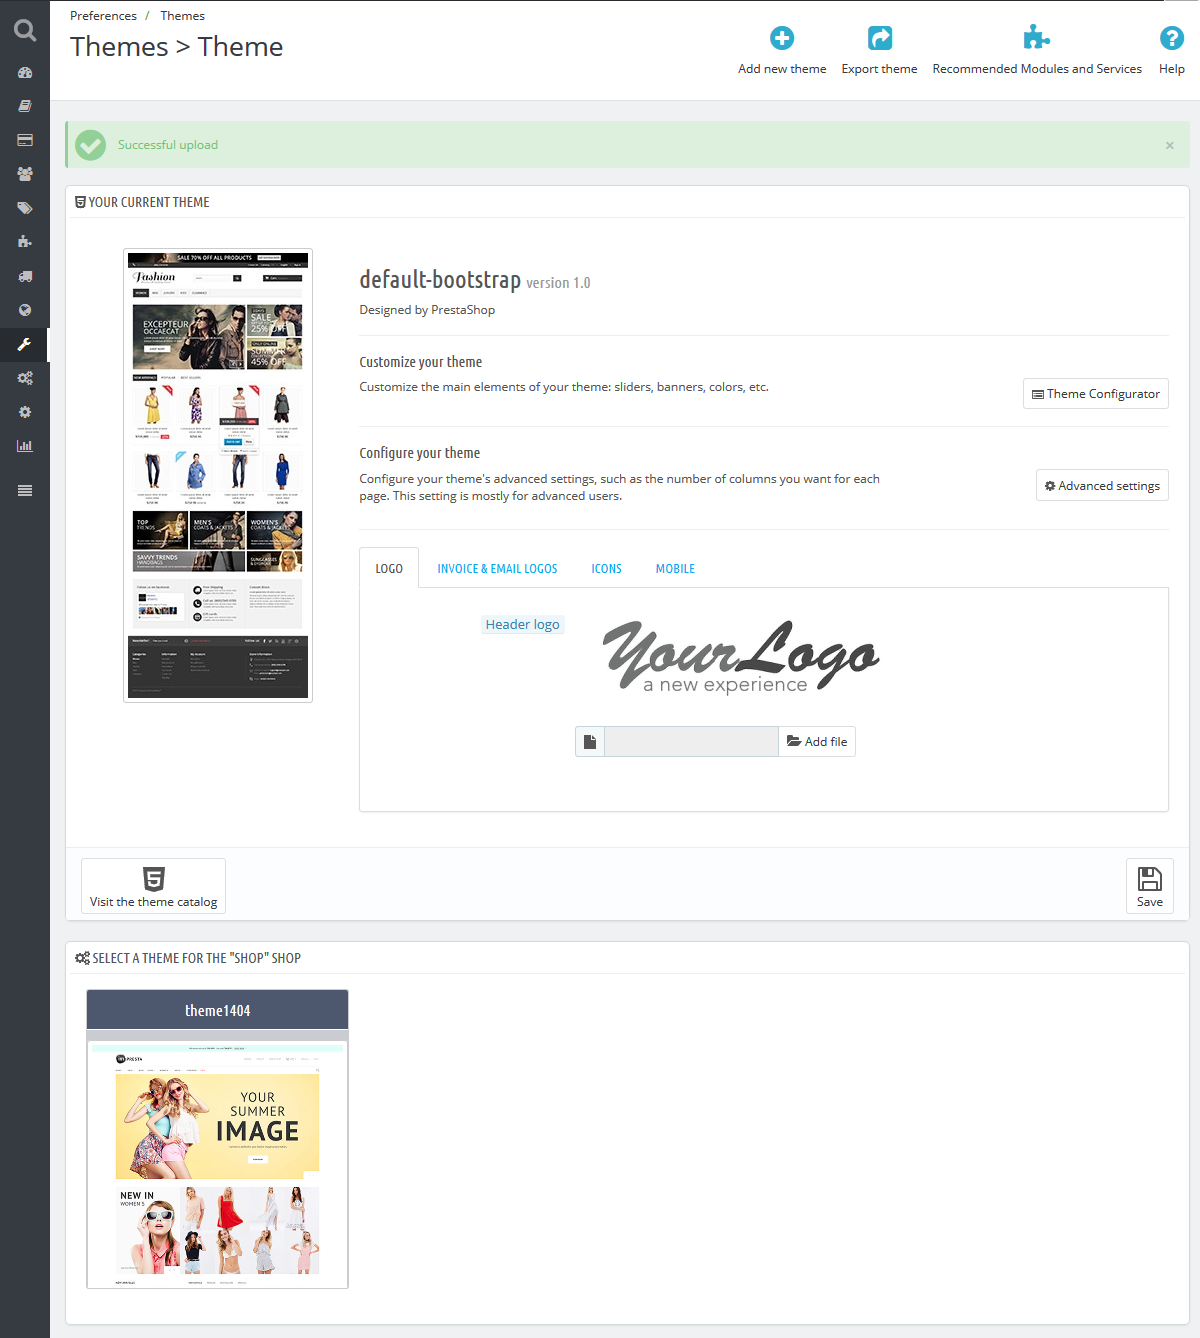
The uploading process will be started. You will see the message that the theme has been successfully uploaded. Your new theme preview will appear in the list of installed themes.
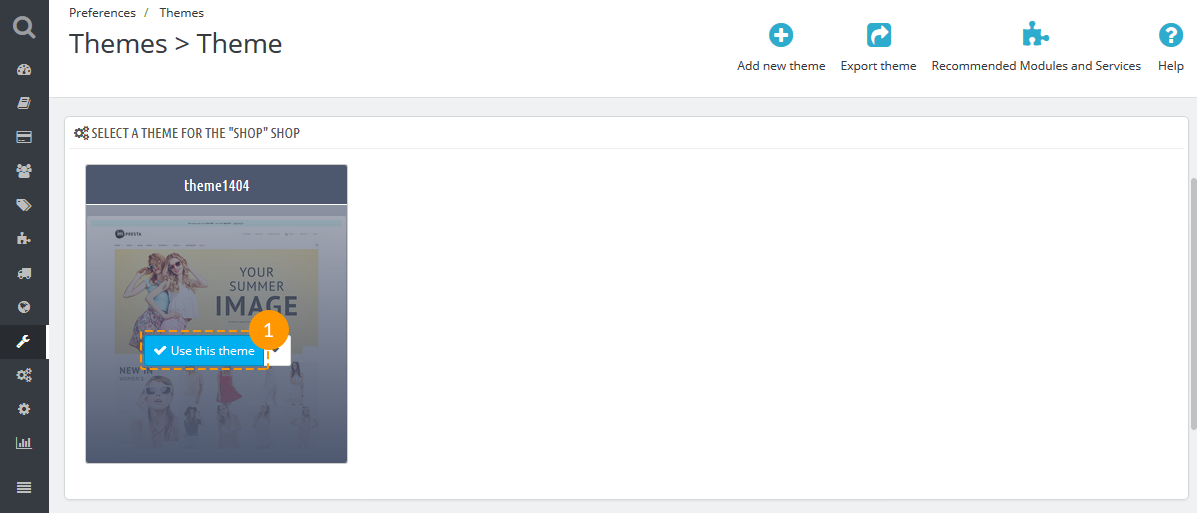
In order to activate the theme, hover the cursor over the theme preview icon and click Use this theme.
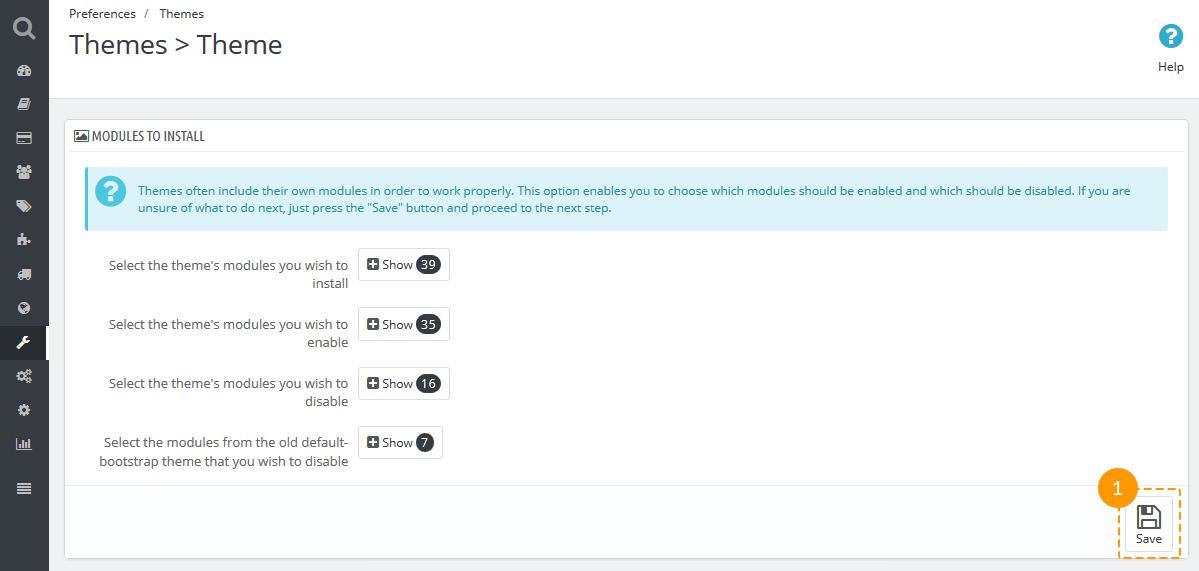
You will see the screen with the information about the modules used in the theme, the number of modules that are turned on and off. Click Save in order to continue.
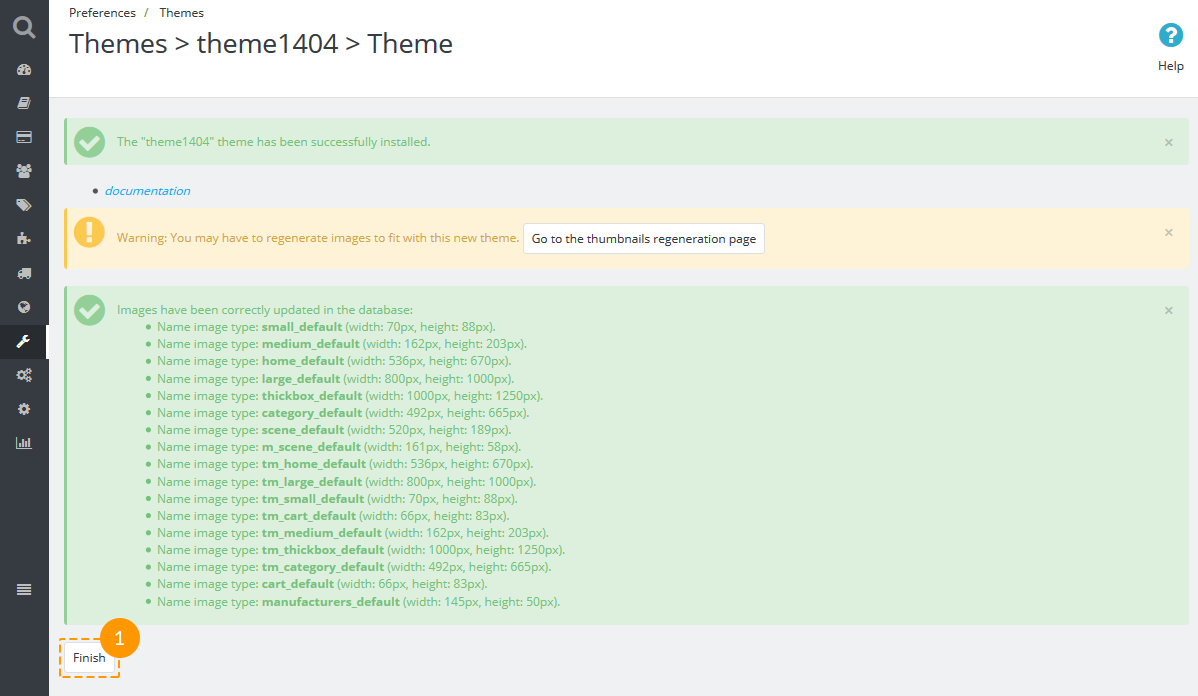
After this you will see the pop-up with the message about successful theme activation: the theme has been installed successfully, images have been re-generated up to the defined in theme dimensions. To finish installation click Finish button.
Automatic installation with demo data (Sample data installer)
If you don't want to spend your time installing the template, don't hesitate to order installation service using our live-chat.
To make your PrestaShop store appear the same as template live demo, you need to install sample data. It will contain all demo products, categories, modules and store settings.
Please do not use the sample data for your running website! This will replace all your store products and store settings.
Please make sure your version of PrestaShop engine matches the specified version in
"Technical Details" tab, mentioned as "PrestaShop Engine: 1.X.X.X".
Also, make sure your database tables prefix is ps_. Install sample data only if your PrestaShop
engine matches the specified version.
In order to install sample data using the Sample data installer module, please follow instruction from the step 1 (Theme import) of this manual. Then in your store admin panel you'll see Sample data installer module.
Using this module you can easily install store sample data in few easy steps. Please do the following:
-
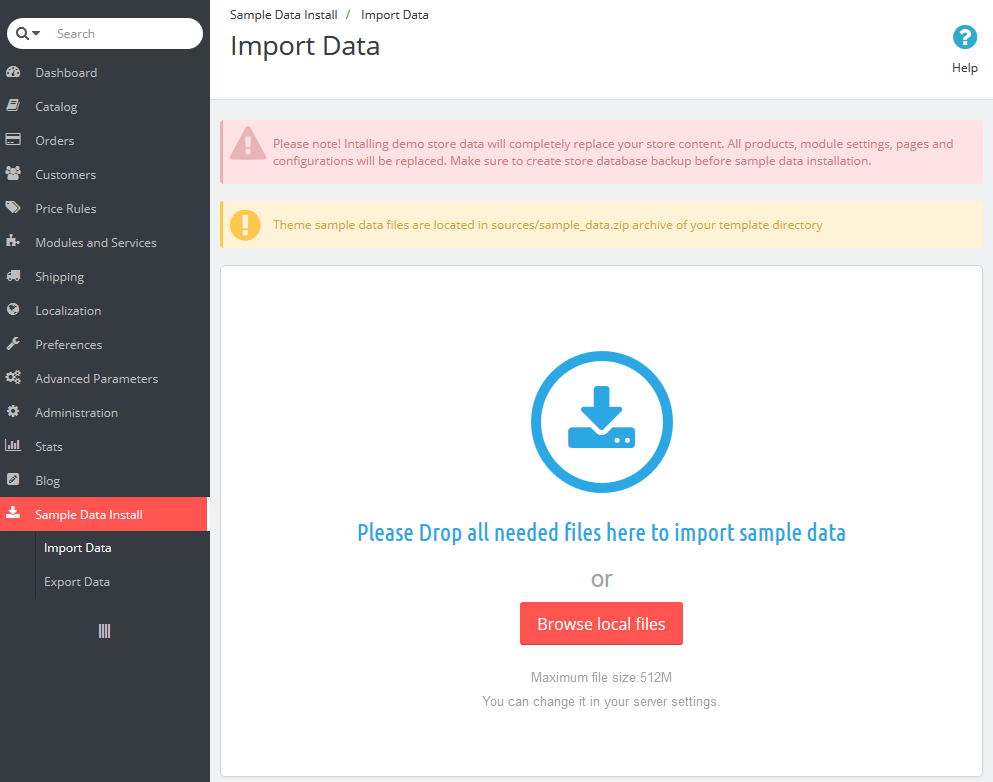
From the admin panel menu click "Install Demo Store" item.
-
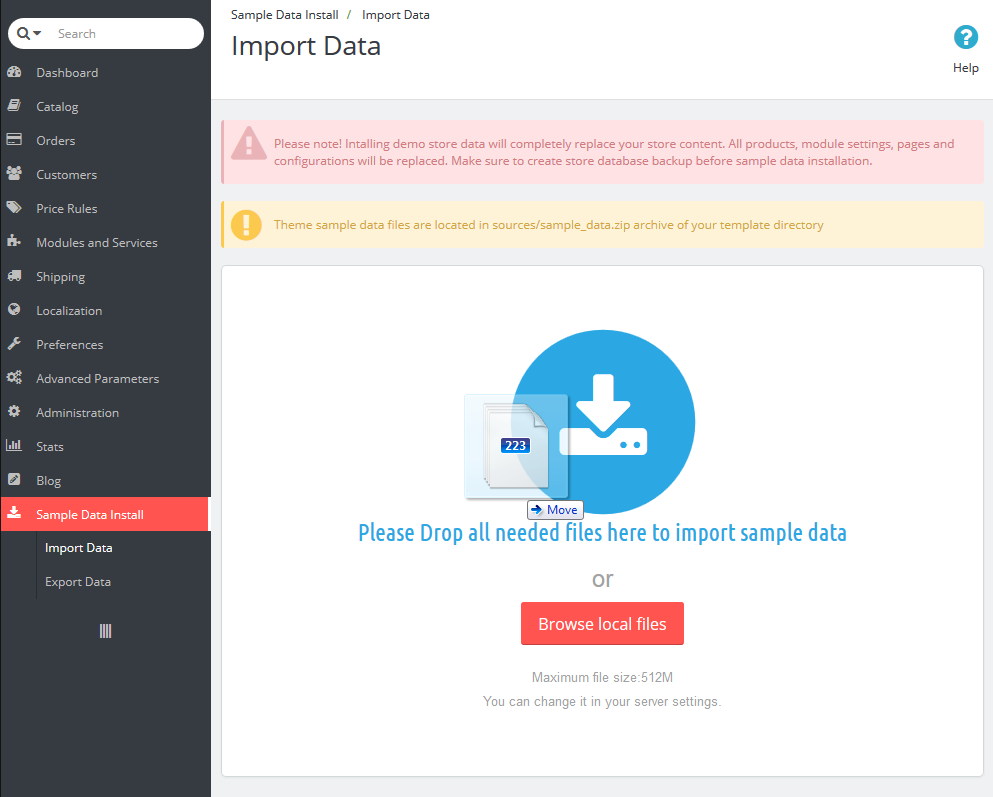
Select and upload sample data files from 'sample_data' directory of your template package. You can do this using the "Browse local files" button or dragging sample data files to the browser window.
-
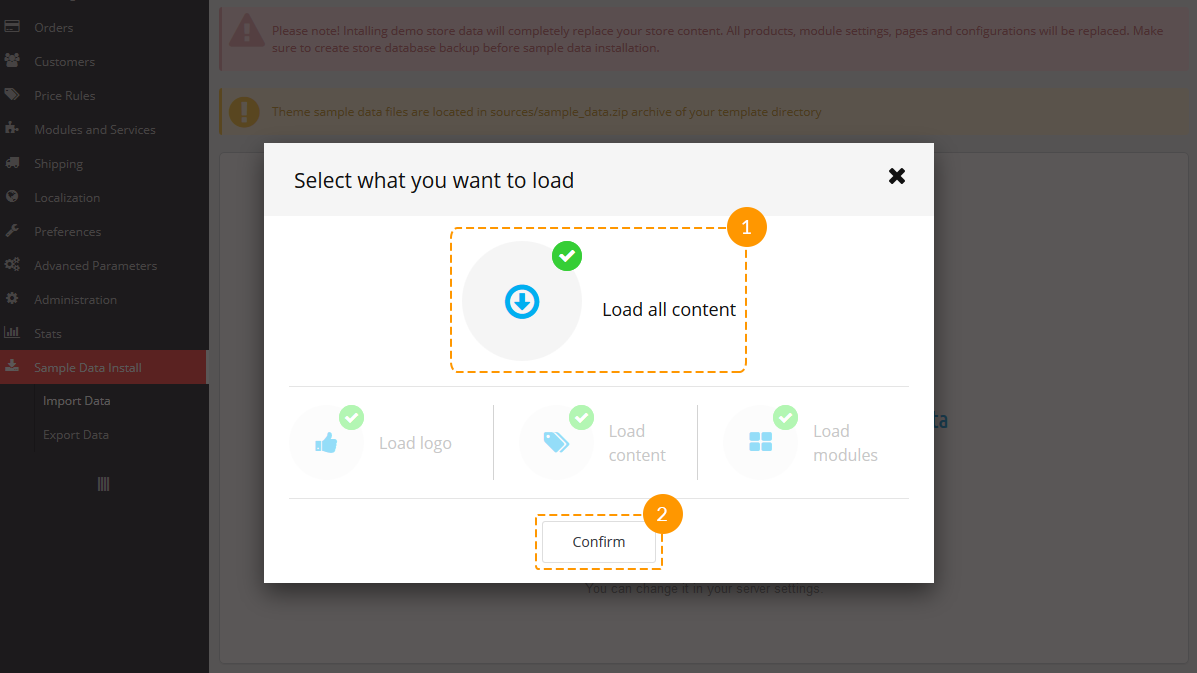
You will see the pop-up window offering different types of sample data installation. By default it's set to 'Load all content' type (1). This means that all sample data will be imported to your store. If that's what you need, click the 'Confirm' button.
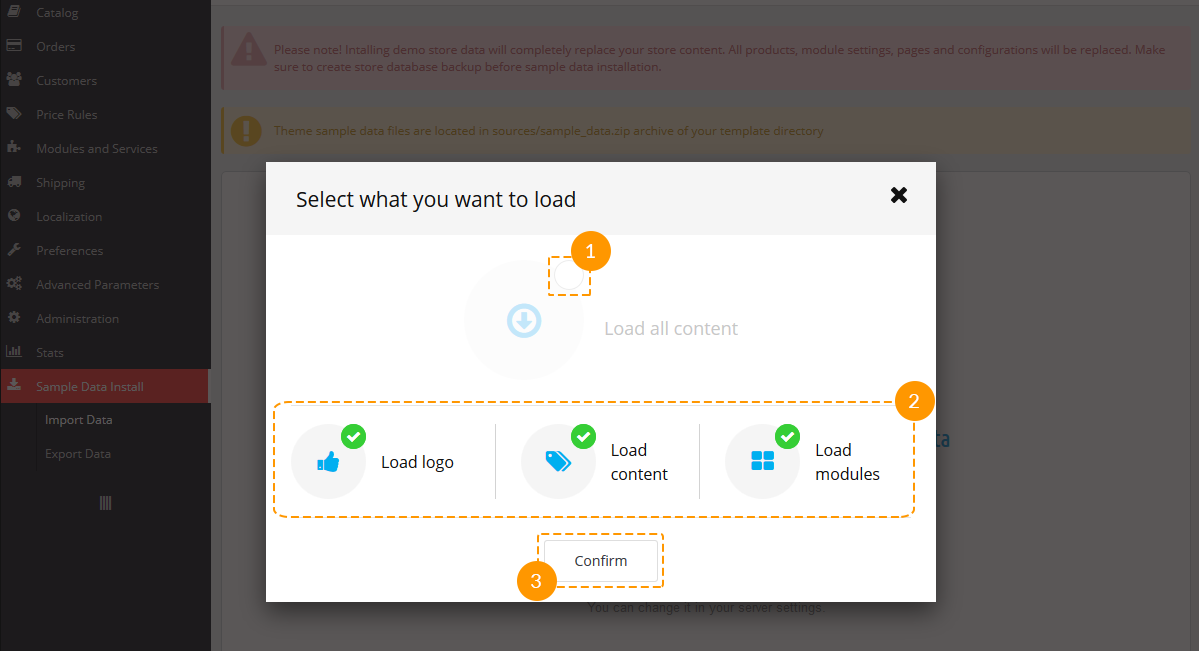
If you do not need to install all sample data, uncheck 'Load all content' (1), choose from the required options below by checking options the same way (2) and confirm your choice (3).
-
Wait until the files are uploaded.
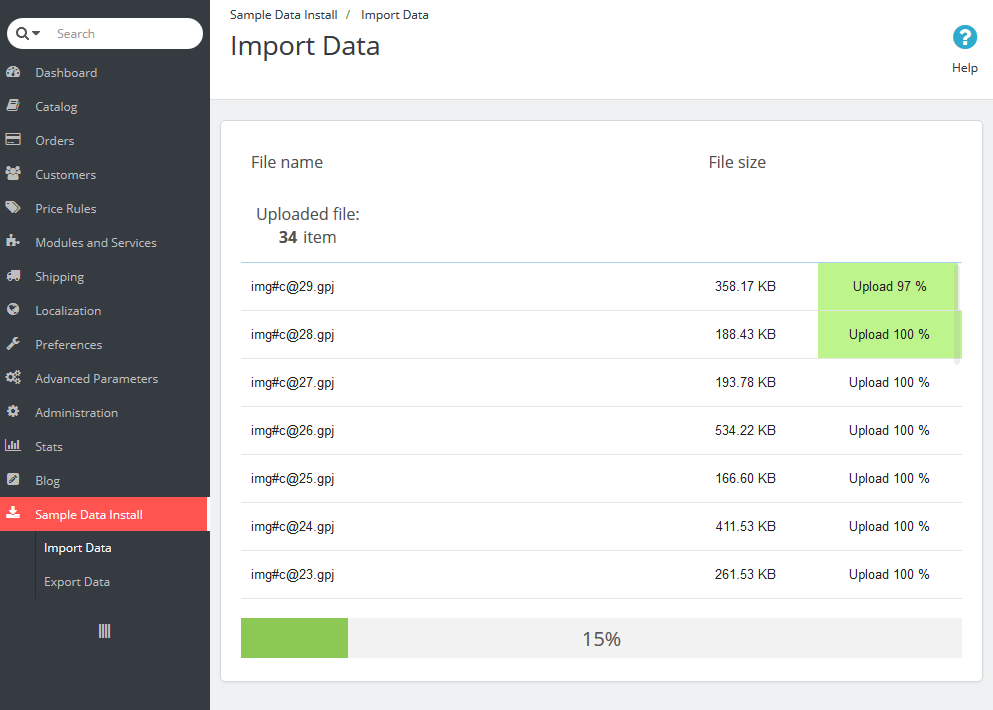
-
Then click "Continue Install" button.

-
Then Sample data installer will automatically configure your store and other modules. This can take several minutes.
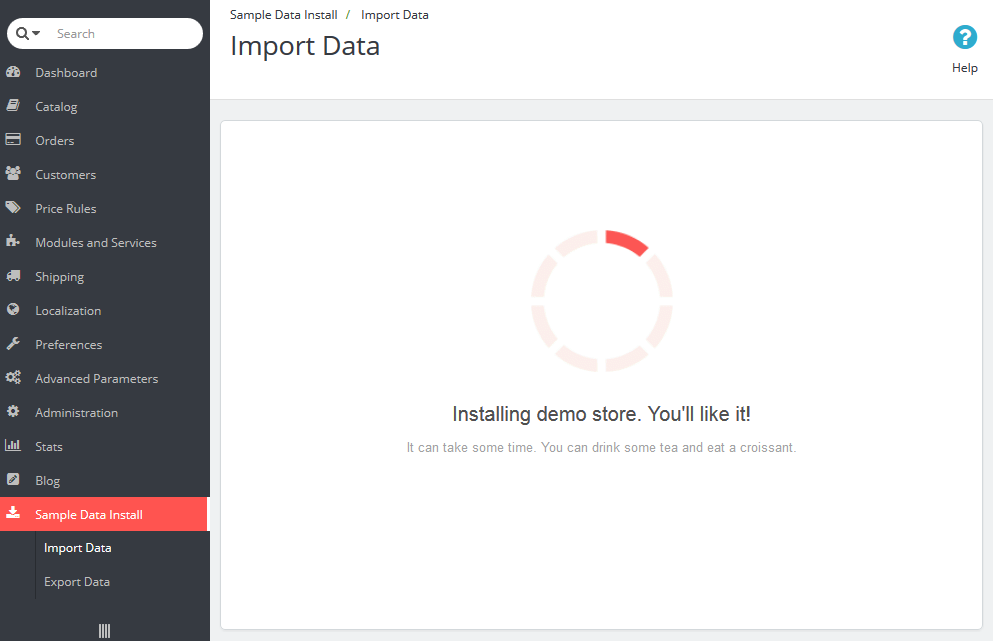
-
When sample data is installed successfully, you need to perform the last step - regenerate images. Click "Go To Regenerate Page" button.
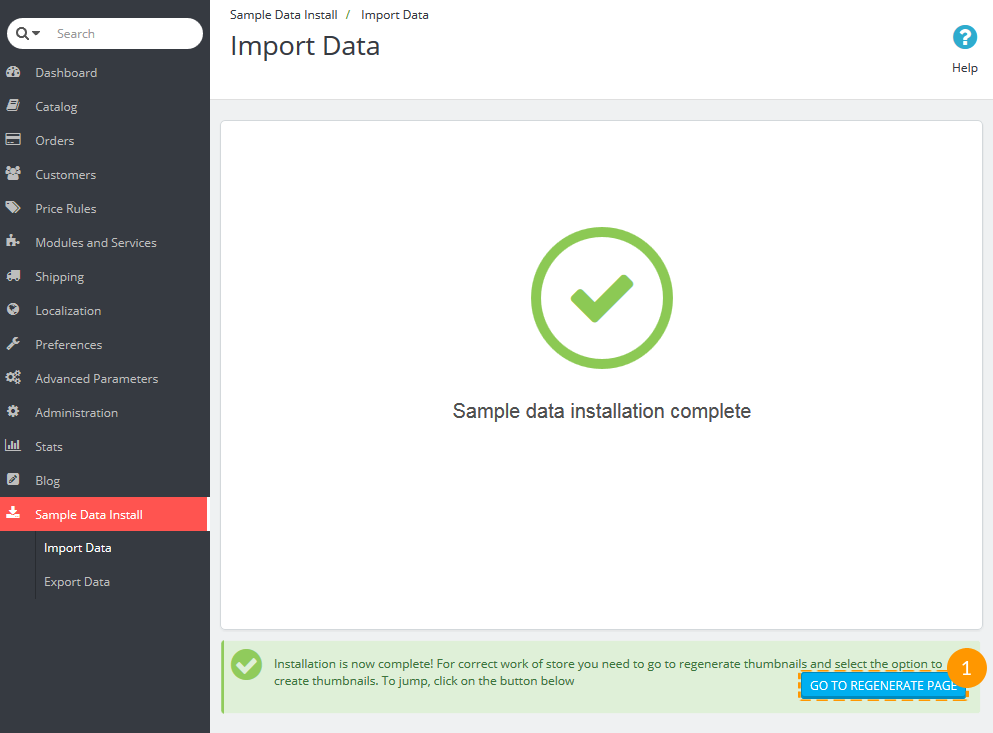
-
To regenerate images click "Regenerate thumbnails" button.
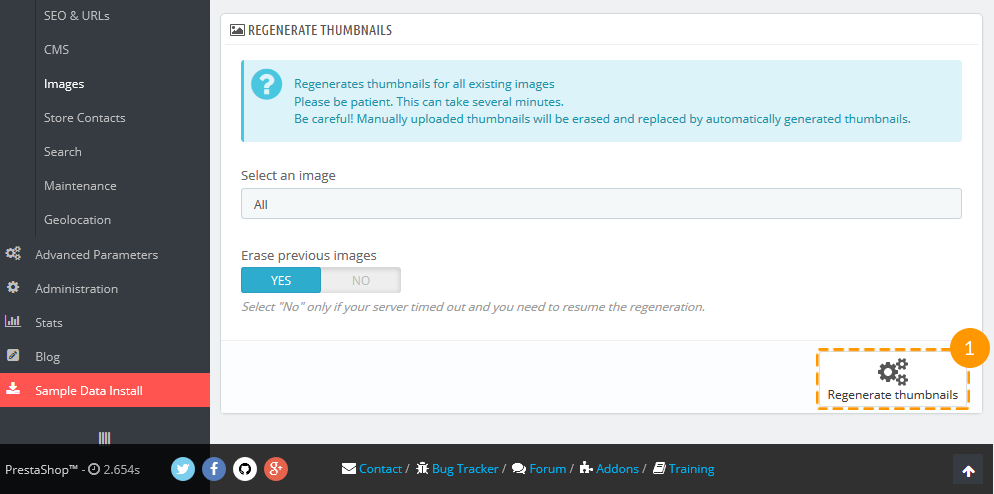
Congratulations, your demo store is installed.
Manual template installation with sample data
If you don't want to spend your time installing the template, don't hesitate to order installation service using our live-chat.
To make your PrestaShop store appear the same as template live demo, you need to install sample data. It will contain all demo products, categories, modules and store settings.
Please do not use the sample data for your running website! This will replace all your store products and store settings.
Please make sure your version of PrestaShop engine matches the specified version in
"Technical Details" tab, mentioned as "PrestaShop Engine: 1.X.X.X".
Also, make sure your database tables prefix is ps_. Install sample data only if your PrestaShop
engine matches the specified version.
Uploading template files
To upload the template to your server:
- Open the template package.
- Then go to the /theme/manual_install/ folder.
- Upload /img/, /modules/ and /themes/ folders to PrestaShop root directory.
You can check the detailed video tutorial on how to upload files to server using FTP manager and how to upload files to a server using cPanel (WebHost Manager, WHM).
Installing Sample data
Sample data is provided as an .SQL file. It is located in the theme/manual_install/ of the template package and is called dump.sql.
The dump.sql file can be installed using the phpMyAdmin tool or some other database management tool in your hosting control panel.
Before you proceed, please back up your database.
Please make sure your version of PrestaShop engine matches the template requirements. Otherwise, the database will be damaged.
When you are done with installing the dump.sql file, you will need to activate the template.
From the PrestaShop admin panel, go to Preferences > Themes, choose your template in the Themes section and click Save.
Adding languages to online store
Once the multi-language template is installed, you will be able to add all languages provided with it (English, French, Spanish, German, Russian) to the online store platform. It can be done this way:
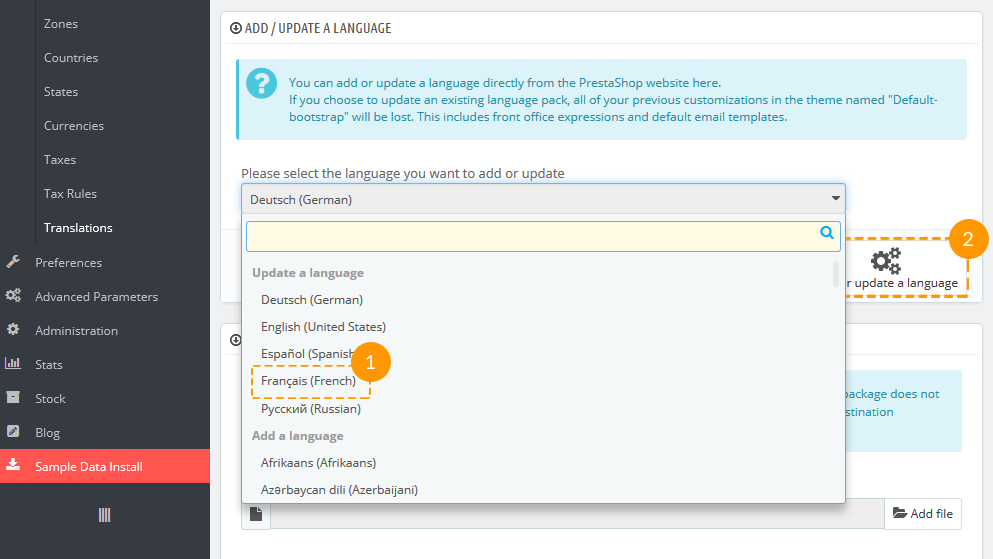
Go to 'Localization > Translations' in the admin panel, find 'ADD/UPDATE A LANGUAGE' and add languages by choosing them from the drop-down menu (1) and clicking the 'Add or update a language' button (2).
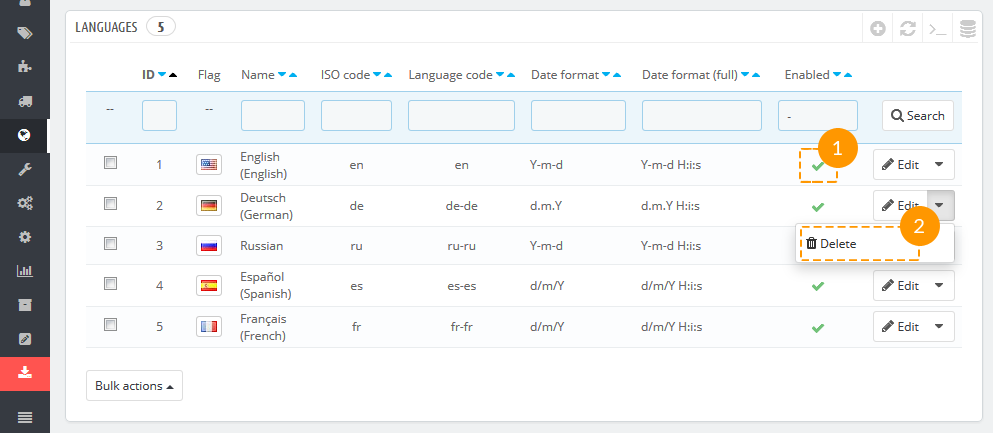
If you do not want to have some languages, you can delete them (2) or turn them off (1) in the 'Localization > Languages' menu.
Installing template over existing store
You can use this method of installation if you have a running PrestaShop website.
Modules configuration table can be found on the template livedemo page. Find the 'Sitemap' link in top or in footer menu and go the Sitemap -> Pages -> Pages Configuration.
In order to install sample data using the Sample data installer module, please follow instruction from the step 1 (Theme import) of this manual. Then in your store admin panel you'll see Sample data installer module.
-
In your PrestaShop admin panel navigate to Sample Data Install -> Import Data.

-
Select and upload sample data files from 'sample_data' directory of your template package. You can do this using the "Browse local files" button or dragging sample data files to the browser window.

-
You will see the pop-up window offering different types of sample data installation. You do not need to install all sample data. So, uncheck the 'Load all content' type (1), and choose from the required options below by checking 'Load modules' option (2) and confirm your choice (3).
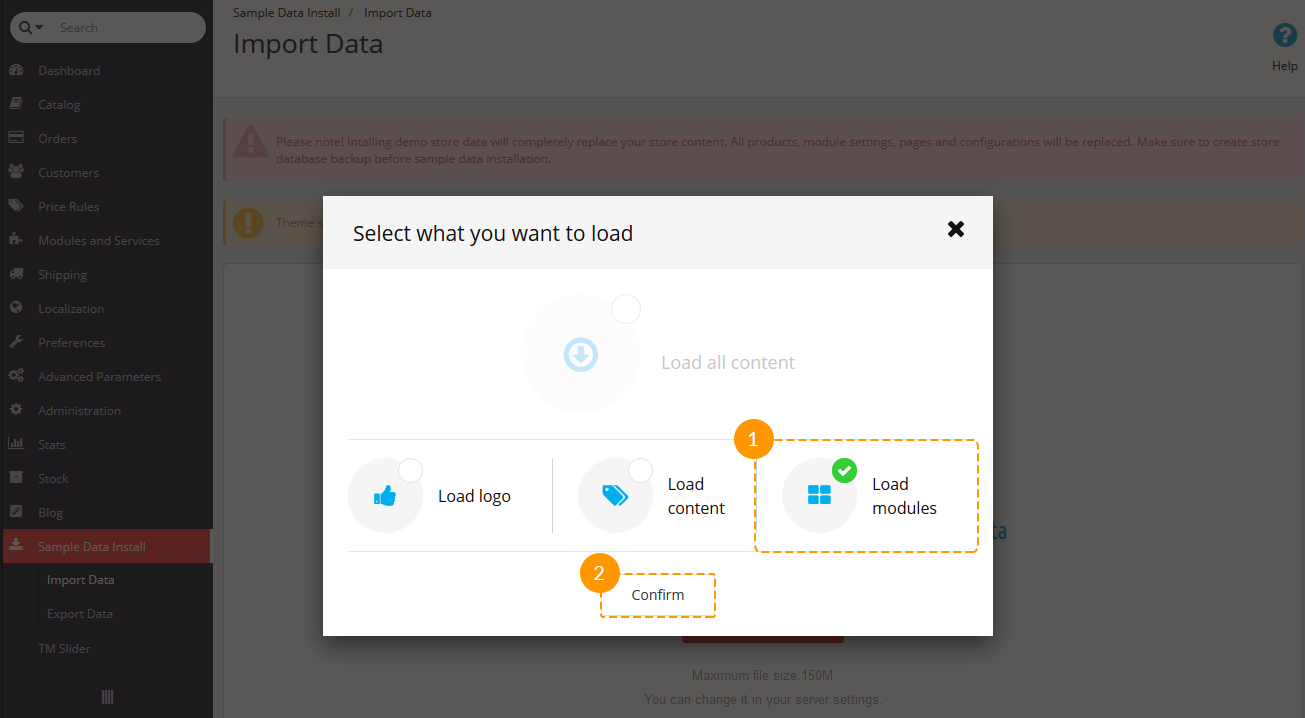
If the following pop-up window does not appear, contact our support team for more information.
-
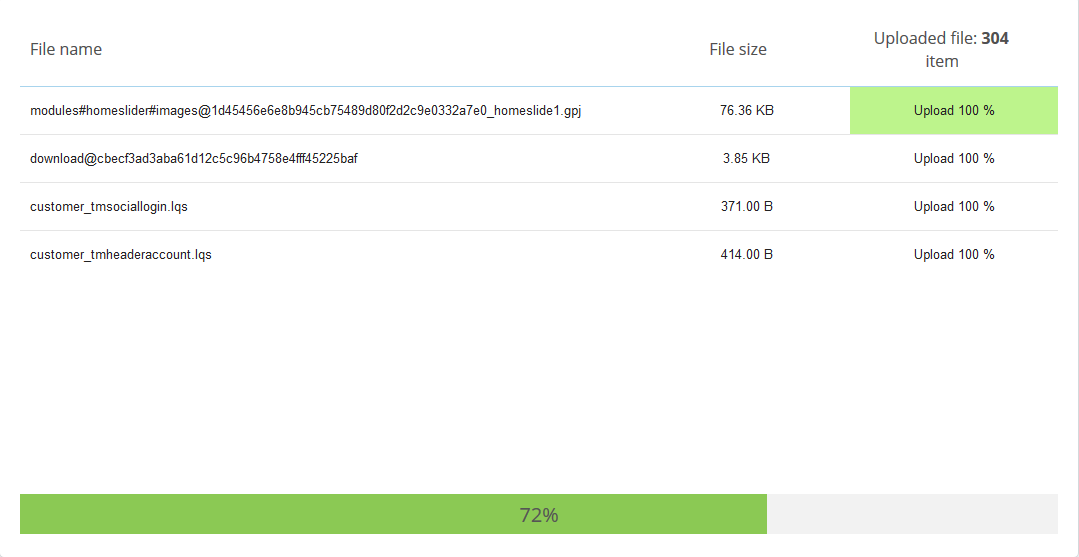
Wait until the files are uploaded.
-
Then click "Continue Install" button.

-
Then Sample data installer will automatically configure your store and other modules. This can take several minutes.

-
Sample data is installed successfully.

Congratulations, your have installed the template over your existing store.
