JetSmartFilters
Creating a new Filter
From this block you can learn how to create a new filter with JetSmartFilters plugin.
Quick Start
To create a new filter navigate to Smart Filters > Add New in WordPress Dashboard. The Add New Filter page will open.
Fill in the new filter title, specify its:
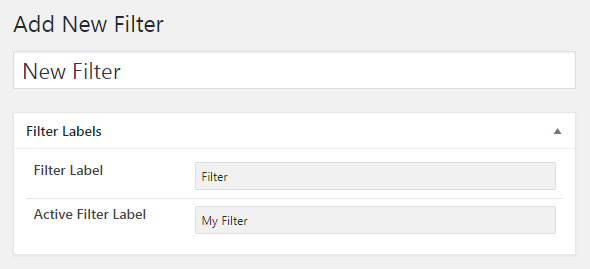
Label - under what title the filter is shown in Elementor.
Active Filter Label - how the filter label is to be shown when the filter is active on the page.
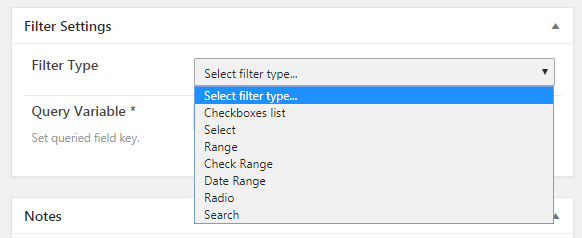
Filter type - here you can select one of the available 7 filter types to create a filter needed specifically for the post listing or products page where you will place it. Let’s overview each of the filters in more details.

Filter Settings
Here you can set the filter type you want to create and specify the field key by which you want to query the posts or products.
Checkboxes List
Use this filter in case you want to specify several options at once from which the visitors will be able to select.
- Data source - here you can set the source from which the checkboxes are to be taken. There are several of them:
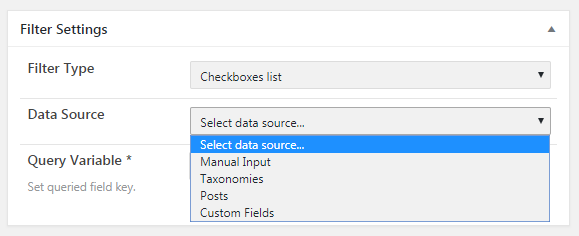
- Manual input - select this type in case you need to manually fill in the options list with the needed values and add the value labels to show (e.g., you’ve got the custom-made products post type and have the “color” meta field with the slug you’ve filled in. You need to add the values (the actual color values you’ve got in this meta field for the different products) to create the checkboxes allowing to select the products by color.
- Posts - select this source to display the post titles as the checkboxes to filter the related posts (e.g., you’ve got the “Speakers” post type and the “Events” post type listing grid. You can select the Posts > Speakers to filter the posts of Event type by speakers participating.
- Taxonomies - select this source to use the term titles as the labels of the checkboxes. E.g., you’ve got the “Clothes” post type and “Colors” taxonomy (the terms are the colors, and each Clothing post item is assigned to different terms (depending on the colors). This filter allows displaying the terms and filtering the posts using them.
- Custom Fields - in case you’ve got the repeaters in the custom post types, you can specify the Custom Fields data source and the specific Custom Field Key which will display the values from the repeating posts fields.
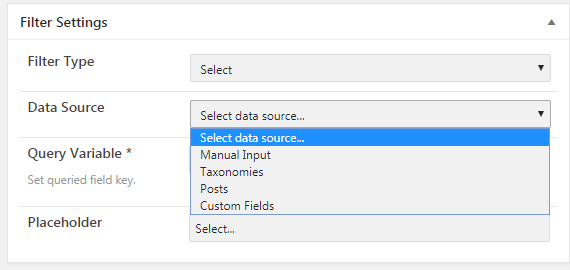
Select
This filter type allows adding a select dropdown filter where the visitor will be able to select from the set values.
You’ll have to specify from where to pull the values using the Data Source option.
Data Source - specify the source from which the select values are to be taken. There are several of them:
- Manual input - select this type in case you need to manually fill in the options list with the needed values and add the value labels to show (e.g., you’ve got the custom-made products post type and have the “color” meta field with the slug you’ve filled in. You need to add the values (the actual color values you’ve got in this meta field for the different products) to create the select items allowing to select the products by color.
- Posts - select this source to display the post titles as the select items to filter the related posts (e.g., you’ve got the “Speakers” post type and the “Events” post type listing grid. You can select the Posts > Speakers to filter the posts of Event type by speakers participating.
- Taxonomies - select this source to use the term titles as the labels of the select filter. E.g., you’ve got the “Clothes” post type and “Colors” taxonomy (the terms are the colors, and each Clothing post item is assigned to different terms (depending on the colors). This filter allows displaying the terms and filtering the posts using them.
- Enable Show only children of current term option to allow displaying the child terms in the hierarchy for the parent term (inline, or using any other style).
- Enable Group terms by parents option to allow showcasing the child terms below the parent terms.
- Custom Fields - in case you’ve got the repeaters in the custom post types, you can specify the Custom Fields data source and the specific Custom Field Key which will display the values from the repeating posts fields.
- Placeholder - here you can specify the text to show instead of the standard one shown in the Select filter.
Range
The Range filter type allows setting the certain range within which one has to query the prices.
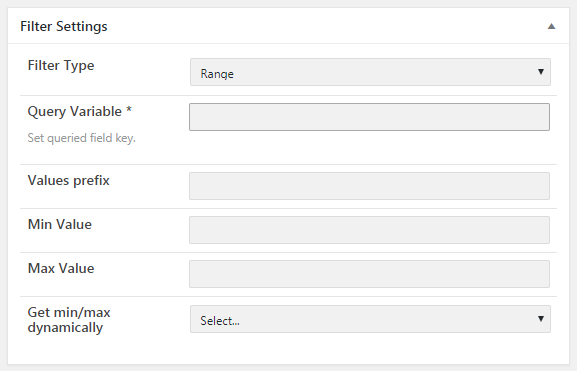
- Values prefix - set the prefix to be shown before the values (e.g., the currency sign).
- Values suffix - set the suffix to be shown after the values (e.g., the currency sign).
- Thousands separator - here you can define the separator for thousands values (e.g., space).
- Decimal separator - here you can define the separator for decimal values.
- Number of decimals - here you can specify the number of decimals after the separator.
- Min Value - here you can specify the minimum value available for filtering.
- Max Value - here you can specify the maximum value available for filtering.
- Step - this option allows setting the minimum value exceeding an already set one to be applied when defining the range. The lower is the Step value, the more exactly the visitor is able to tune the range.
- Get min/max dynamically - in case you’re working with prices, you can enable auto select for the minimum or maximum values. These values will be defined automatically depending on the actual min and max product prices.
- Query Variable - fill in the needed meta field slug (this meta field will become the source of the range values). E.g., you can specify the _price meta key to allow working with the Price range.
Check Range
The Check Range filter allows filtering the prices range using the minimum and maximum values.
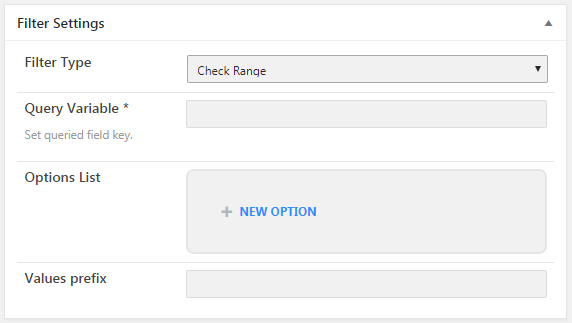
Options list - click +New Option to add a new prices range for the checkbox.
Values prefix - set the prefix to be shown before the values (e.g., the currency sign).
- Values suffix - set the suffix to be shown after the values (e.g., the currency sign).
- Thousands separator - here you can define the separator for thousands values (e.g. space).
- Decimal separator - here you can define the separator for decimal values.
- Number of decimals - here you can specify the number of decimals after the separator.
- Query Variable - set the necessary query variable (e.g., _price to showcase the WooCommerce prices).
You need to add at least several options and fill in the min and max value for each one (e.g., $5 - $10, $20 - $50, etc.).
Date Range
The Date Range filter type allows filtering posts by meta date and post date.
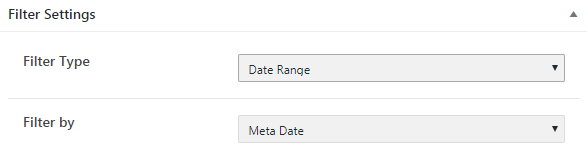
- Filter by - here you can specify whether you want to filter posts by meta date or post date.
Radio
This filter type allows filtering the posts or products using the different sources, allowing to add the options via manual input using the values that are already added to the meta fields of the posts, as well as use the posts, taxonomies and custom fields as the select options.
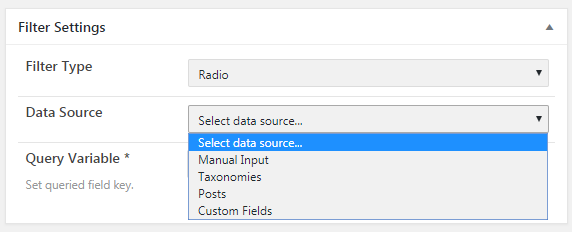
In case you choose the Manual Input source type, you’ll have to set the Query Variable into the corresponding field to specify which field contains the data by which the filter will filter the publications or products.
Then you’ll have to manually add several options with different corresponding values and labels to show then as the select options.
- Taxonomies - in case you’ve selected this data source, you’ll be able to use the taxonomies or categories as filters for your posts or custom post types, products, etc.
- Posts - if you’ve selected this data source, you’ll be able to filter the posts using the related posts if there is a relation set for them.
- Custom Fields - in case you’ve got the repeaters in the custom post types, you can specify the Custom Fields data source and the specific Custom Field Key which will display the values from the repeating posts fields.
Search
Use the Search filter type to allow the visitors to filter the posts or products using the common search field.
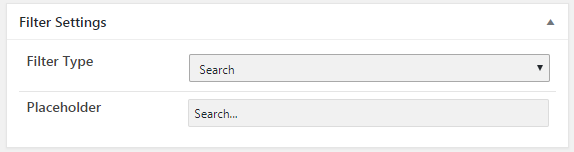
Placeholder - change the placeholder text inside this field fill in the needed text in the corresponding field.
Search by - here you can define how the search is implemented: by deafult WP search or by custom field.
Query Variable - fill in the needed meta field slug (this meta field will become the source of the search). E.g., you can specify the "color" meta key to allow searching the products by color.
Rating
This filter type allows filtering the posts or products by their average rating.
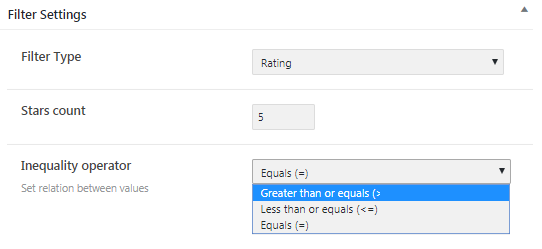
Stars count - here you can specify the amount of the stars displayed in the filter.
Inequality operator - here you need to set relation between the values. You can select what values will be showed in the filter according to the stars count. There are greater than or equals (>=), less than or equals (<=), equals (=) options.
WooCommerce Meta Keys
In case you’re going to display the filters which are to be applied for WooCommerce products, you’ll be able to find the meta fields for filtering different values, such as prices, weight, width, height, etc., in the list below.
The following list contains the most popular meta keys for filtering products.
Popular plugins fields
- _price: filter by product price;
- _wc_average_rating: filter by product rating;
- total_sales: filter by sales count;
- _weight: product weight;
- _length: product length;
- _width: product width;
- _height: product height;
- _sale_price_dates_from: filter by product sale start date;
- _sale_price_dates_to: filter by product sale end date.