"How to..." Shopify Customization Issues
Here we have gathered the most frequently asked questions about Vendy theme customization and management.
How to edit Powered By Shopify link?
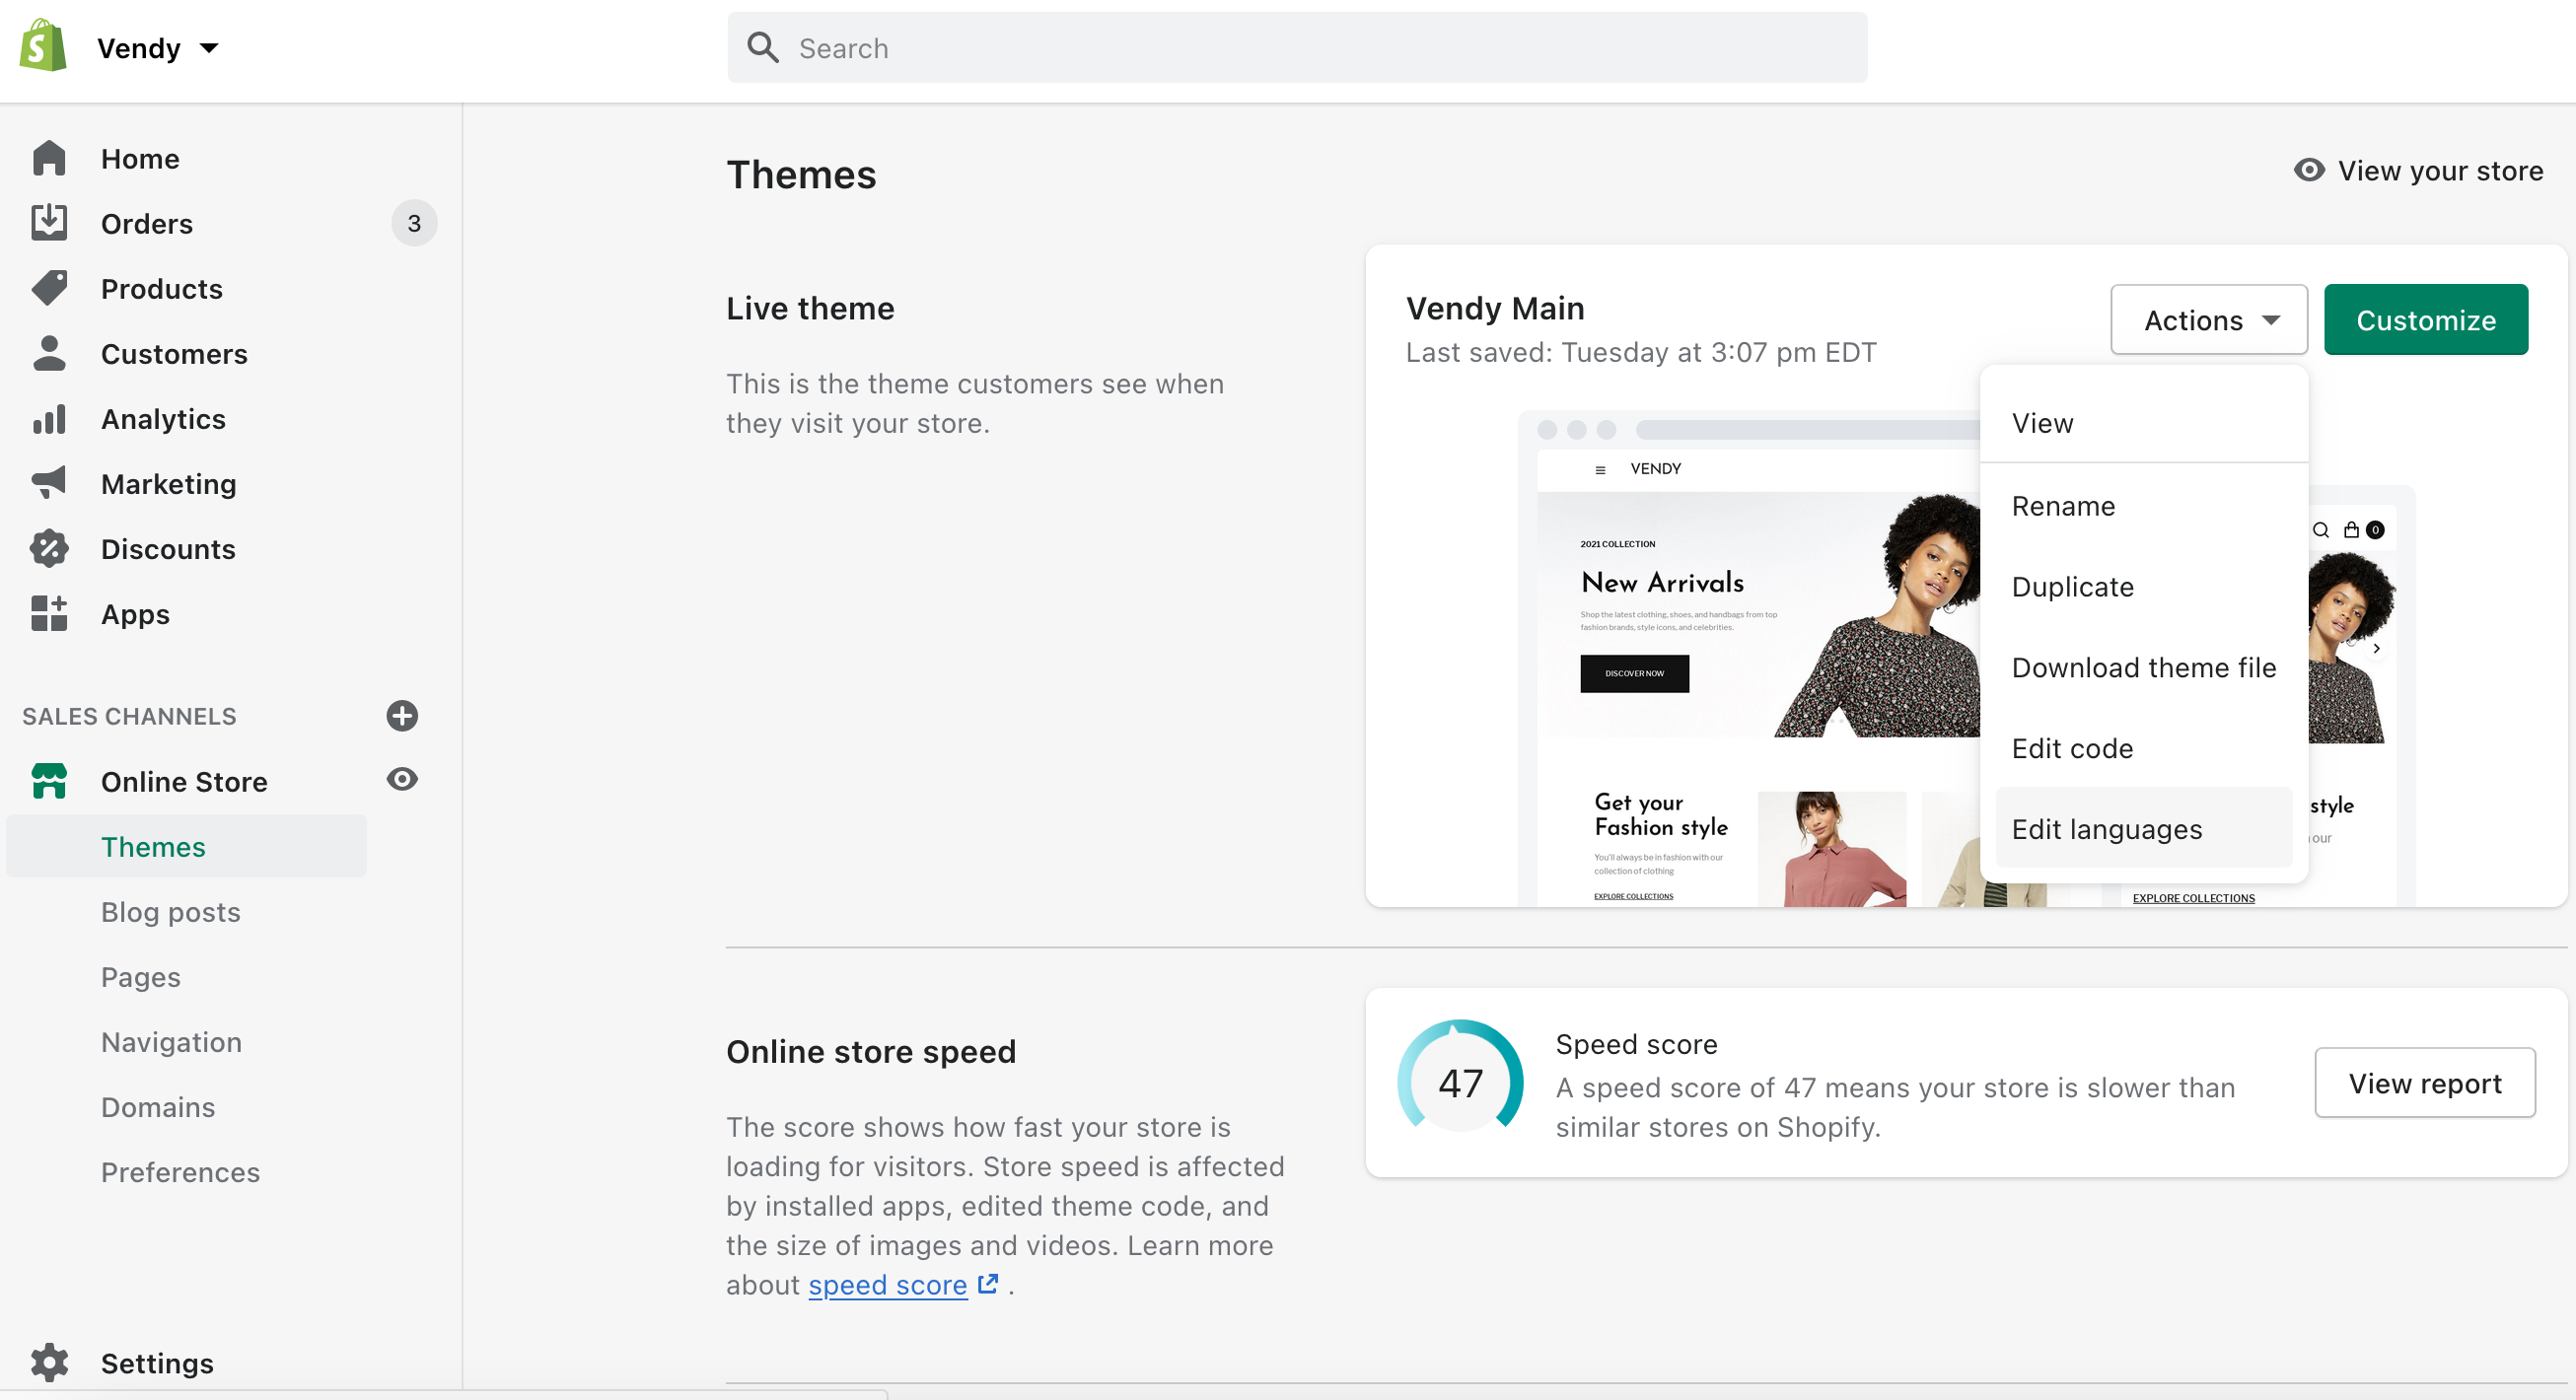
The copyright message can be changed in Online Store > Themes > Actions > Edit Languages.
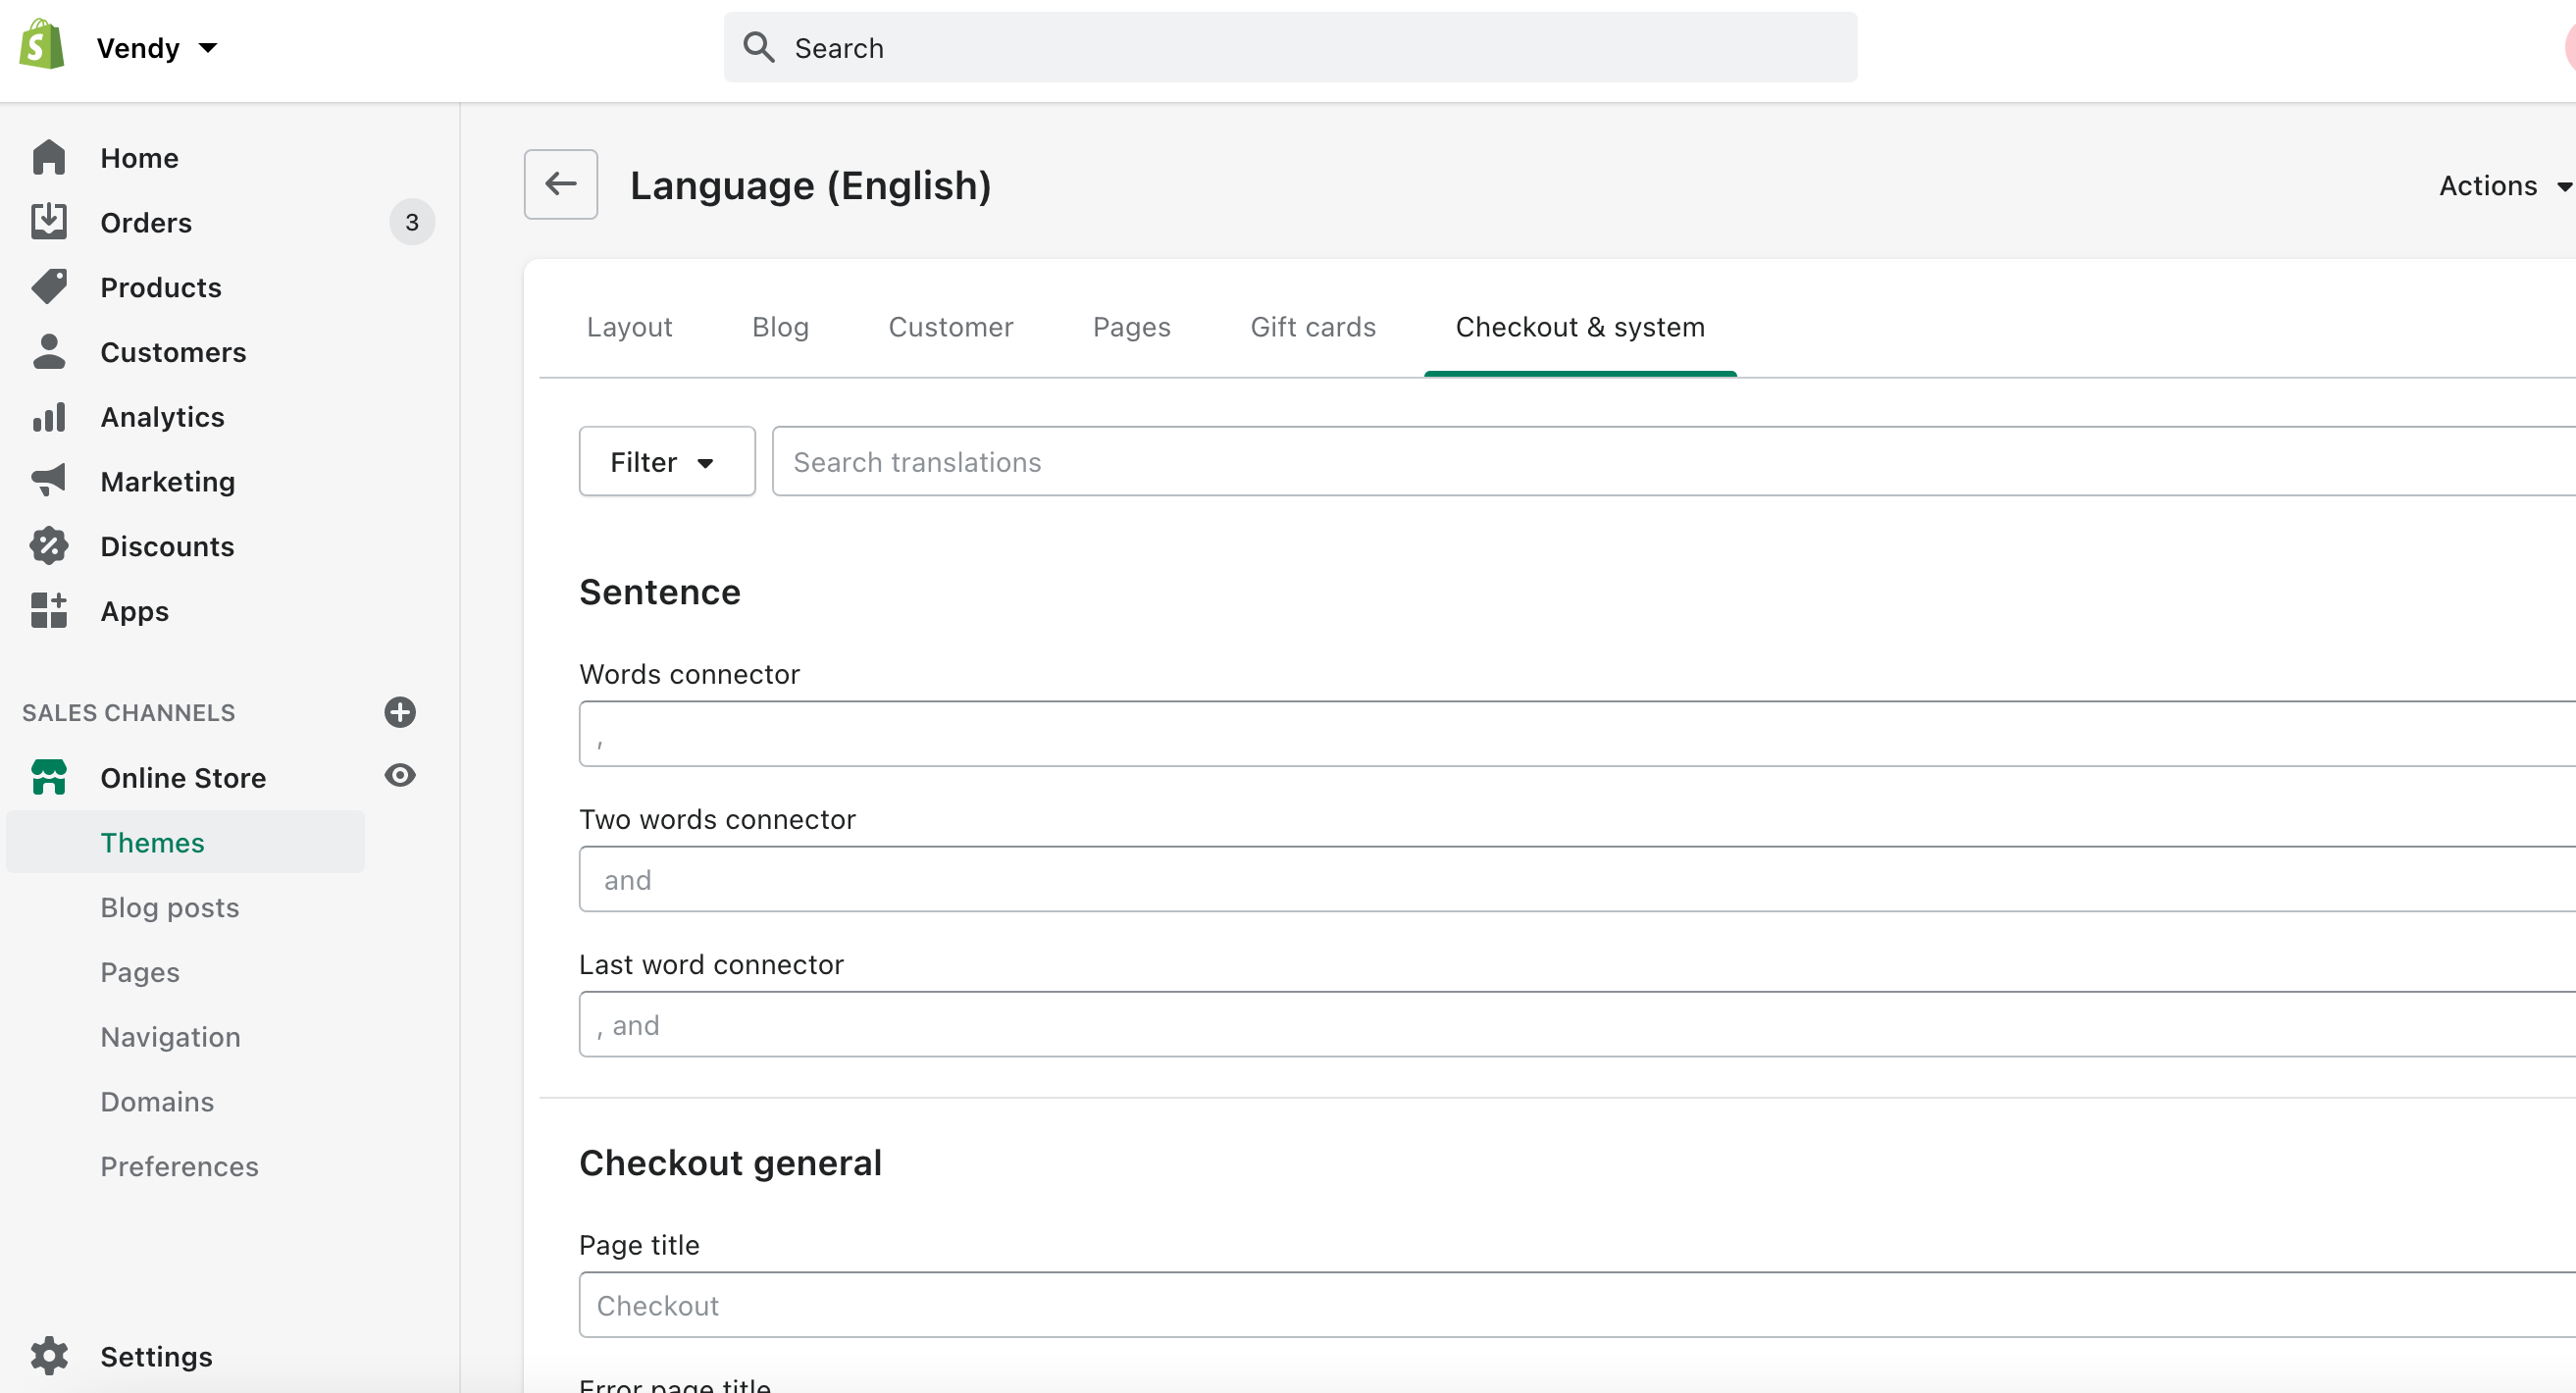
Then choose Checkout & system.
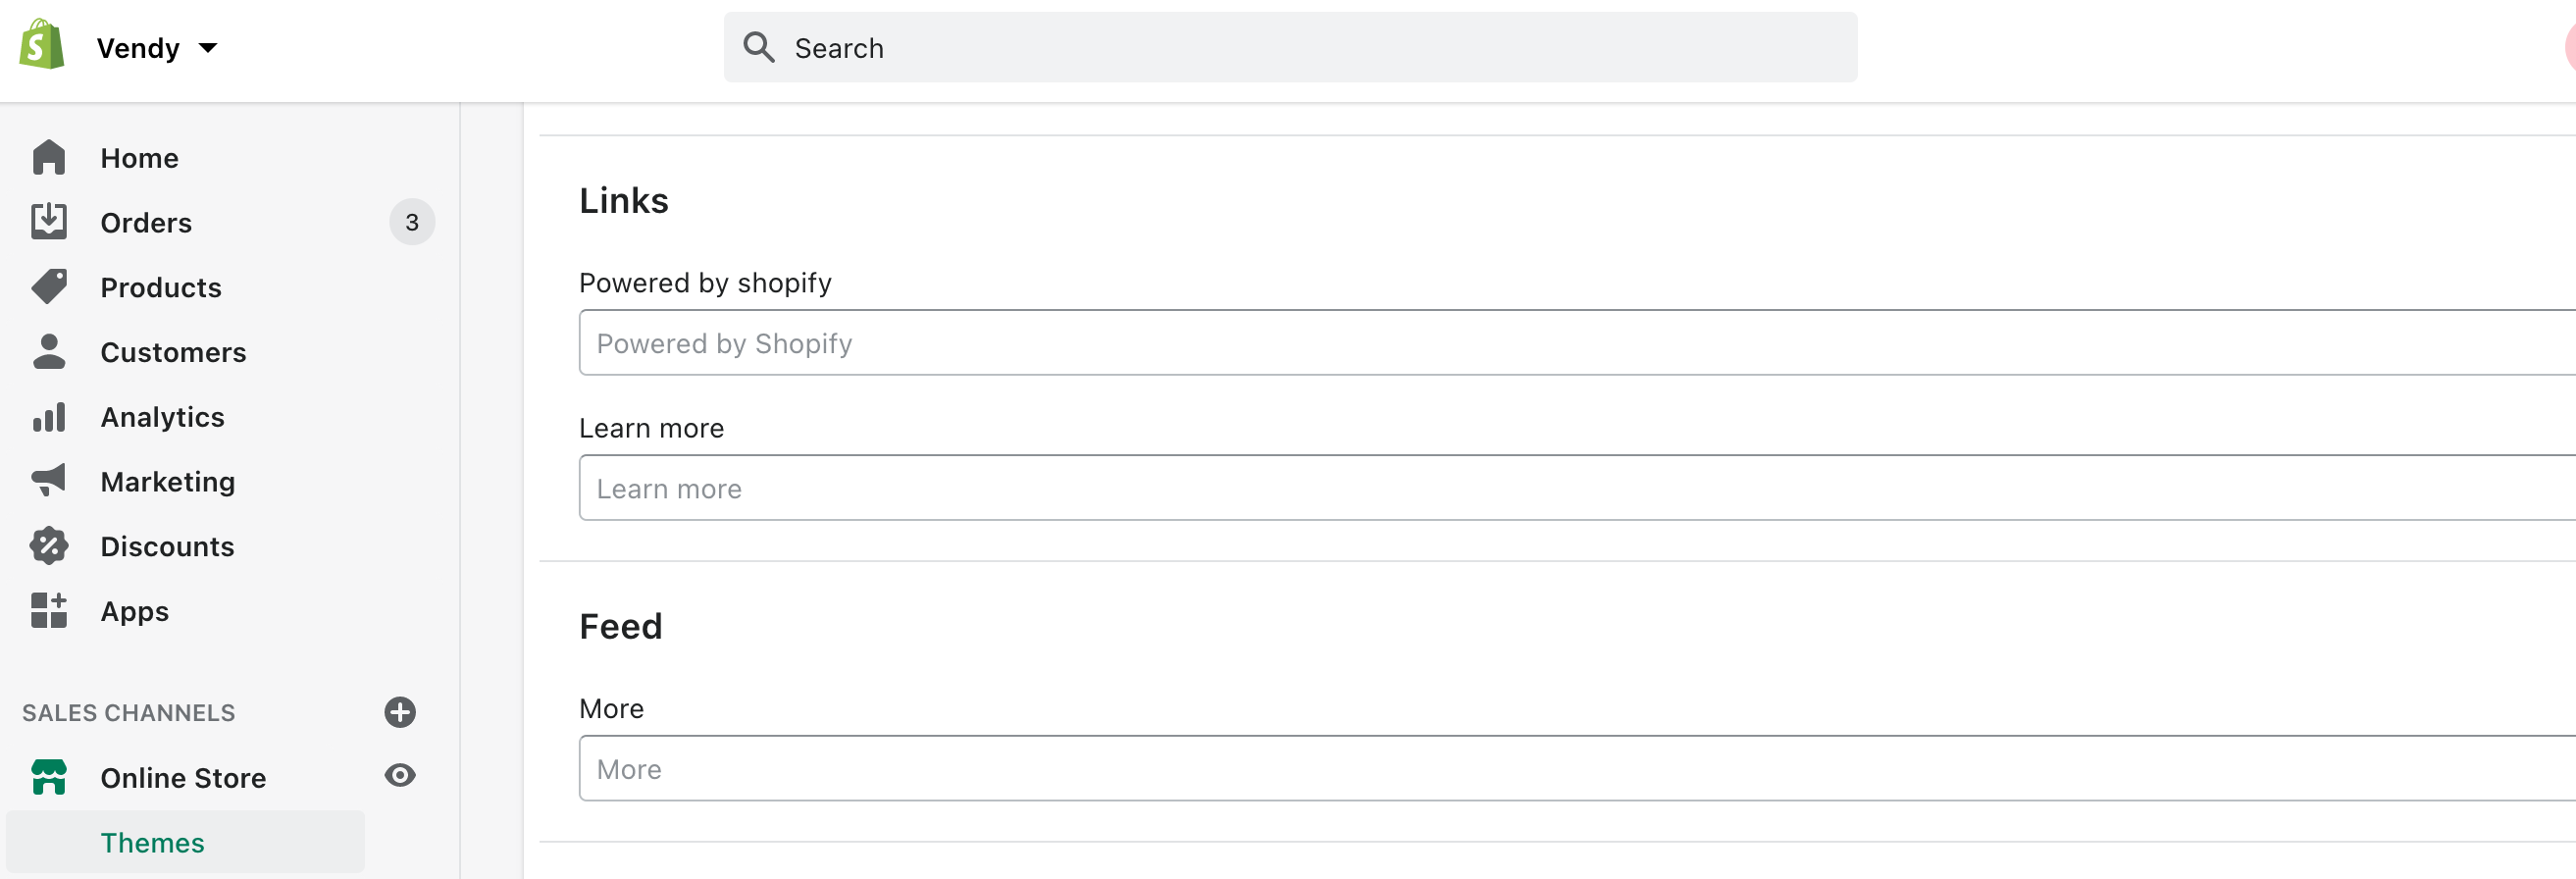
Scroll down to the Links section.
The copywrite coding is located in the Online Store > Themes > Actions > Edit code.
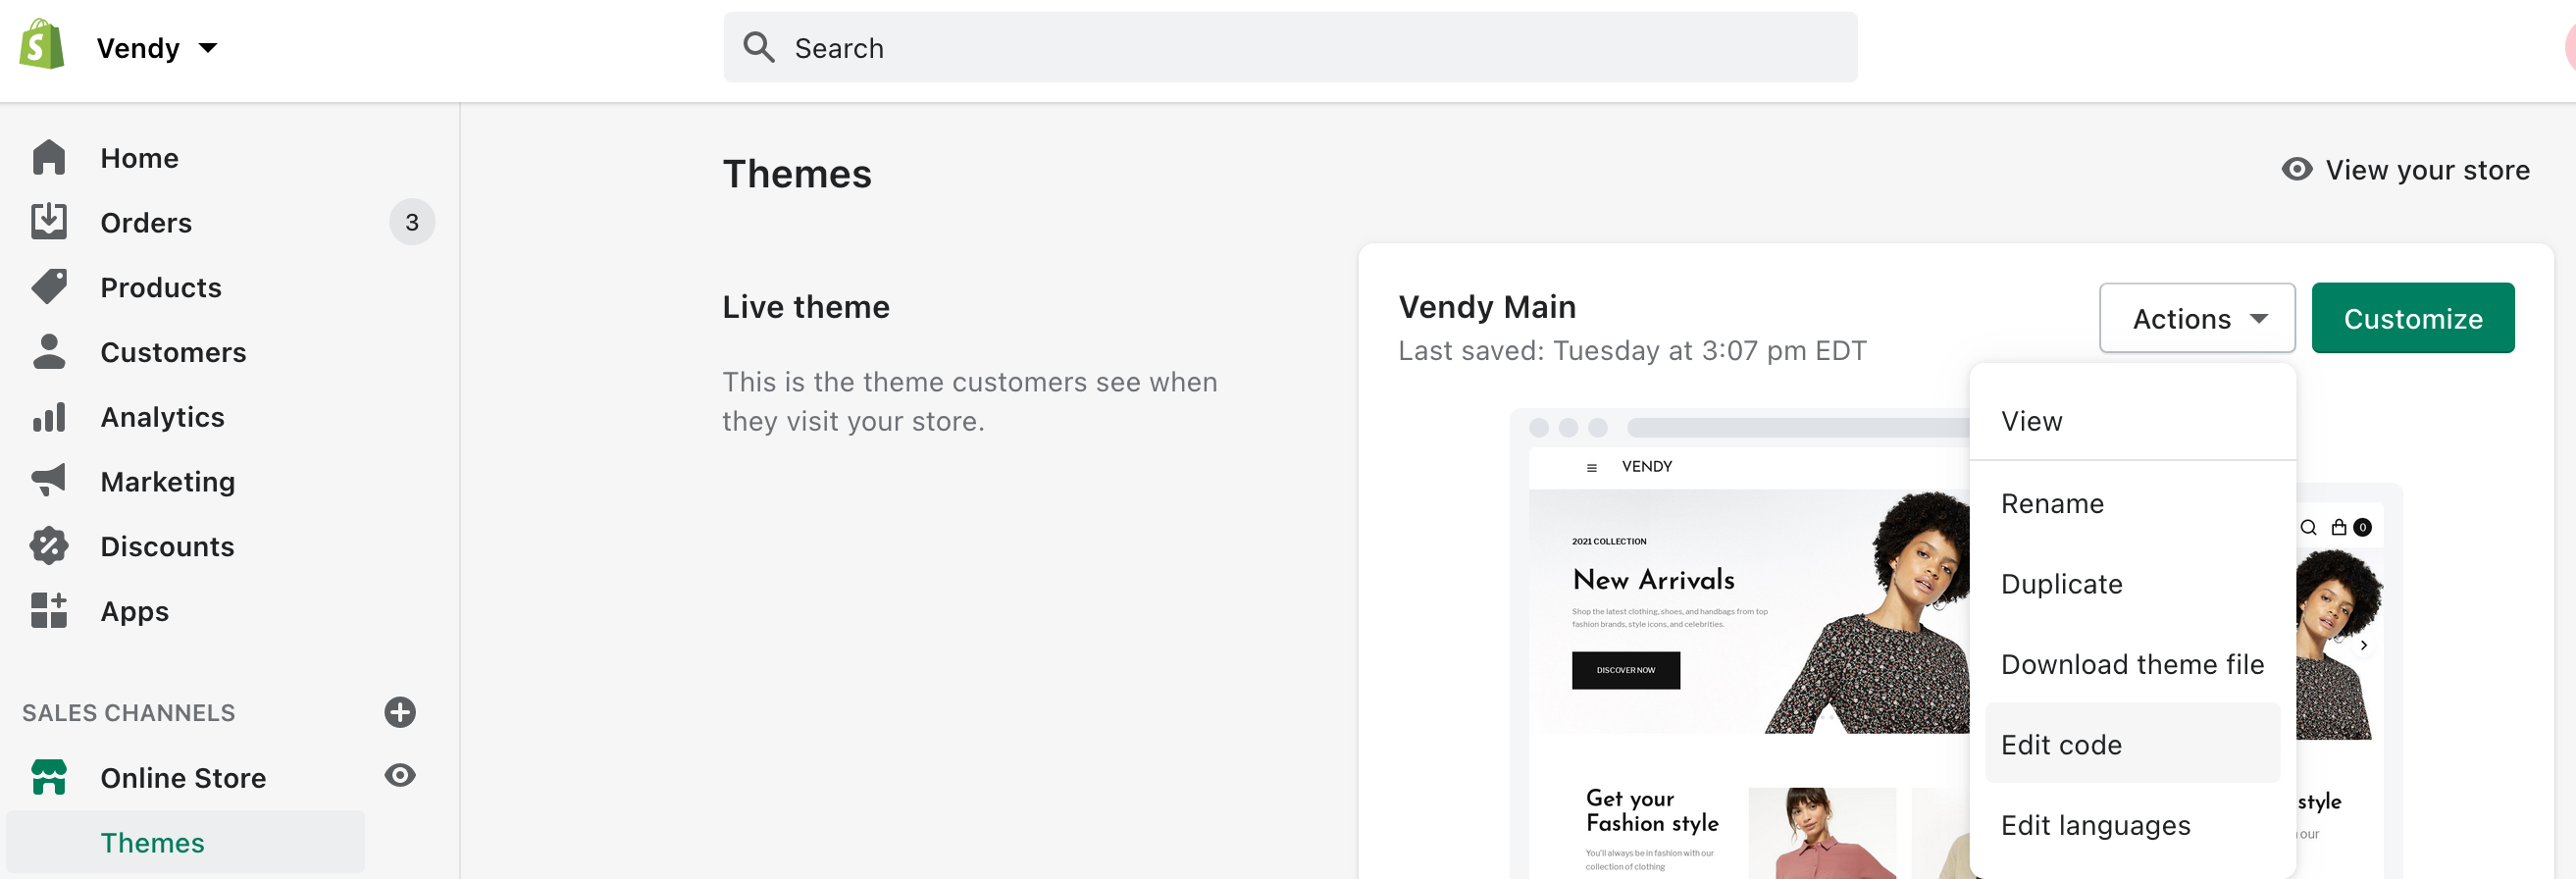
Scroll down to the Sections and edit footer-1.liquid / footer-2.liquid / footer-3.liquid depending on the footer type you use on the site.
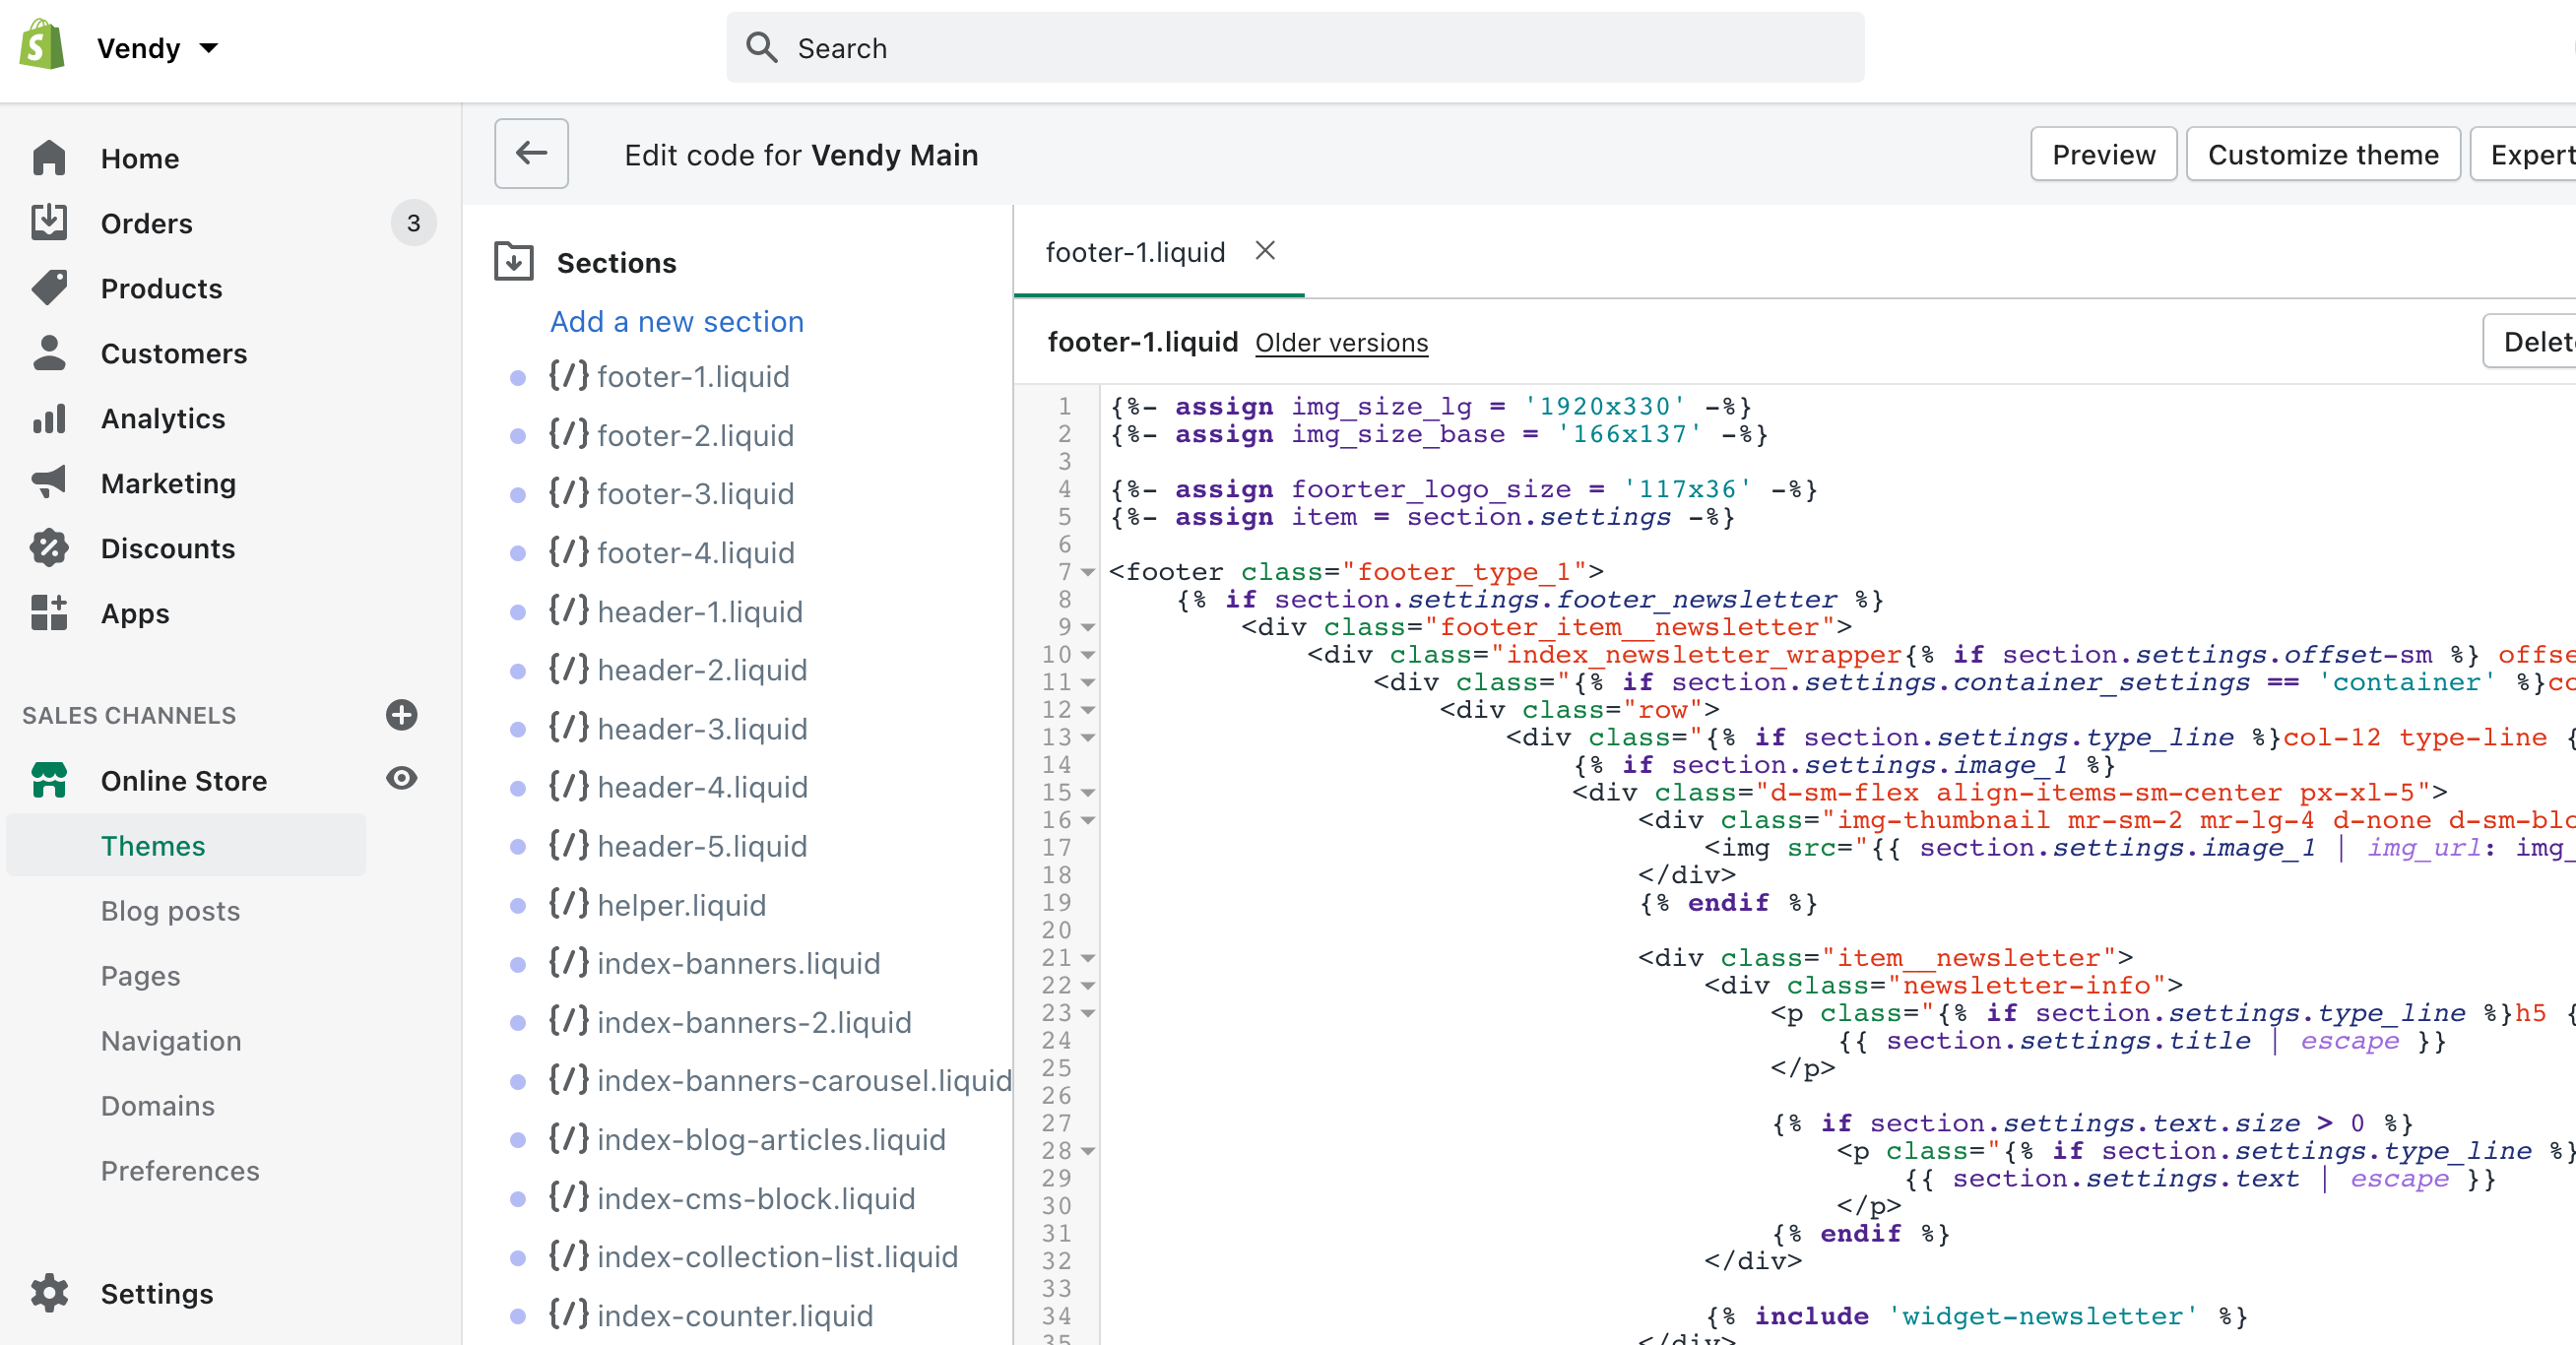
How to manage the Product Image Size?
The size of product images on collection pages can be adjusted in Online Store -> Themes -> Edit code -> Sections -> template-collection.liquid:
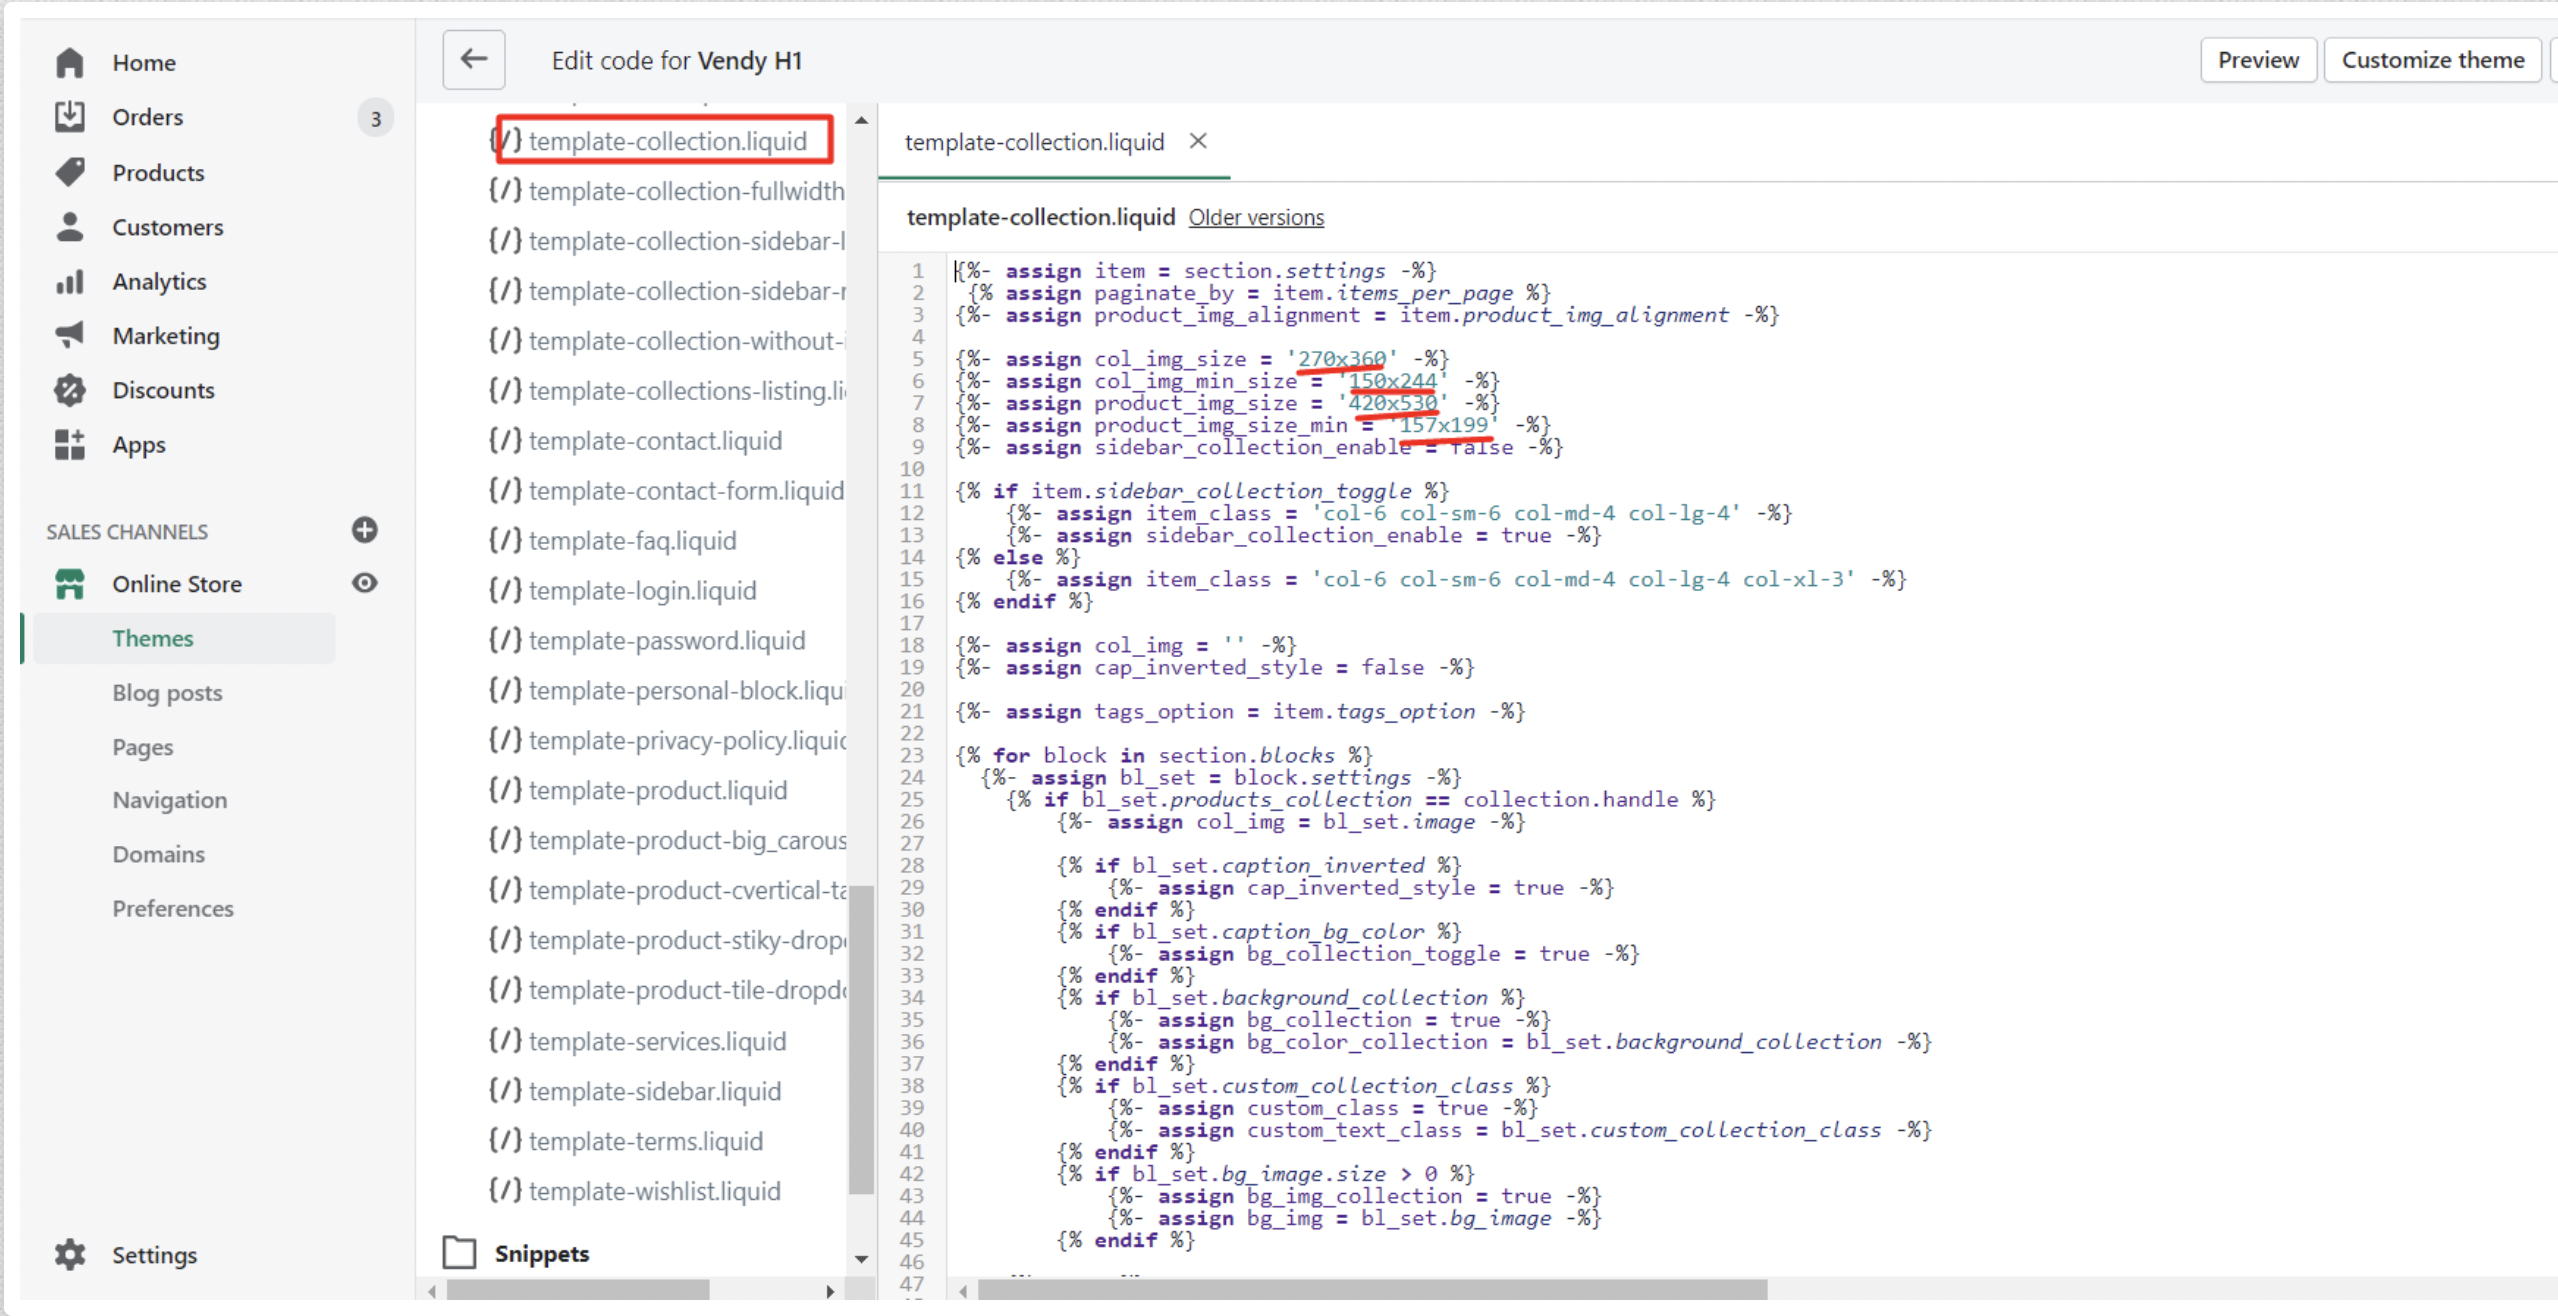
The size of product images on Product Pages can be adjusted in Online Store -> Themes -> Edit code -> Sections -> template-product.liquid in the product_img_url area.
The size of product images on Home Page Sections can be adjusted in Online Store -> Themes -> Edit code -> Sections select the needed section name in the product_img_url area.
Make sure to upload all the images of the same size per selected product dimensions for the nice layout.
How to manage a Delivery policy on the product page?
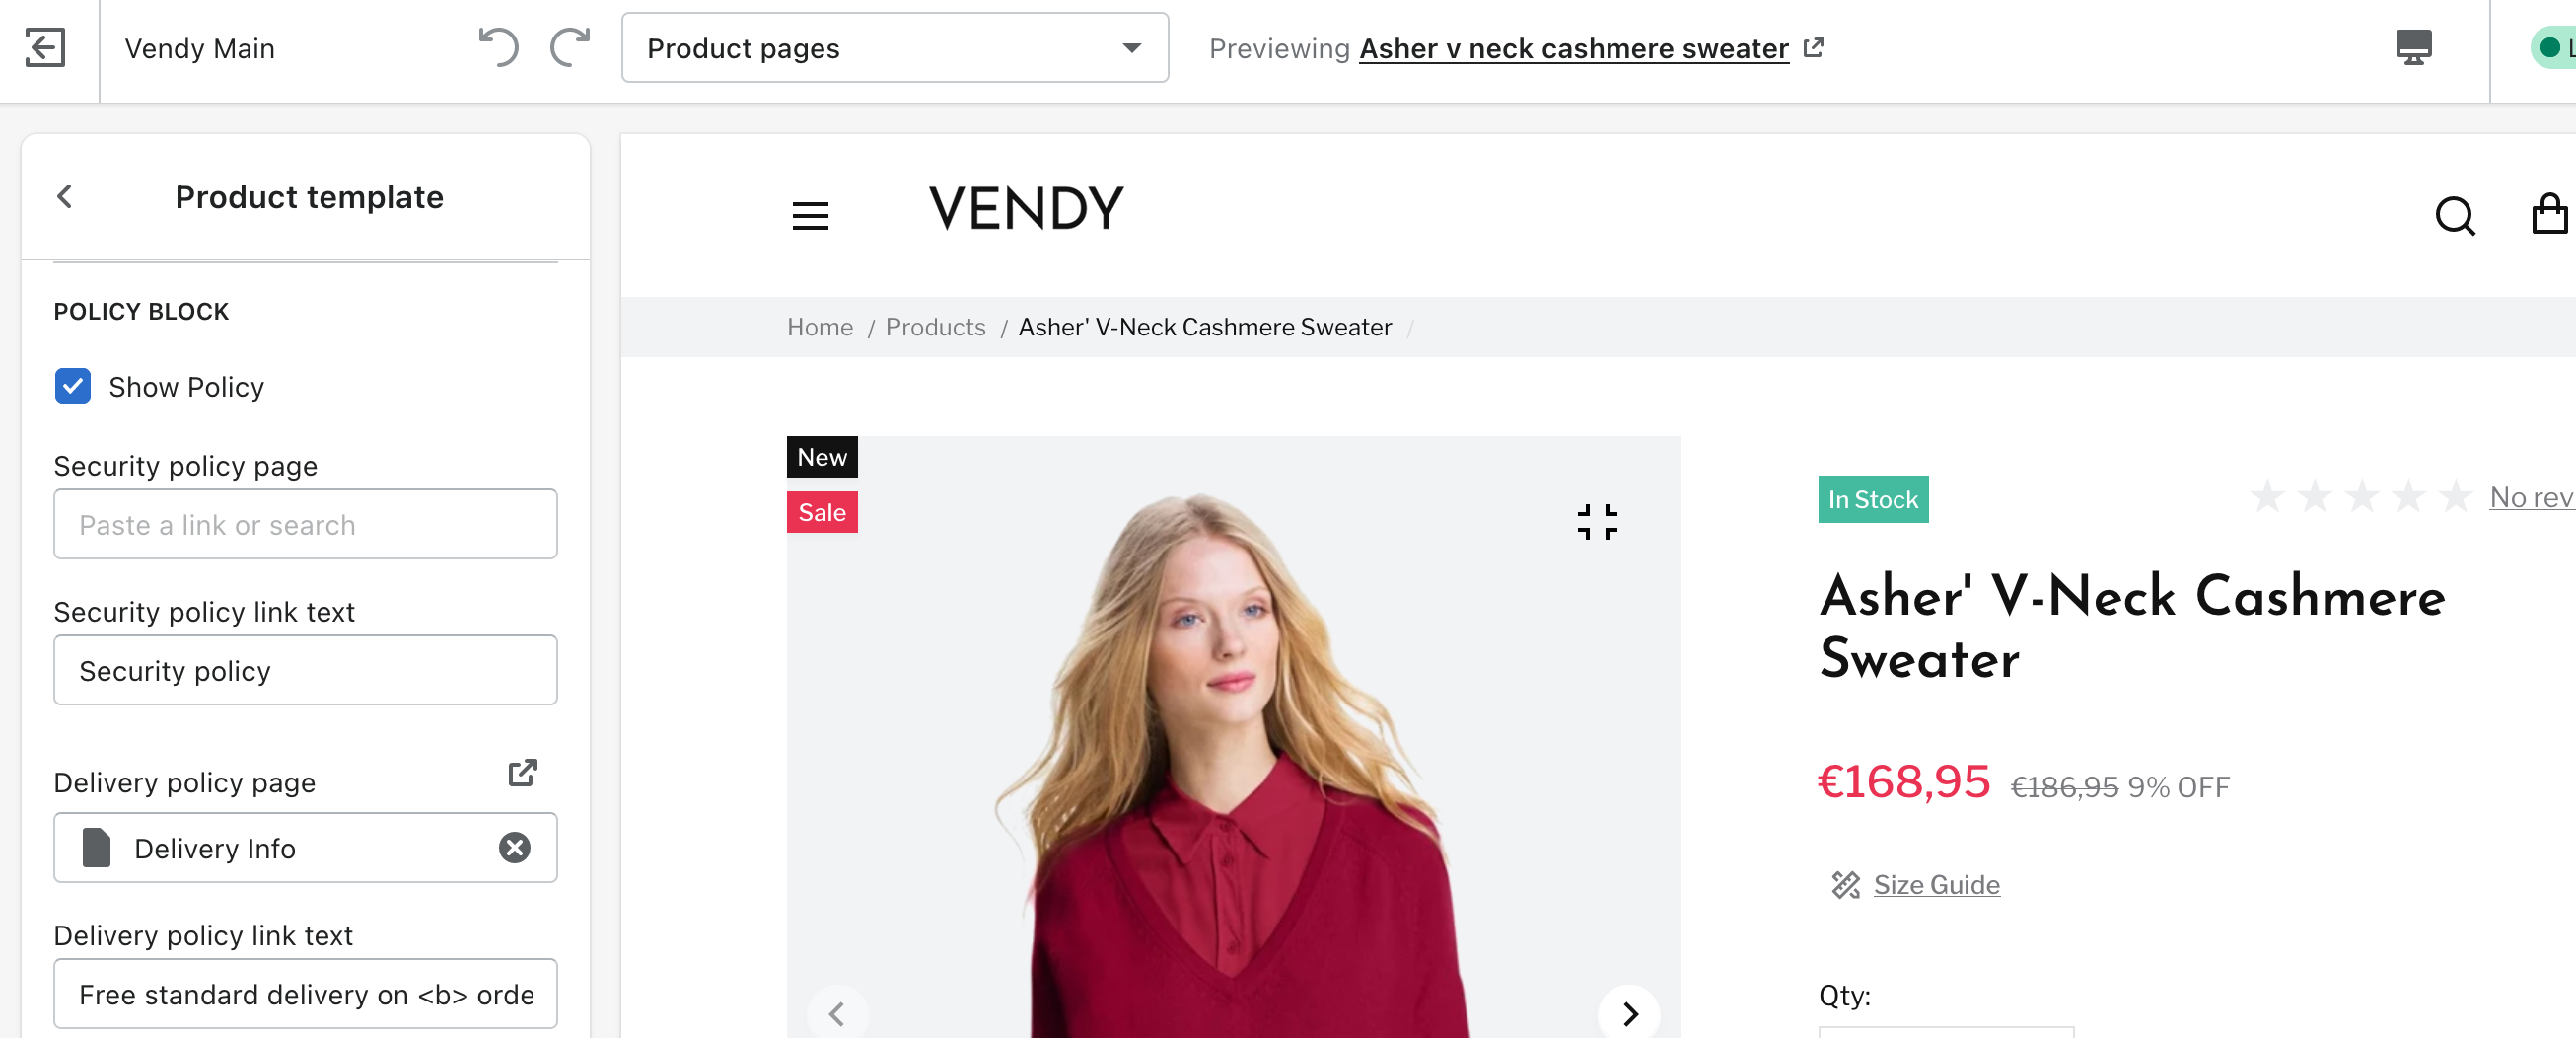
You can adjust the delivery policy display under Online Store -> themes -> Customize.

In the dropdown at the top choose product pages:
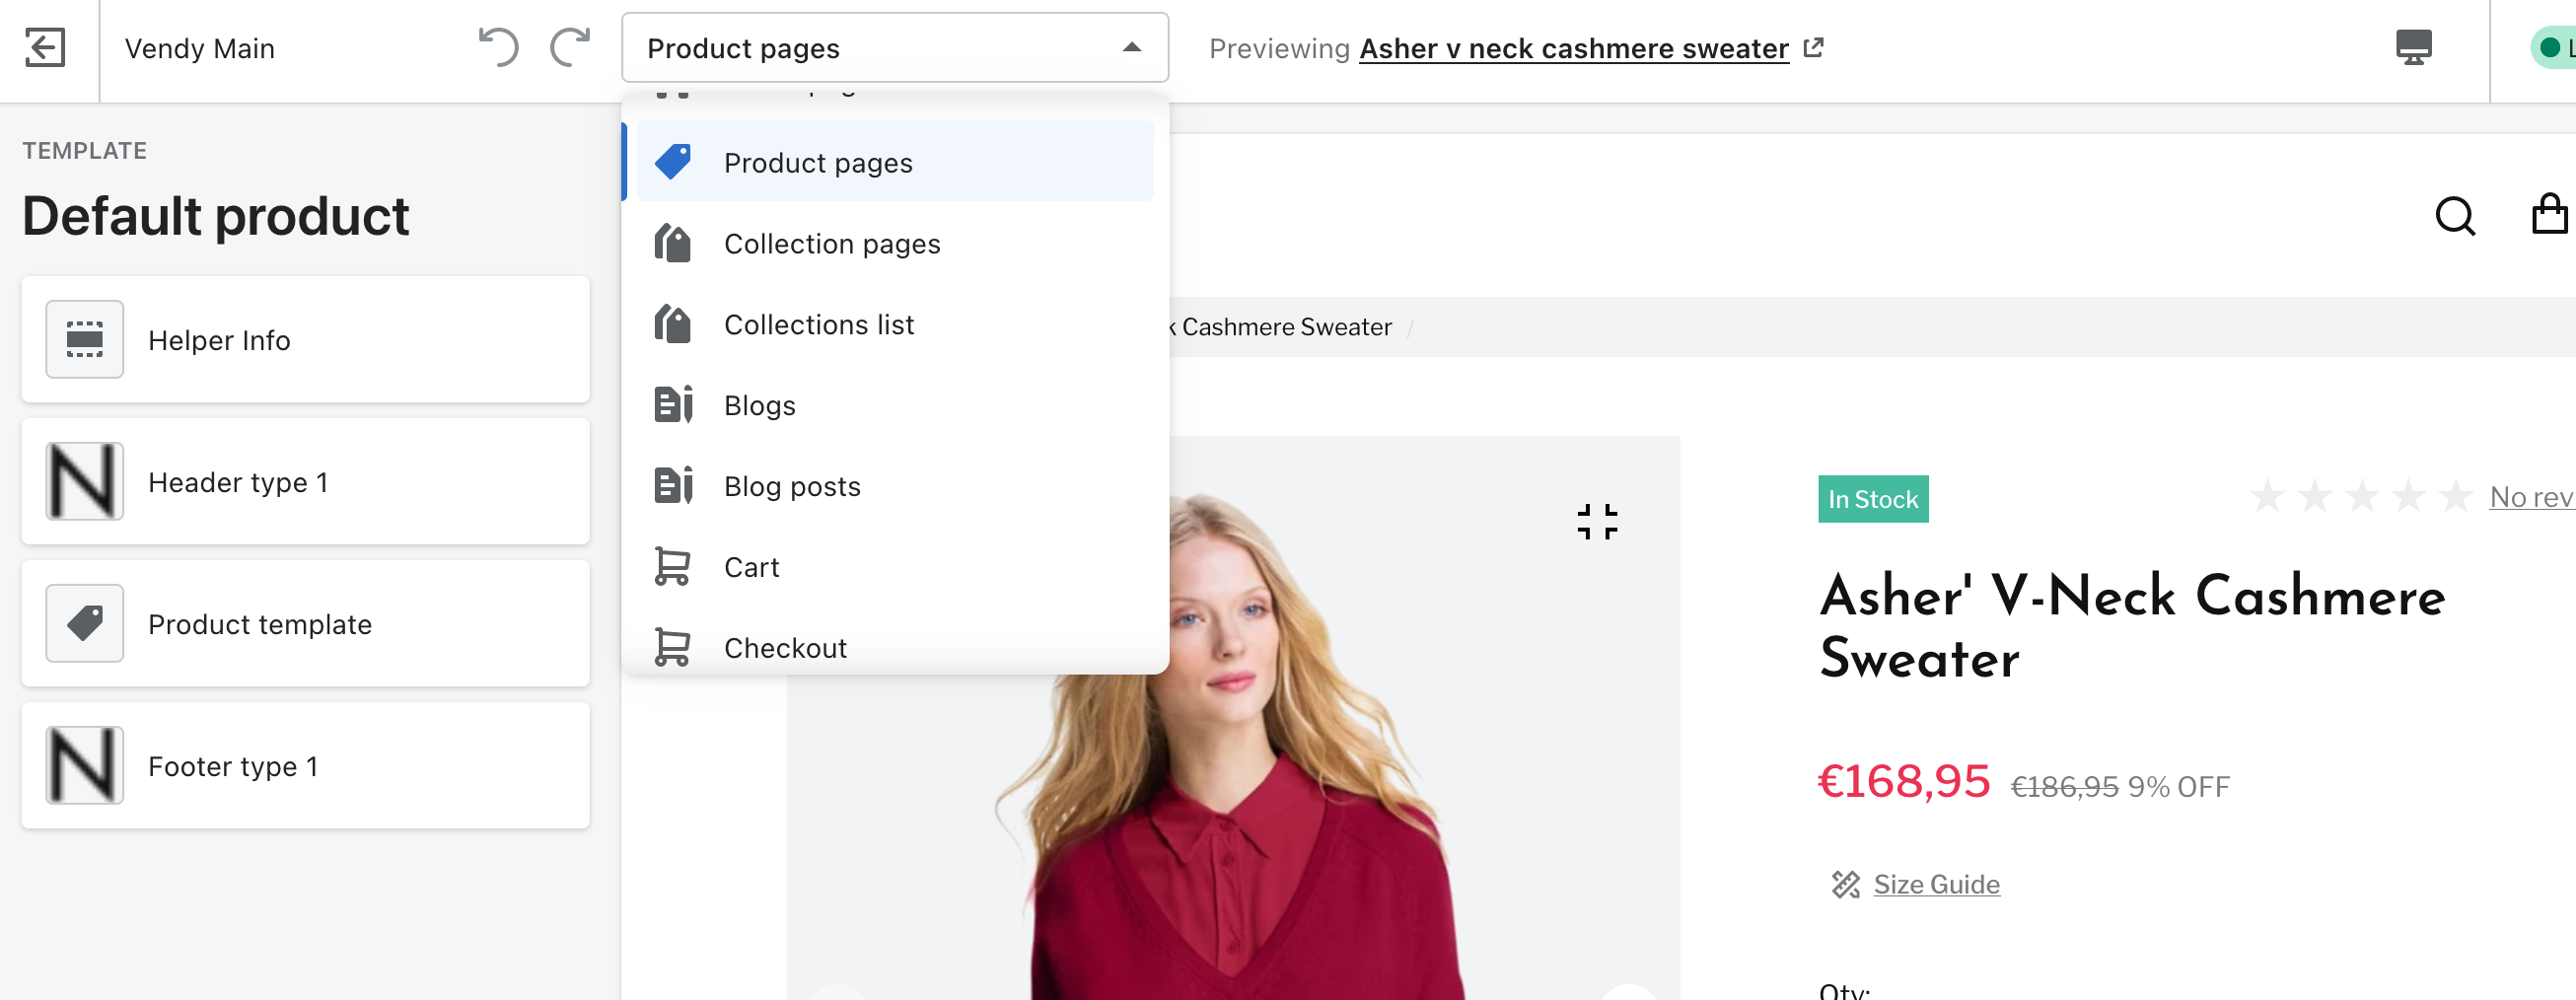
After that click on the Product template tab and scroll down to the Policy block.
How to edit the Cart page?
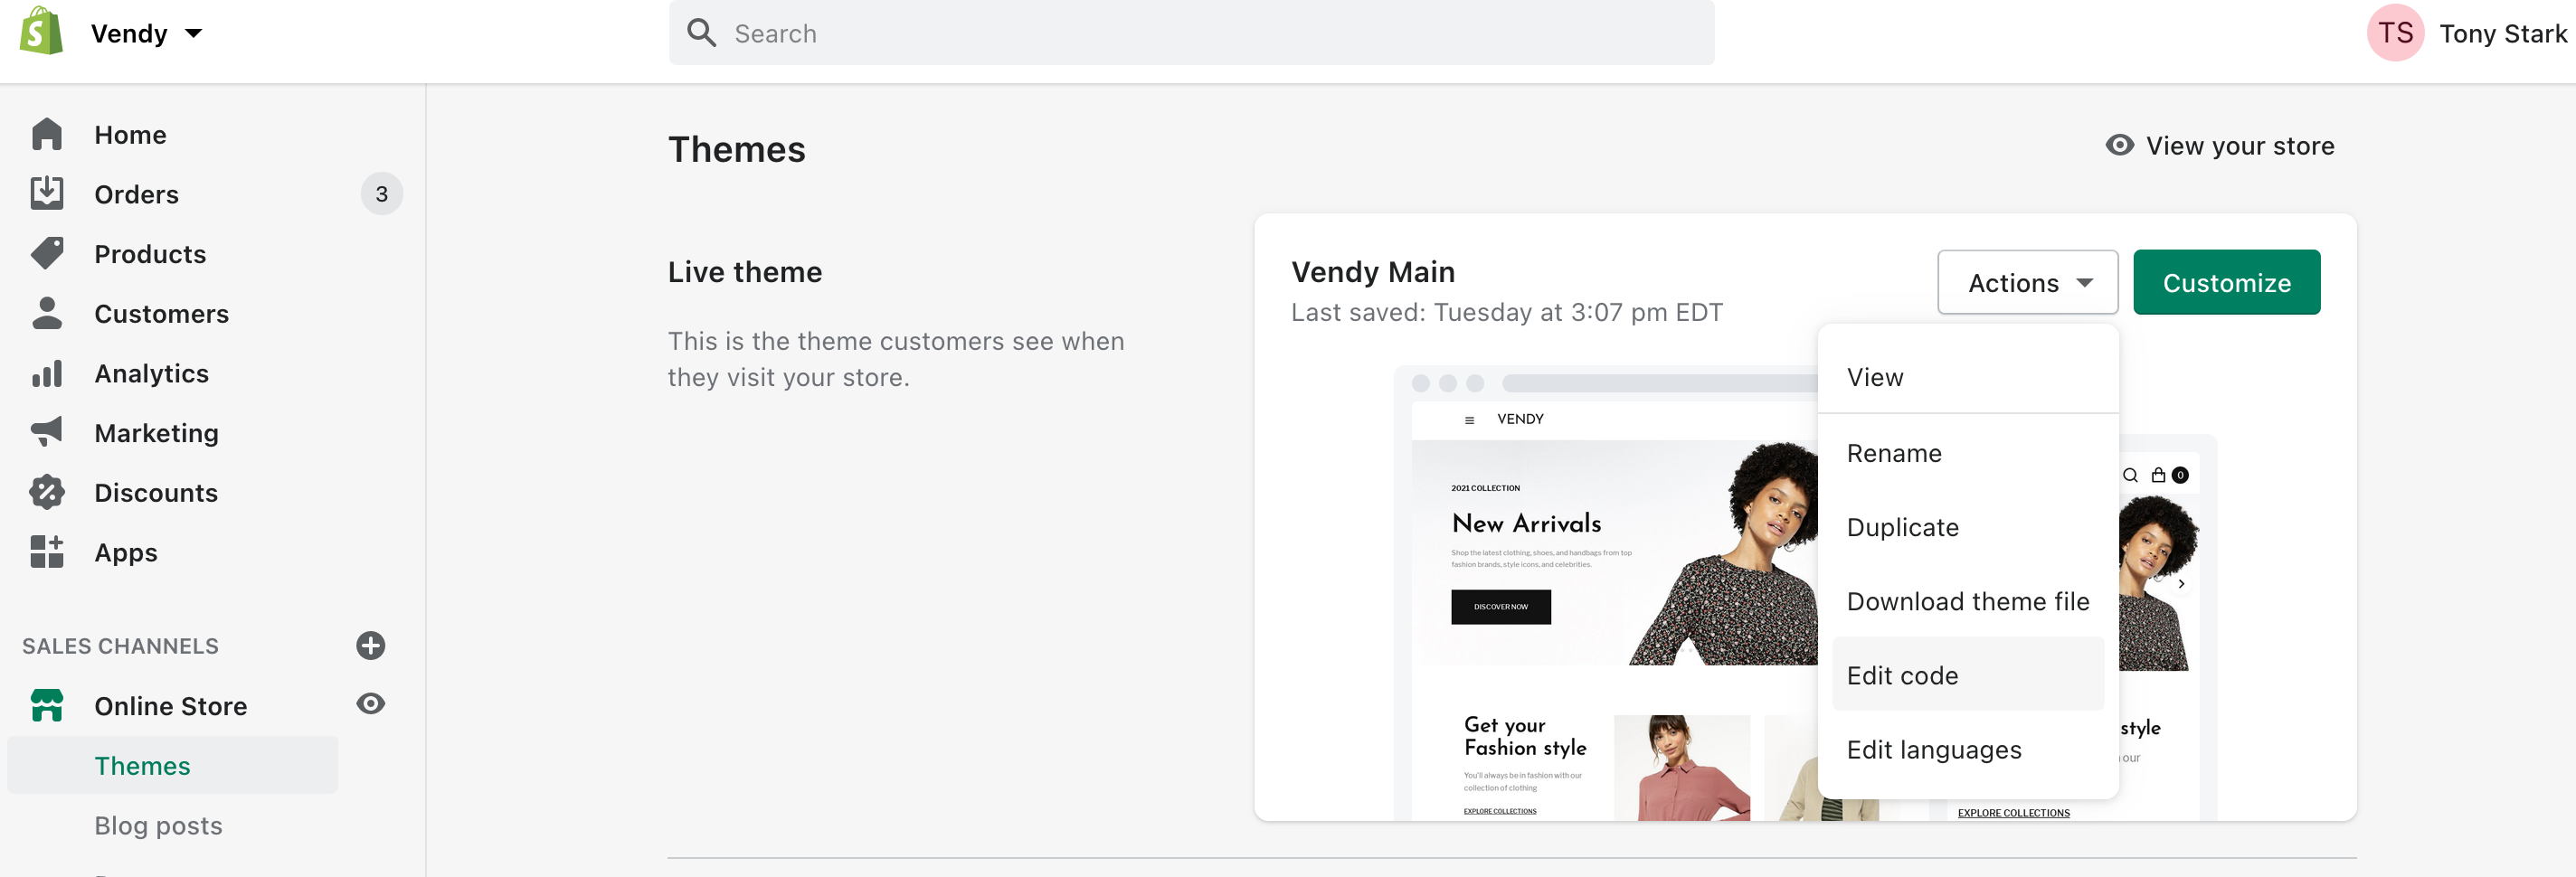
The cart page can be adjusted through Online Store -> Themes -> Actions -> Edit code.
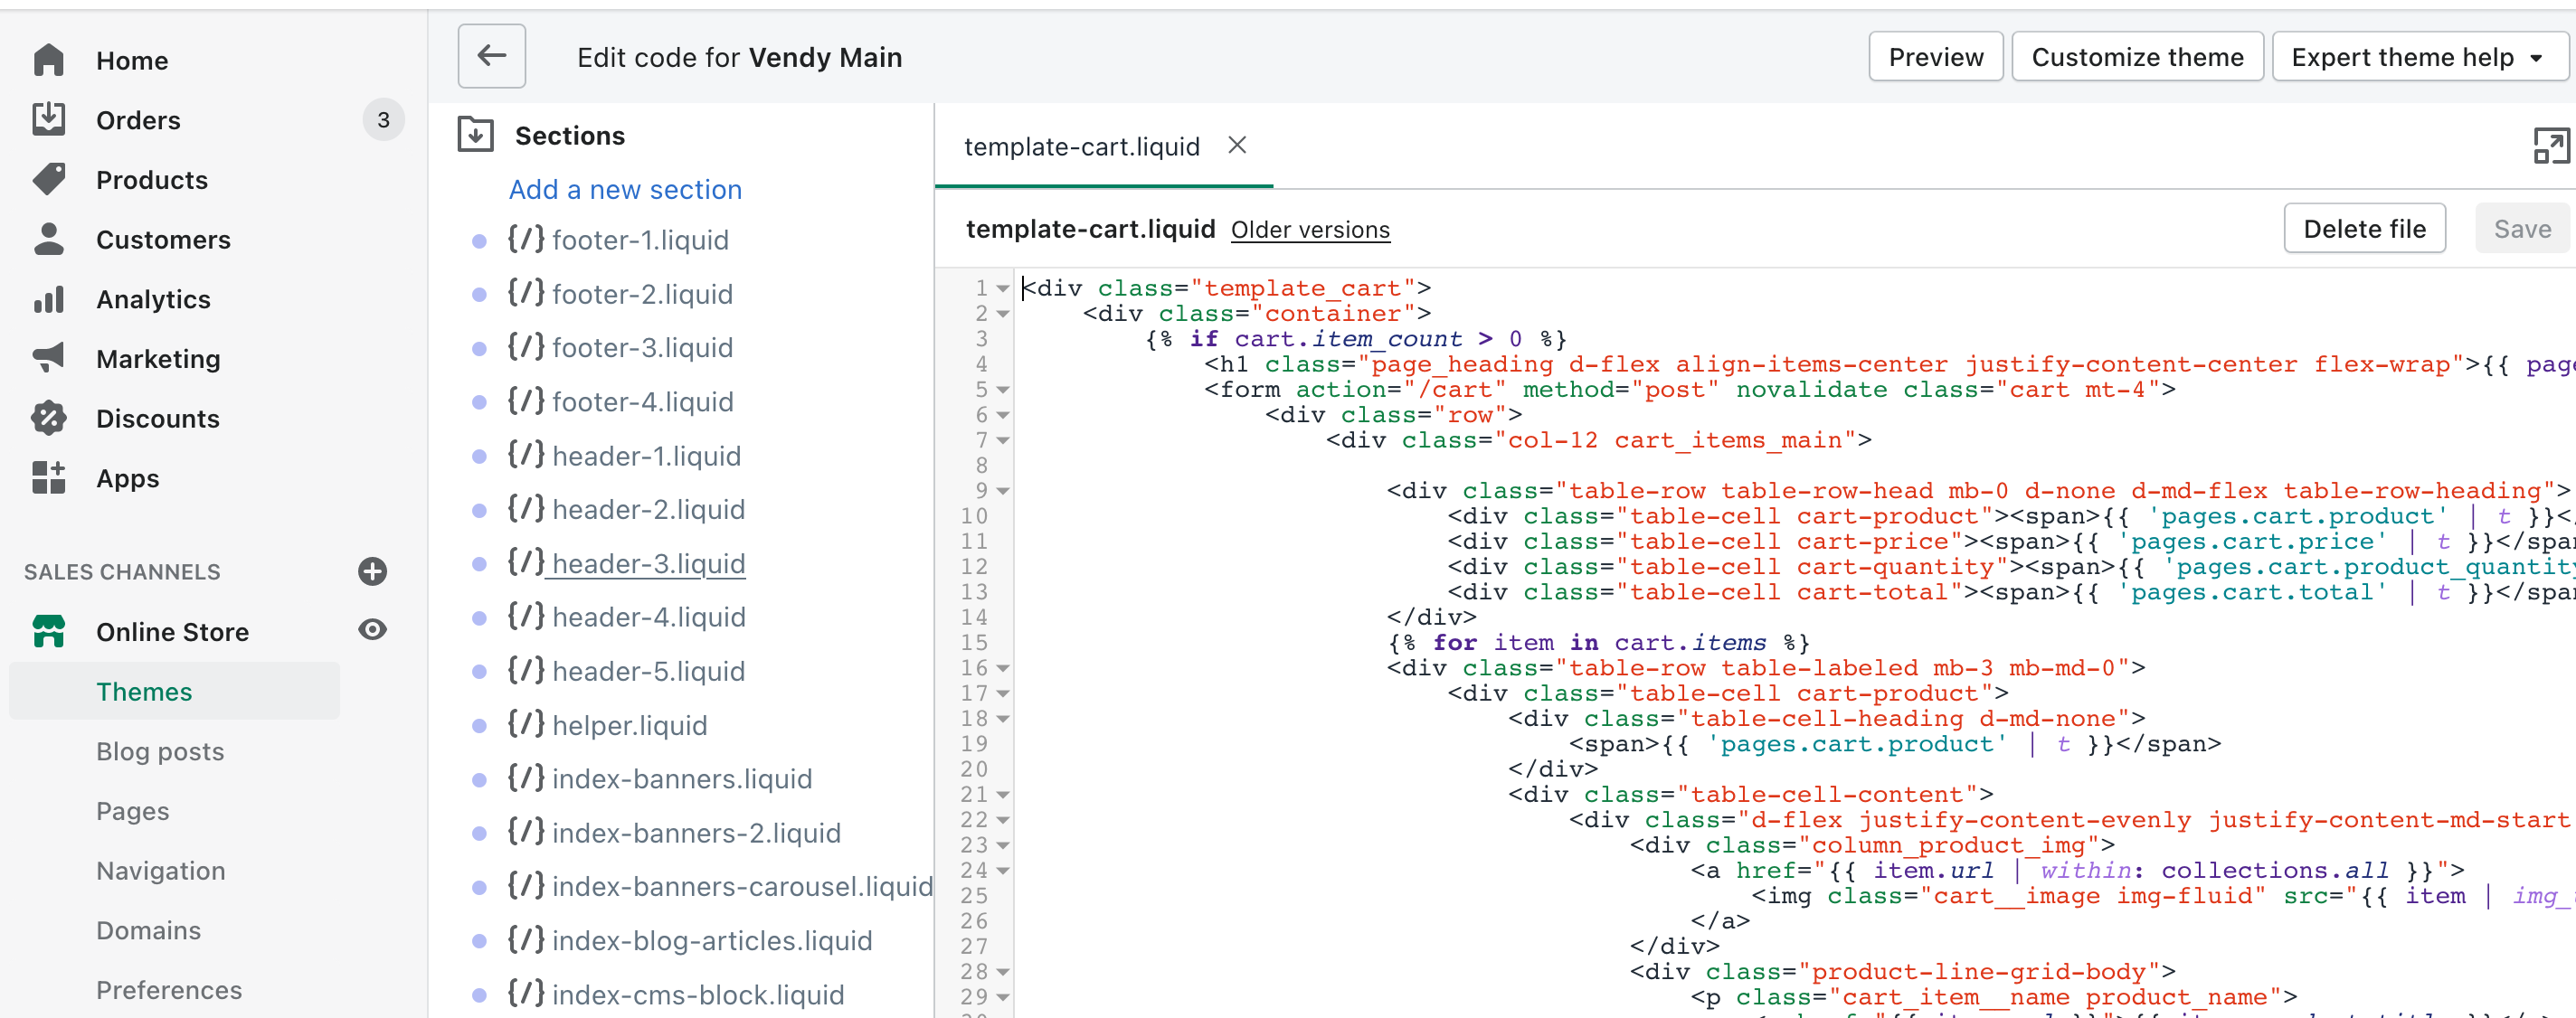
Scroll down to the Sections and adjust the template-cart.liquid.
How to manage Product Badges?
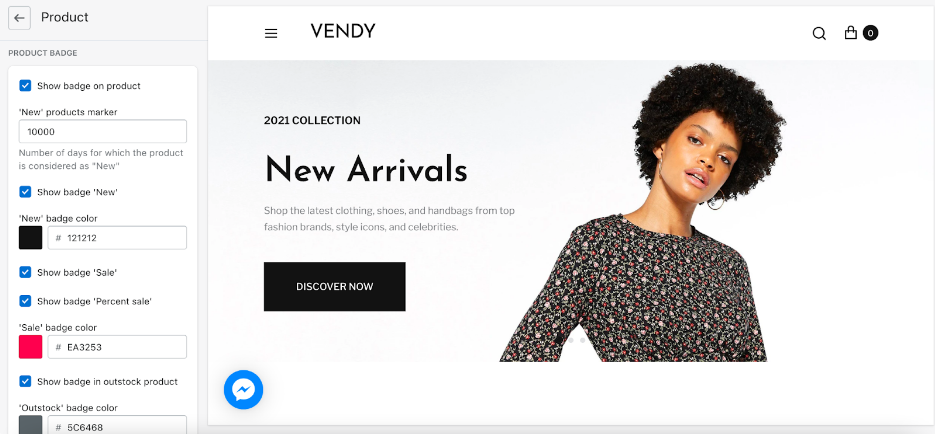
You can adjust badges under Online Store -> Themes -> Customize -> Theme settings -> Product settings.
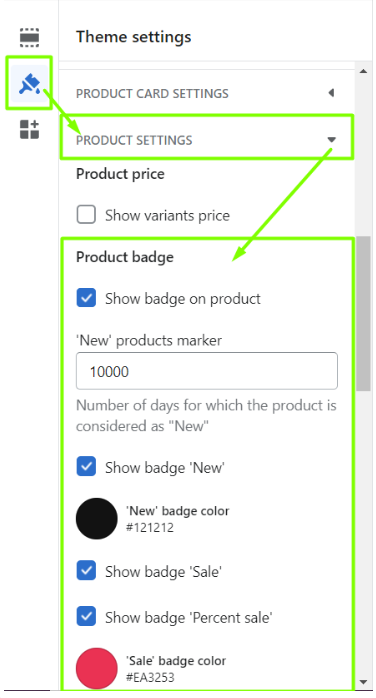
Scroll down to the Product badge.
Instagram Feed
Instagram in-built section cannot be used anymore due to API restrictions from 2020, Facebook stopped the support of the old API.
In order to have the Instagram feed, you can install an application.
Please, note that we do not support any third party extensions since they were not developed by us and cannot guarantee the correct work of the site due to script interaction. All the support should be provided by the application support/developer.
How to install a .fig file in theme?
The .fig file is included in the package in case you might need to edit the layout in Figma. This file is not needed for template installation.
How to use a google font?
The theme comes with predefined list of Shopify fonts you can select from in Theme settings -> Typography inside the Theme Customizer:
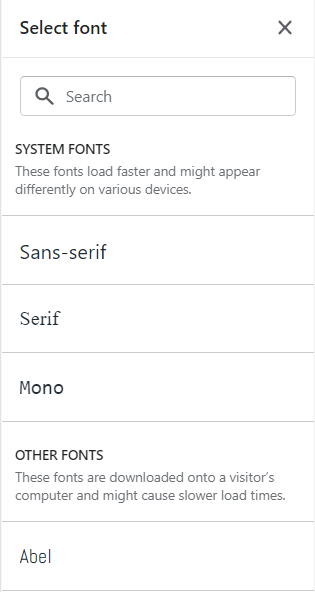
Shopify's font library is a collection of fonts that includes system fonts, a selection of Google fonts, and licensed fonts from Monotype. These fonts are free to use on Shopify online stores, and are provided in both WOFF and WOFF2 formats.
You can add custom fonts using these links: link1, link2, link3, link4.
How to change Logo size?
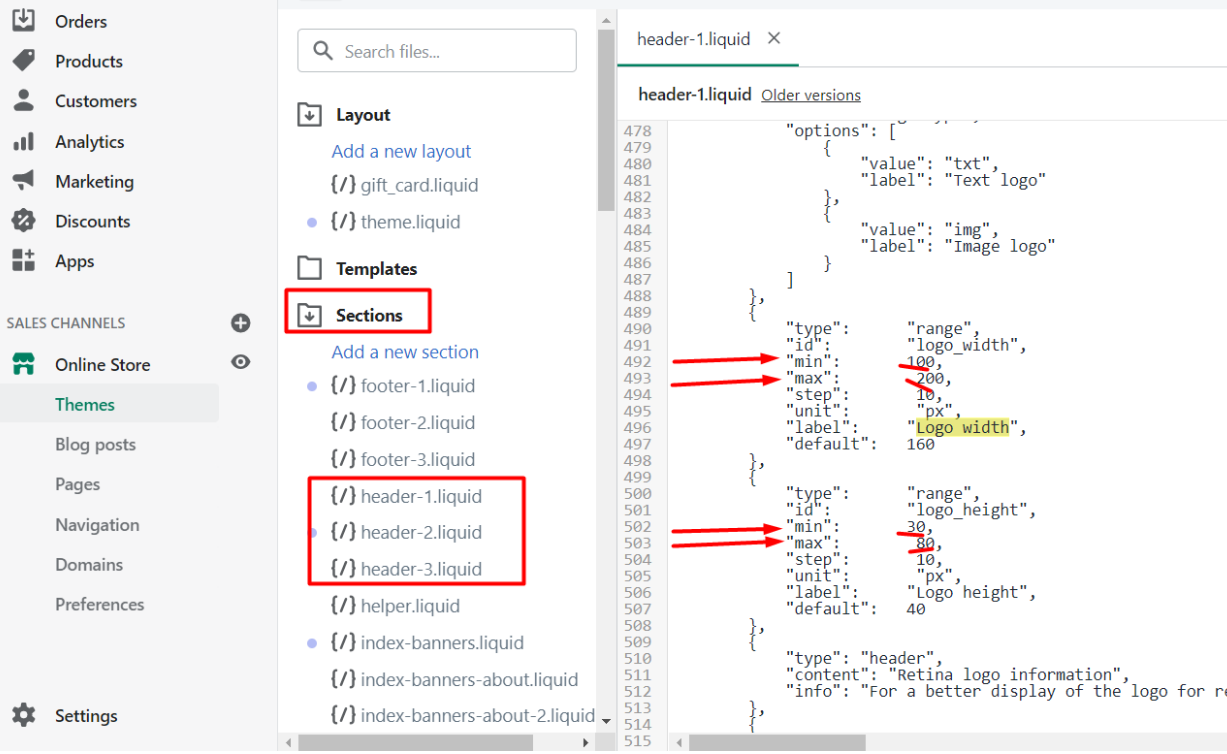
You can increase maximum width and height values for the logo in Online Store -> Themes -> Actions -> Edit code -> Sections in the needed header type header-1.liquid / header-2.liquid / header-3.liquid around line 490.
How to install Zemez Wishlist?
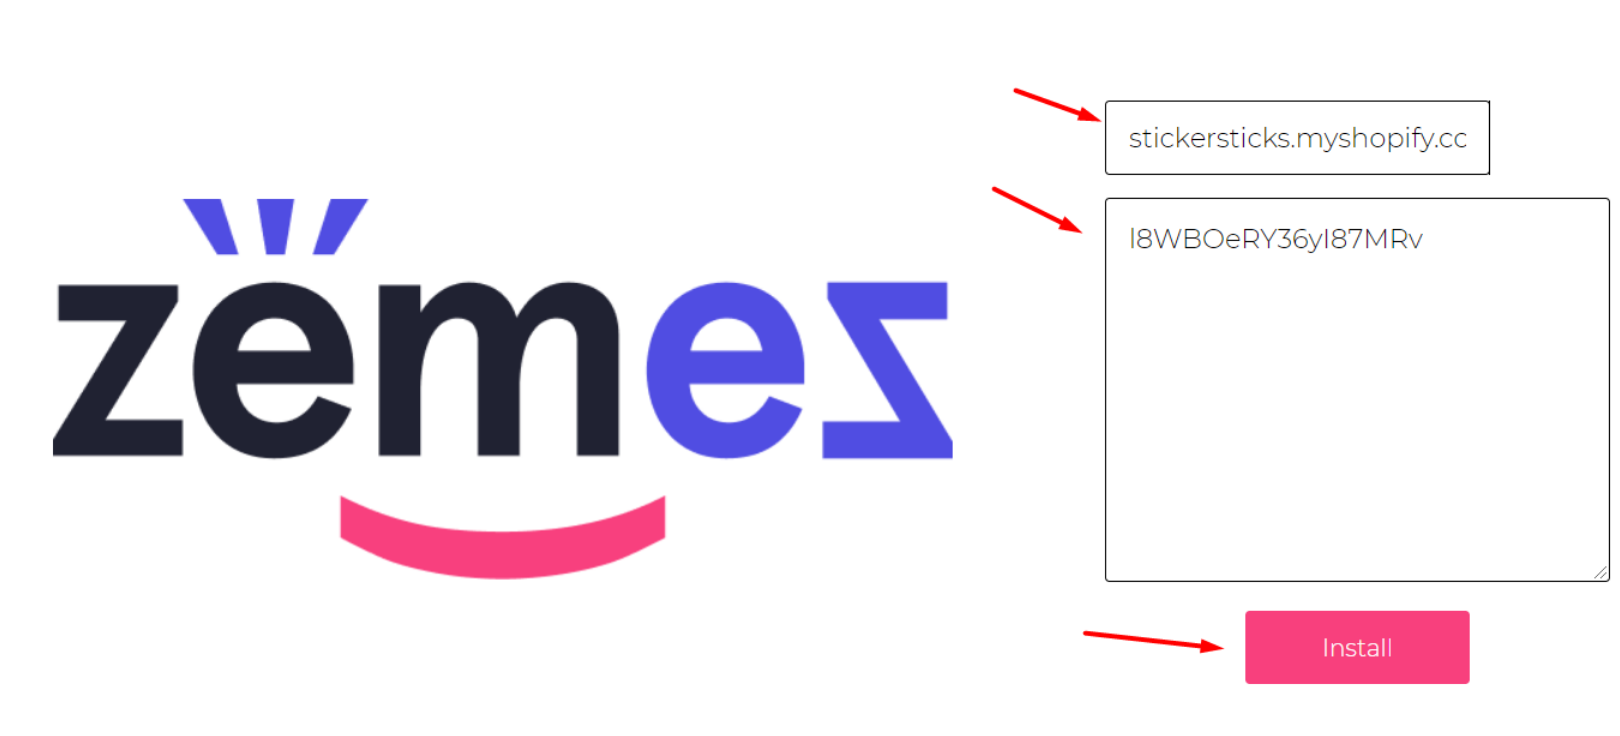
For Zemez Wishlist installation you should enter the following information to fields and press on Install:
storename.myshopify.com (if you paste the link with https, it will return error 500)
l8WBOeRY36yI87MRv (the key displayed in the Theme Customizer).
and after being redirected to the Shopify admin panel, press on Install unlisted app.
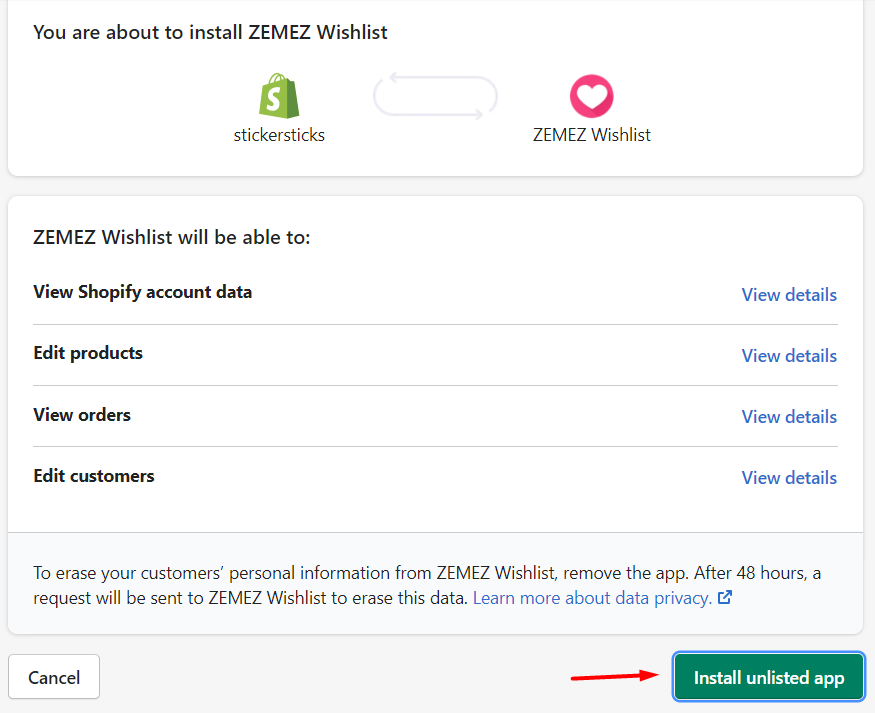
In order for the wishlist to display on the site, it should be enabled in the Theme customizer and the accounts creation should be allowed in Settings -> Checkout.
Please note that wishlist does not work on websites with a custom domain name, that is without myshopify.com in the link.
In this case, you may consider using 3-rd party application for this functionality: here.
For example, this one.
How to set social Icons?
Social icons are set with the help of svg icons.
We attach useful links regarding svg icons usage.
You can add more items by adding more blocks in the same format to Online Store -> Themes -> Actions -> Edit code -> Snippets -> social-icon-link.liquid:
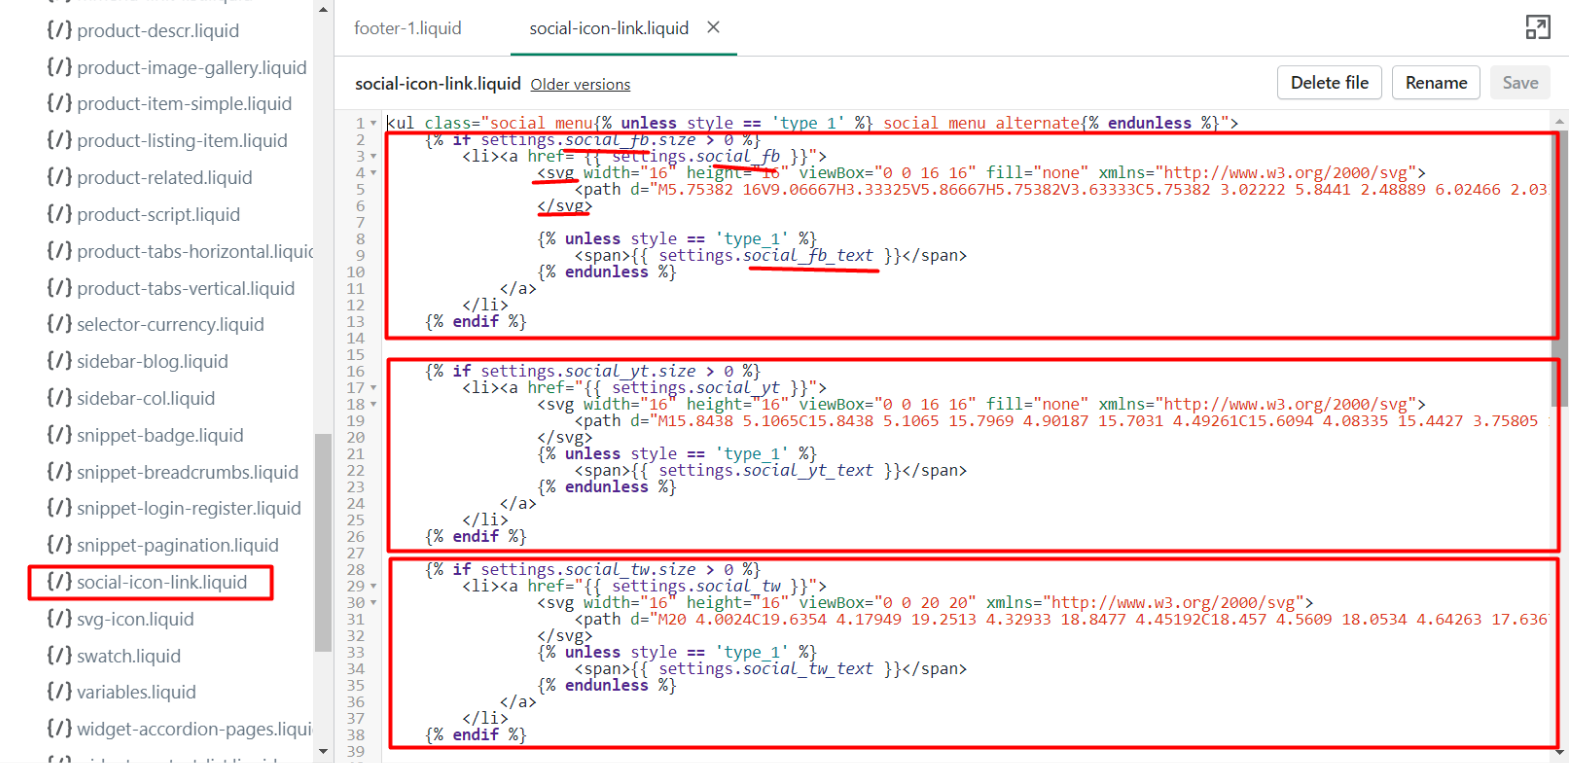
...and then add variables of the new icon to Online Store -> Themes -> Actions -> Edit code -> Config -> settings_data.json and settings_schema.json and set the text in Online Store -> Themes -> Actions -> Edit code -> Locales -> en.default.jso (or the language file you use).
Alternatively, you can change just existing svg icons in Online Store -> Themes -> Actions -> Edit code -> Snippets -> social-icon-link.liquid.
Please, check the links below to help you with managing svg icons: - Build an app to power Shopify’s millions of merchants. - Adding more font icons to Shopify Timber Framework. - Using SVG icons in Shopify.
How to manage policy links?
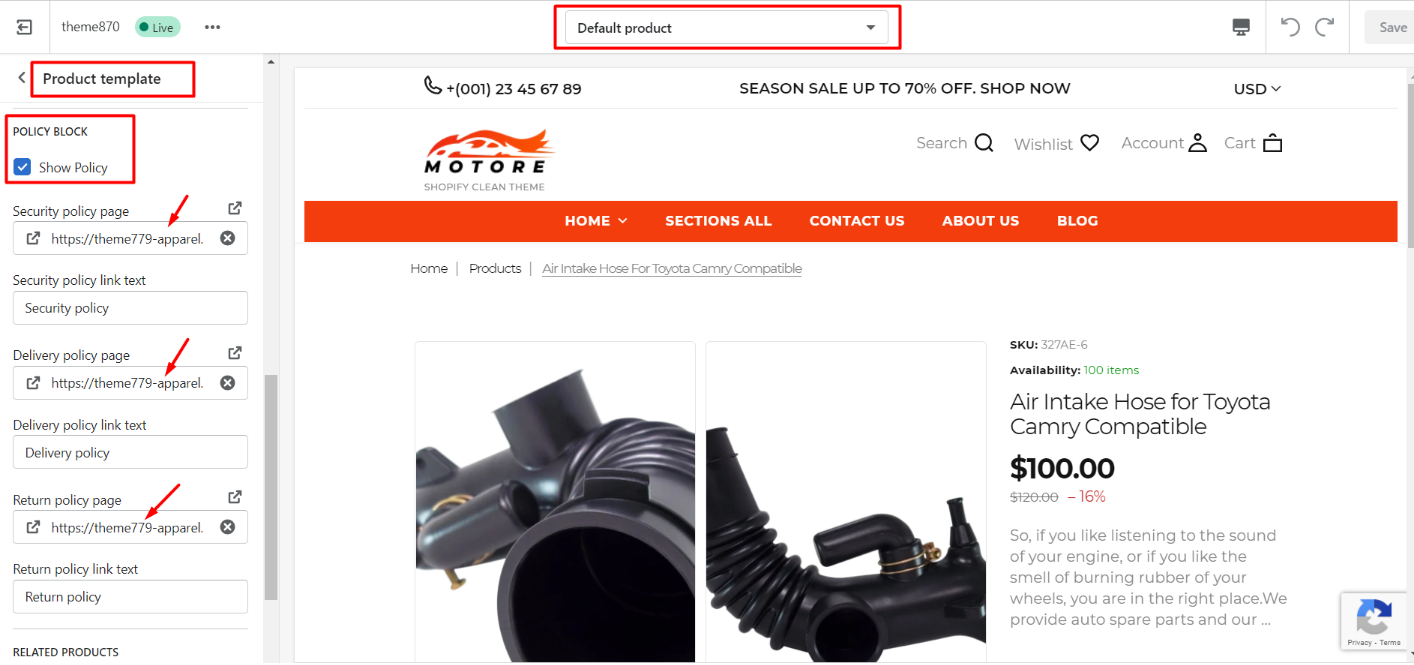
You can manage policy links through Online Store -> Themes -> Customize -> select Products -> Default product from dropdown -> Product template -> Policy block:
How to manage color swatches?
If you want the color options not to be displayed in dropdowns, it is enough to enable Show color options in Online Store -> Themes -> Customize -> Product pages -> Product template -> Settings.
Standard color names for color options reflect the corresponding colors in the frontend by default in Shopify. If you set a custom title, a white or grey circle is displayed instead.
If you want to set custom colors or images for color product variants, you may use the links below to help you with it: link1, link2. For more details, please, visit the forum as the issue is Shopify the engine itself, not theme related.
If you want us to integrate the changes for you, we may perform it within the "Add Product Color Swatches" service for $149. If you are interested, please, use this link to get it and provide us with the Order ID or purchase email once it is ordered: Shopify Color Swatches.
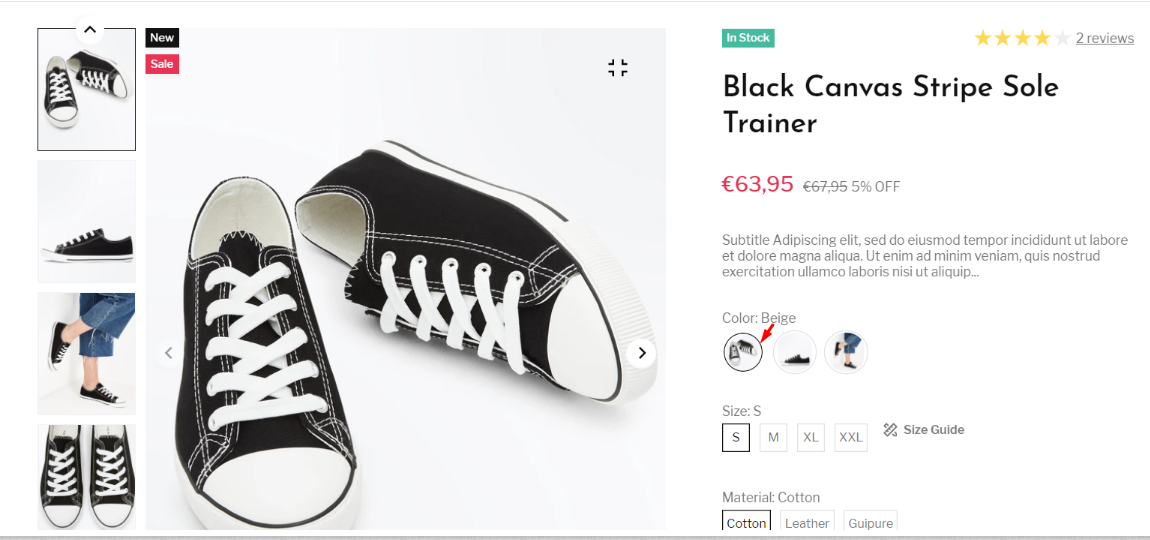
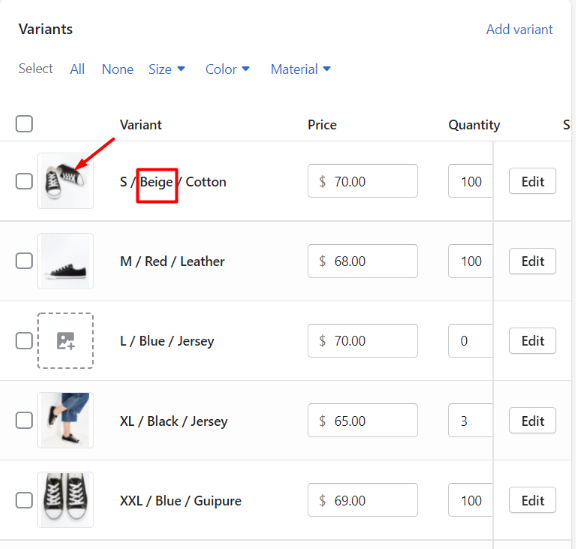
In Vendy 2 color swatches can be enabled/disabled in Online Store -> Themes -> Customize -> Theme settings -> Product settings -> Swatch only color options with the Background image selection.
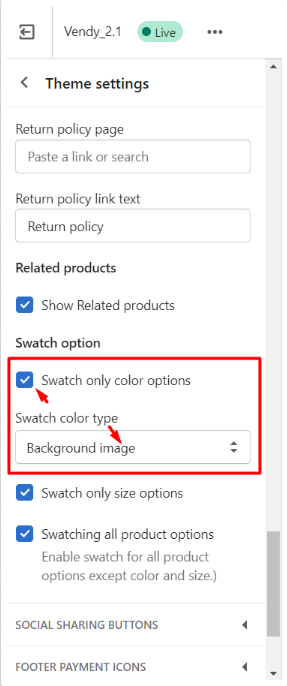
Once color variant options are added for a product and images are uploaded for options, the image associated with a color variant option will display in the circle.
How to manage size swatches?
If you want sizes to be displayed as inline options, it is enough to enable Swatch only size options in Online Store -> Themes -> Customize -> Product pages -> Theme Settings.

If you want size options to be displayed in dropdowns, disable Swatch only size options.
How to modify Newsletter Popup Timeout?
You can modify the newsletter popup timeout in widget-newsletter-popup.liquid. Go to Online store -> Themes -> Your theme -> Actions -> Edit Code -> Snippets.
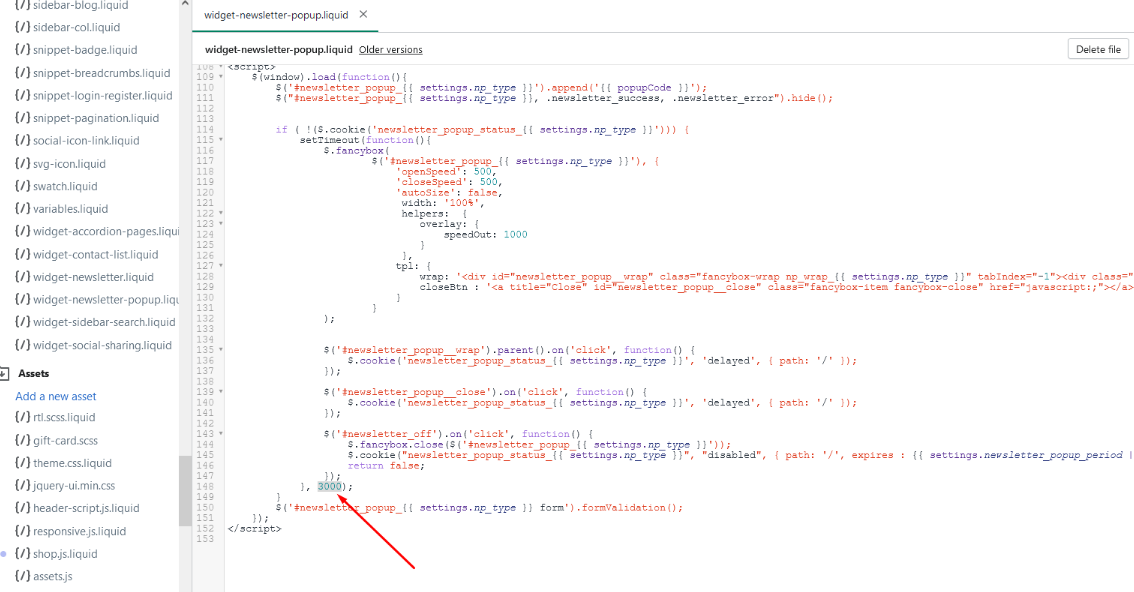
The value should be set in milliseconds.
How to enable blog comments?
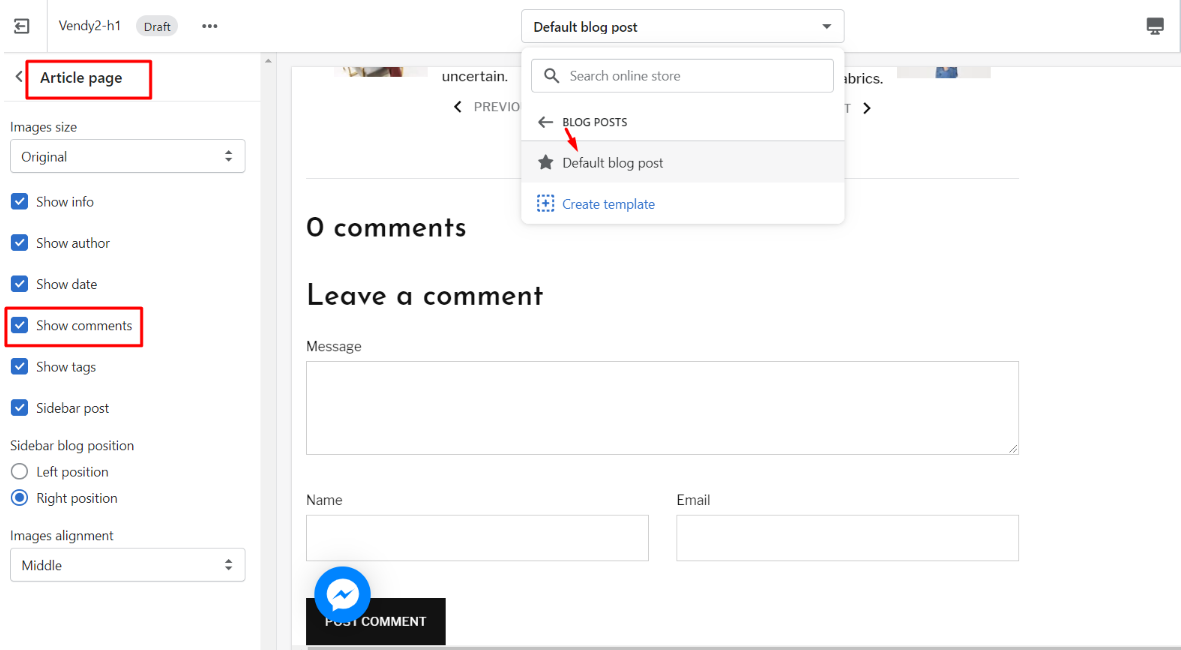
Comments can be enabled for blog posts in Online Store -> Themes -> Customize -> select Blog posts -> Default blog post from dropdown -> Article page -> Show comments.
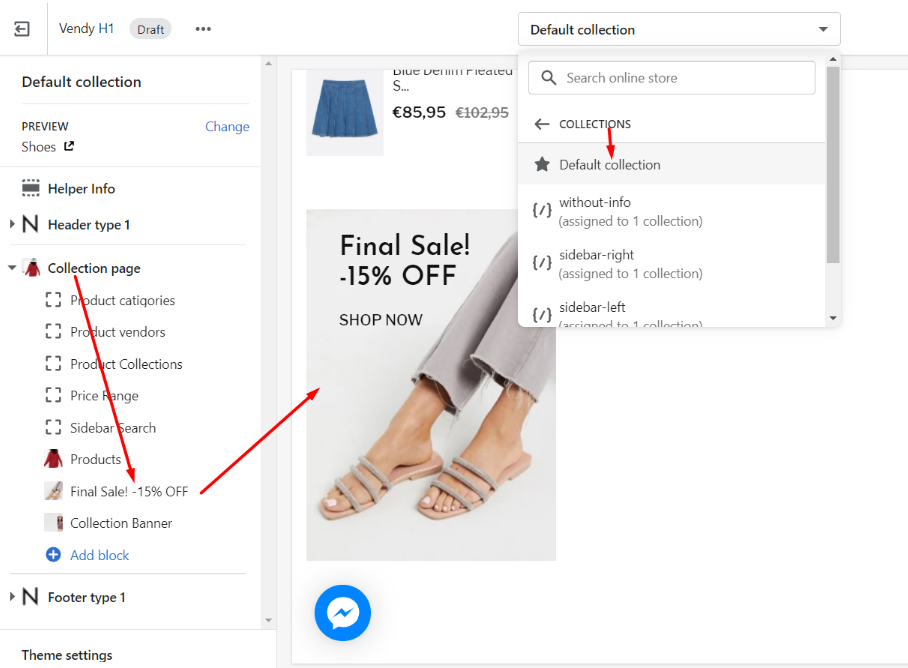
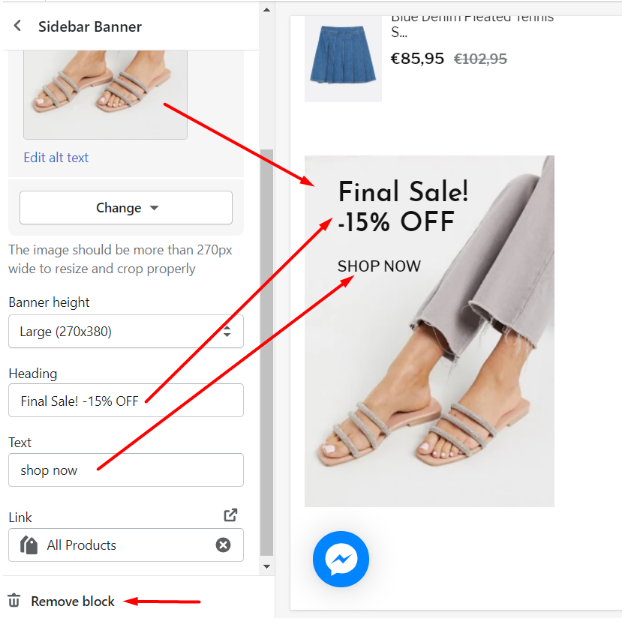
How to manage sidebar on Collection page?
The sidebar sections on collection pages can be managed through Online Store -> Themes -> Customize. Select Collections -> Default collection from dropdown -> Collection page.
How to edit main menu links?
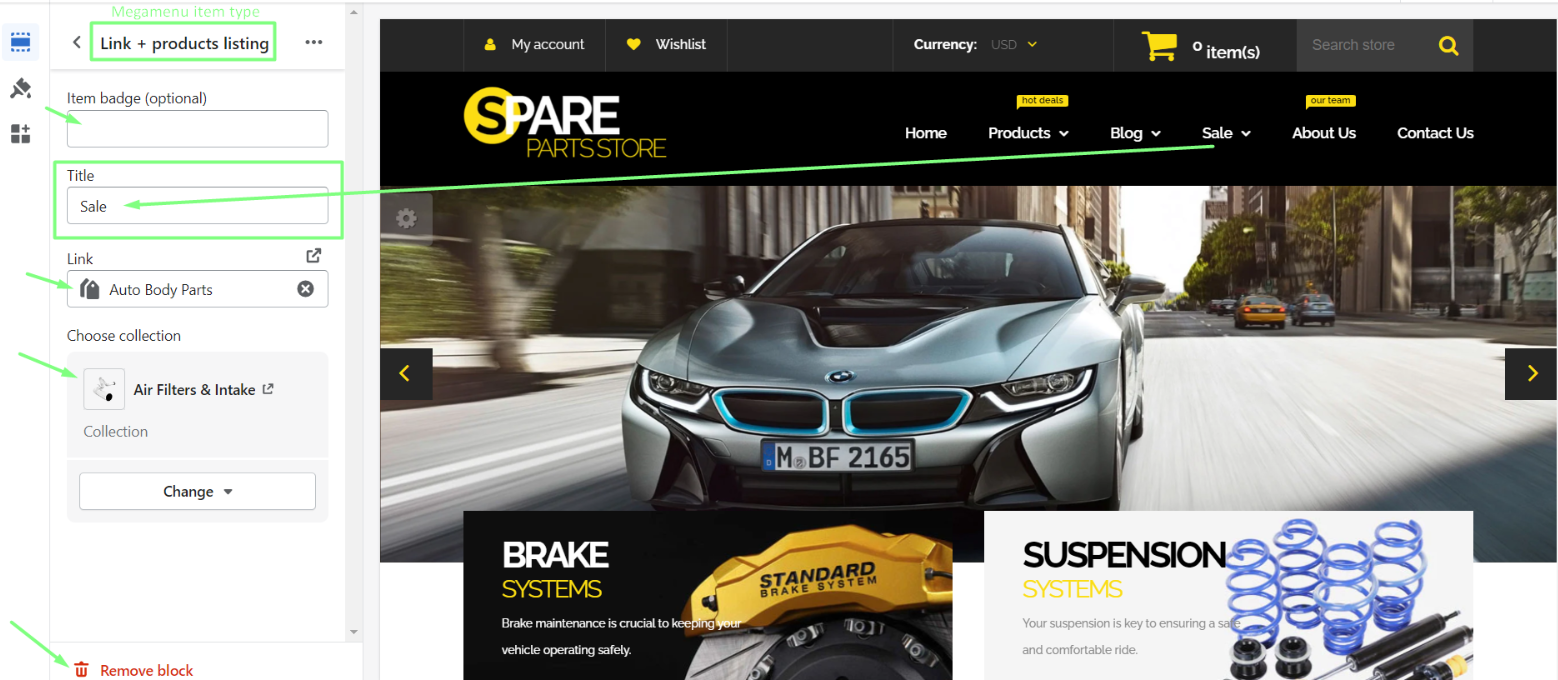
You can modify the main megamenu links in the Customization tool area by pressing on the arrow near Header:

Press on the needed menu item to edit or remove it:
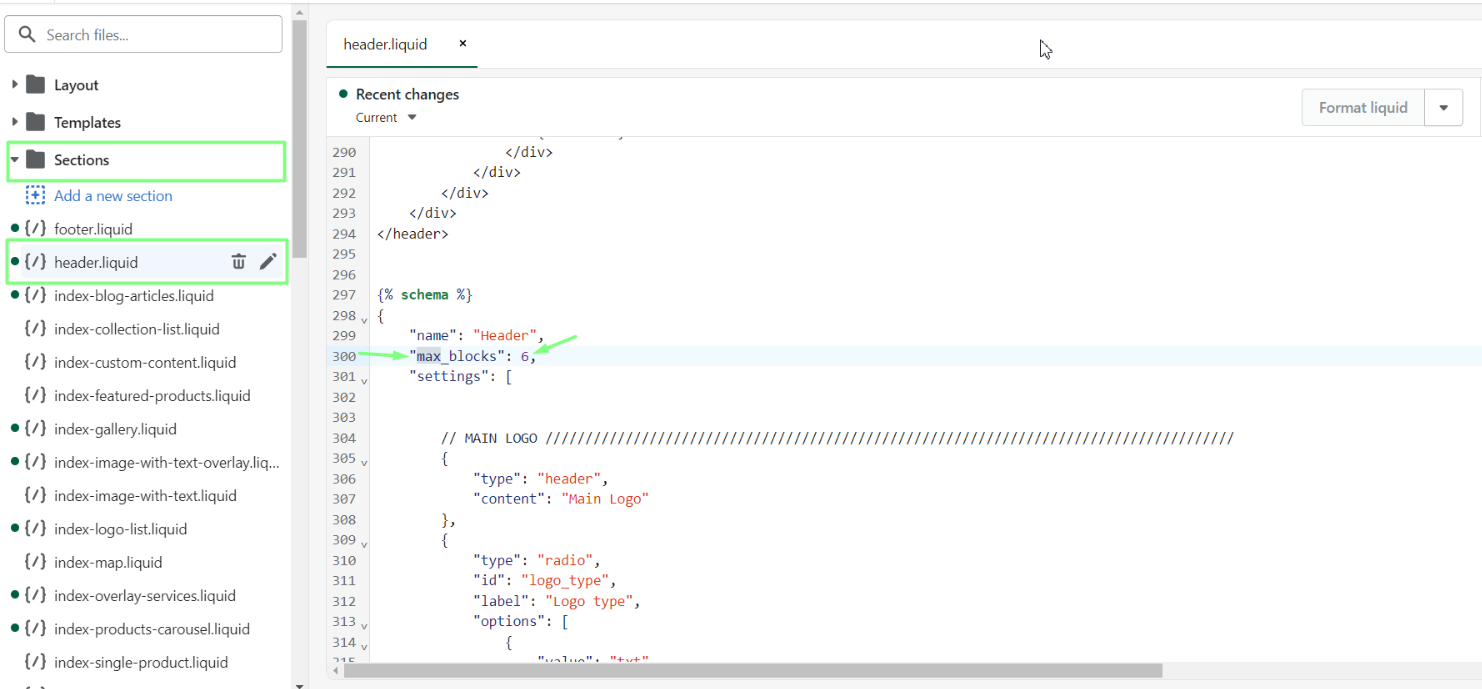
You can increase the maximum number of megamenu items in Online Store > Themes > your theme > … > Edit code > Sections > header.liquid:
How to change sidebar position on collection page?
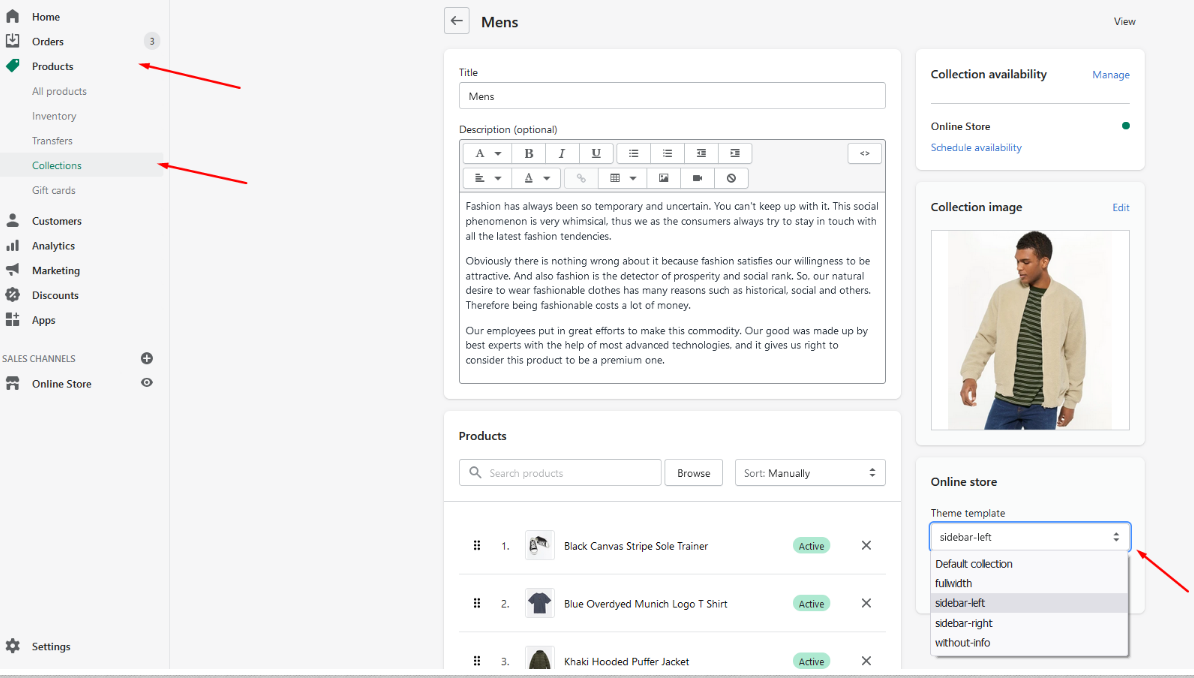
You can set the needed layout for your collection in Products -> Collections -> Your collection -> Theme template.
How to edit Newsletter popup?
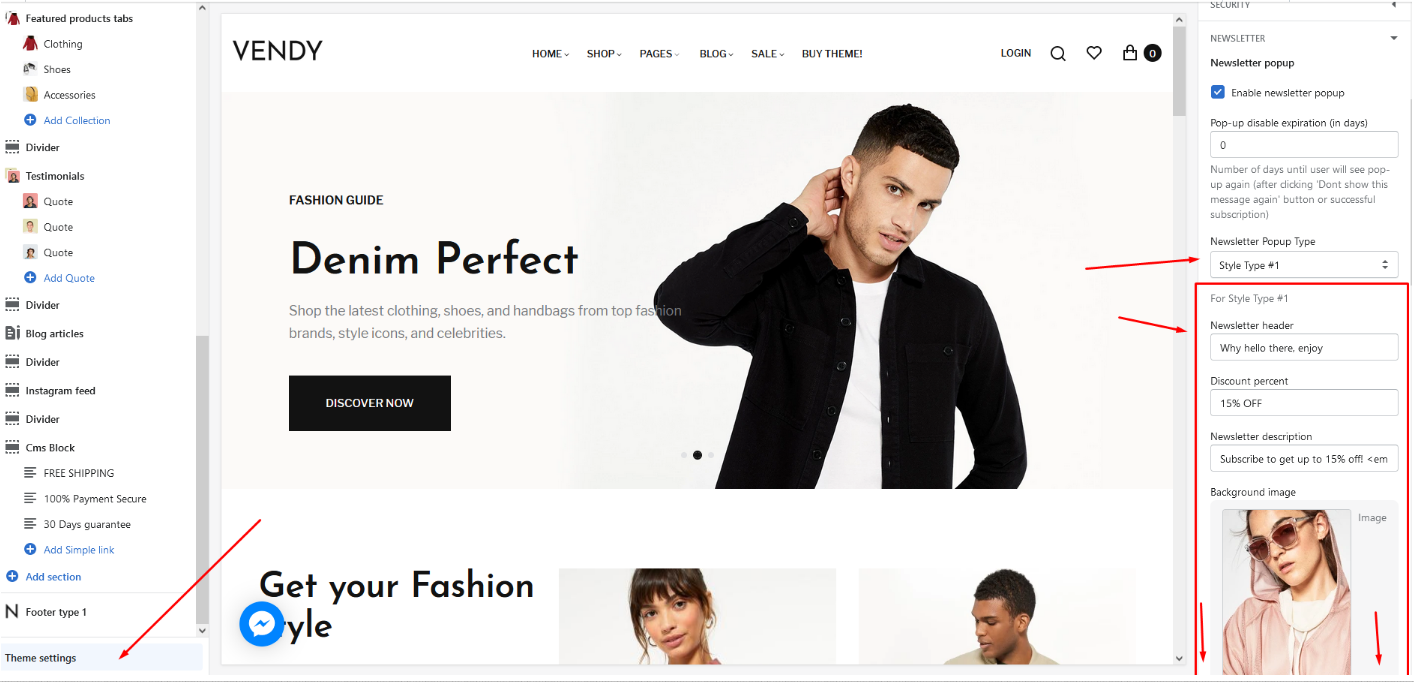
You can modify newsletter pop up in Customization Tool -> Theme settings -> Newsletter.
How to add a size guide?
In order to have the section with the Size Guide with a popup as on the demo Vendy.
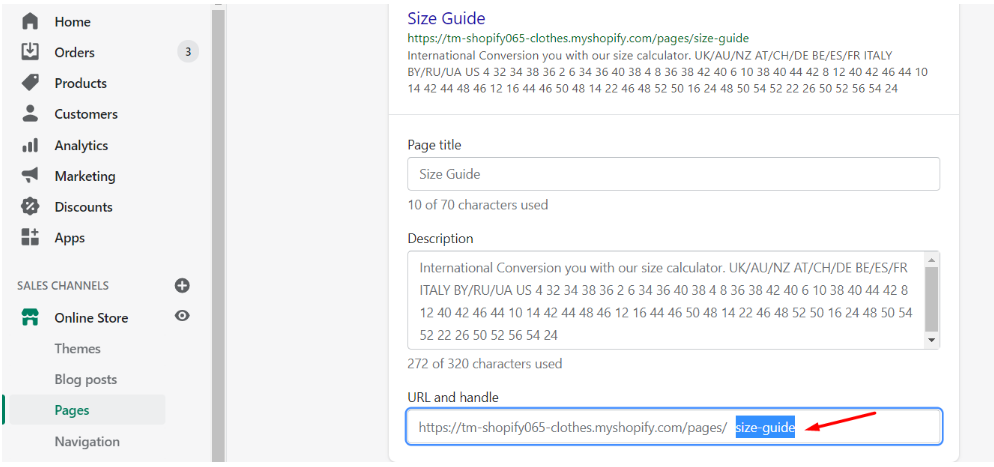
you should have the Size Guide page created in Online Store -> Pages (the page content can be anything but make sure to use the page URL handle for the page as size-guide):
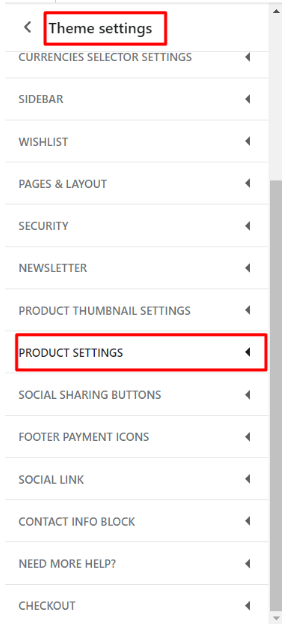
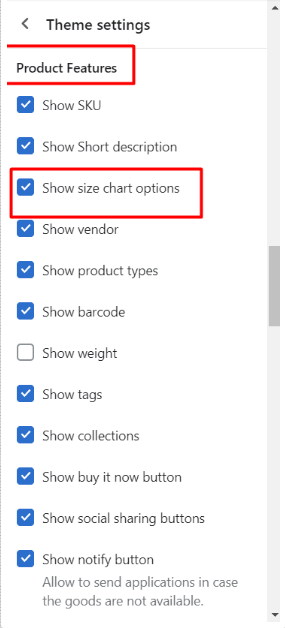
Select Show size chart options in Online Store -> Themes -> Customize -> Theme settings -> Product settings -> Product features.
How to manage the Lookbook section?
LookBook section allows to create lookbooks and viewing the products directly on the model.
Feel free to check demo lookbook blocks setup on the lookbook page:
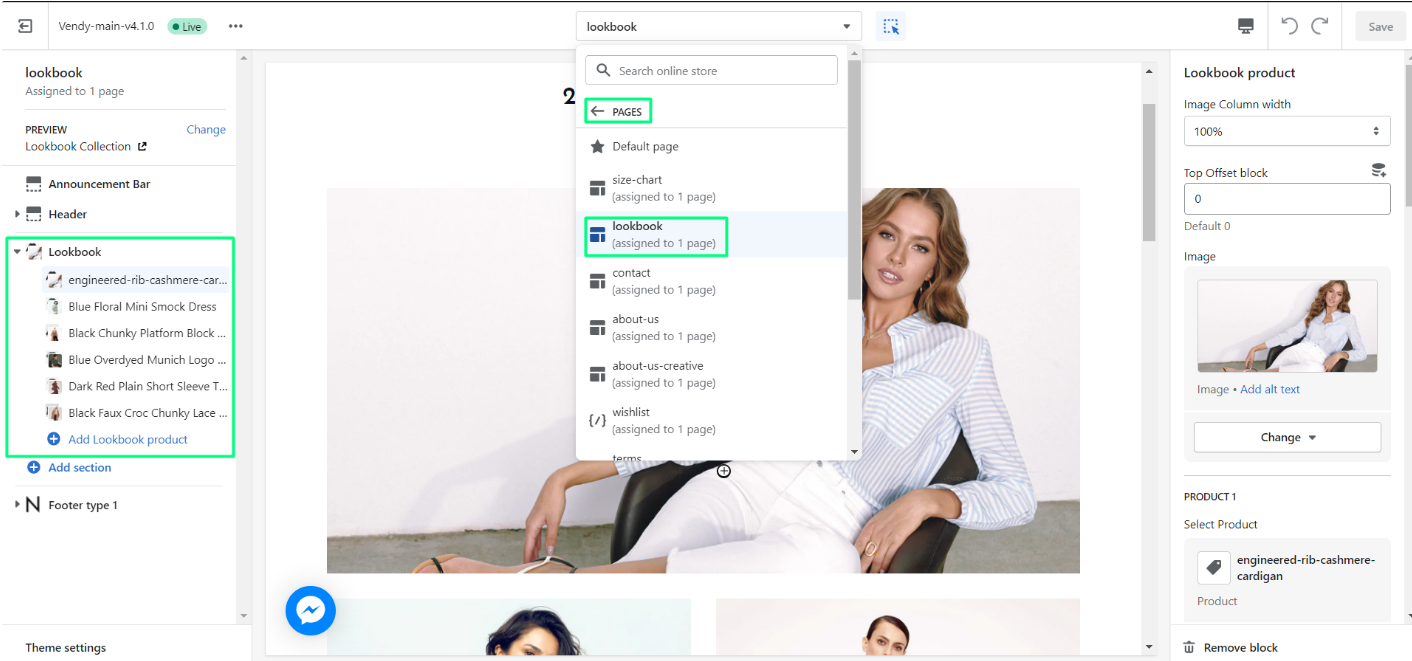
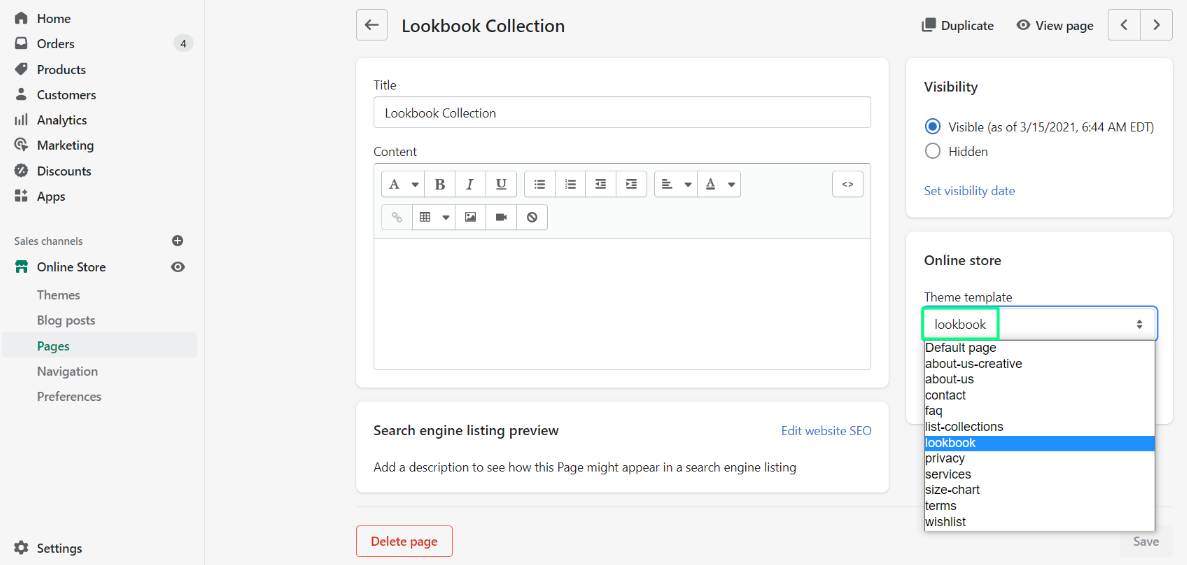
The page should be created through Online Store -> Pages with a Lookbook Theme template first.
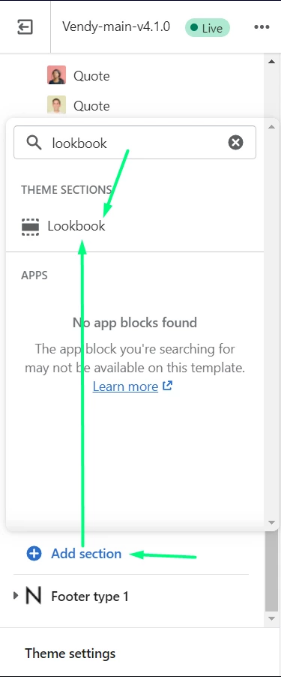
It can be added to the page through Online Store -> Themes -> Customize by pressing on Add section and selecting Lookbook.
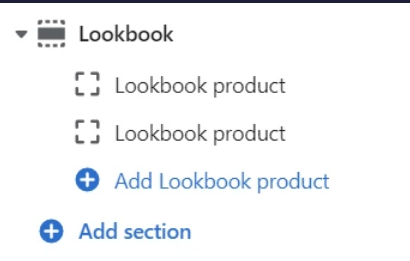
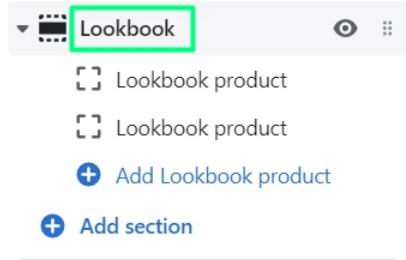
Press on Lookbook to configure the lookbook block settings
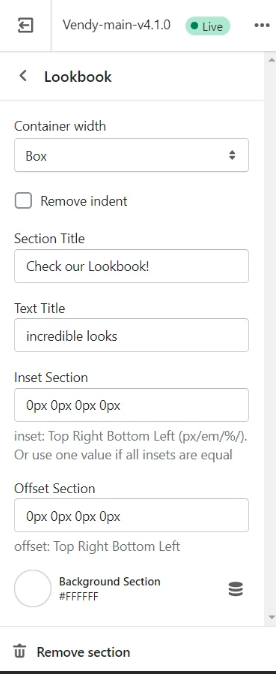
- Container width: Box, Container Fluid, Full - desired block layout;
- Remove indent: On/Off;
- Section Title: the title on the site;
- Text Title: description of the Lookbook section;
- Inset Section: set values for Top Right Bottom Left inset in px, em or %; if all values are equal - you can use one value instead of four;
- Offset Section: set values for Top Right Bottom Left inset in px, em or %; if all values are equal - you can use one value instead of four;
- Background Section: select the color of the background for the Lookbook section.
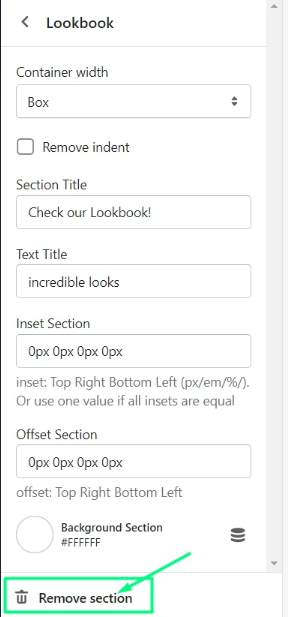
In order to remove the Lookbook section press on the Remove section button in the bottom:
Go back to start adding and configuring products for Lookbook.
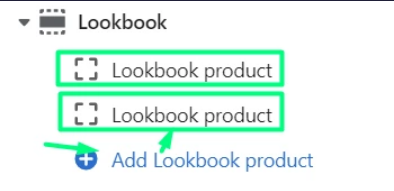
In order to add a Lookbook product block, click on Add Lookbook product and then press on it to set it up:
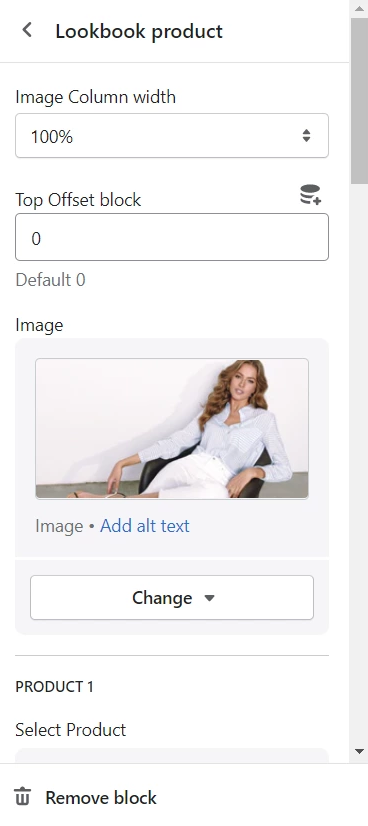
- Image Column width - select the needed width of a product block: 16.67%, 25%, 33.33%, 41.67%, 50%, 58.33%, 66.67%, 75%, 83.33%, 100%.
- Top Offset block - Default: 0.
- Image - select an image for a Lookbook block.
You can add up to 4 products to the Lookbook block:
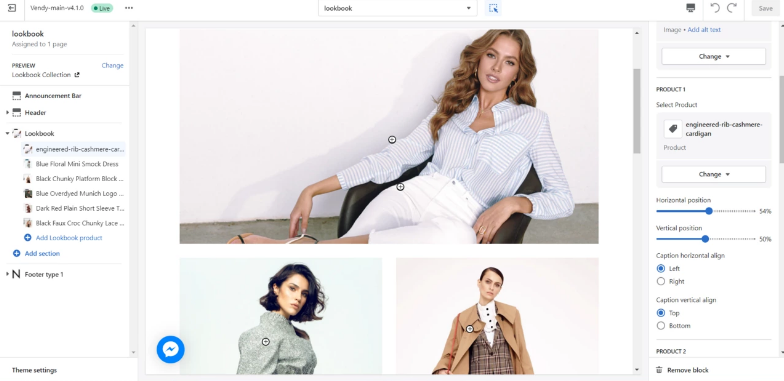
- Select Product - assign a product.
- Horizontal position - select horizontal position of a product in %.
- Vertical position - select horizontal position of a product in %.
- Caption horizontal align: Left / Right.
- Caption vertical align Top / Bottom.
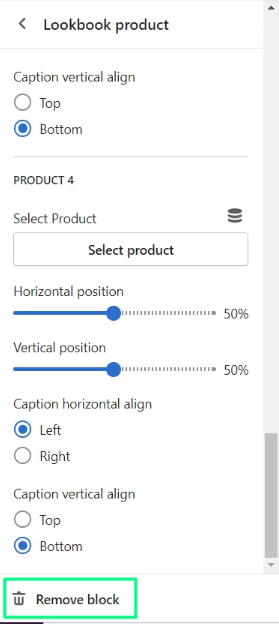
In order to remove the Lookbook product block press on the Remove block button in the bottom
