JetEngine
Working with Custom Meta Boxes
From this block you’ll learn how to create meta boxes to add any custom meta fields you need to the default posts, taxonomies and custom post types.
From this video you can learn more about creating custom meta fields with JetEngine.
Adding Meta Boxes
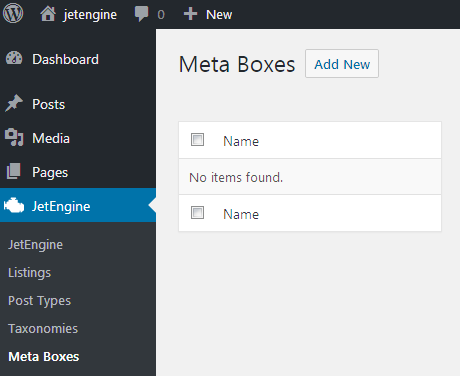
- To add a new meta box to one of the post types or taxonomy type you need to navigate to JetEngine > Meta Boxes block on the left of WordPress Dashboard. Here click Add New button to add a new meta box.
- After that you’ll see Add New Meta Box block. It is divided into two sections: General and Meta fields. Let’s take a closer look at them.
General
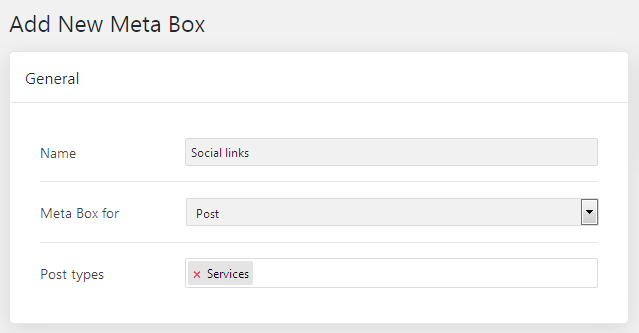
- Name - here you need to specify the title for the meta box.
- Meta Box for - here you have to select the post type or taxonomy, or multiple items for which you want to set this meta box. Depending on the type you’ve selected you’ll be able to set the meta box to specific post type or taxonomy.
Meta Fields
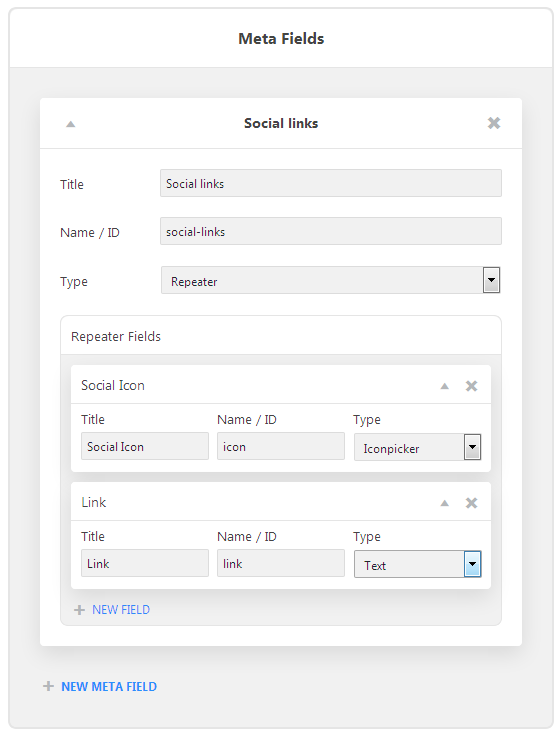
Here you can create the meta fields to display for custom post types or taxonomies.
- To create a new meta field click + New Meta Field option.
- In the newly opened block input these kinds of information:
- Title - here you should type in the title that will be shown for the meta field;
- Name / ID - here you have to provide an ID for the meta field that will be recognized with Elementor widgets when you select the needed meta field to display;
- Type - here you have to specify the type of content that will be available for adding with this meta field.
There are such kinds of possible content available for the meta field:
- Text - will perfectly fit if you want to add an extra field with custom text to the items.
- Date - will help display the date set for the item as a meta field. You can also save the date as a timestamp to allow to query items by it.
- Time - allows to add the time marker for the item.
- Datetime - provides the convenient way to add time and date to the item. You can also save it as a timestamp.
- Textarea - use this content type to add the text area to the item.
- WYSIWYG - use this content type to add the basic editor in the custom field.
- Switcher - allows displaying switcher for the item.
- Checkbox - adds the checkboxes for the items.
- Iconpicker - the tool provides ability to select the icons for displaying them for the item.
- Media - will help add the images for the item.
- Gallery - will help add and display the gallery of multiple images.
- Radio - allows to add the radio options for choosing when creating the item.
- Select - use this content type to add dropdown selector for the item.
- Colorpicker - will add a colorpicker tool for the item.
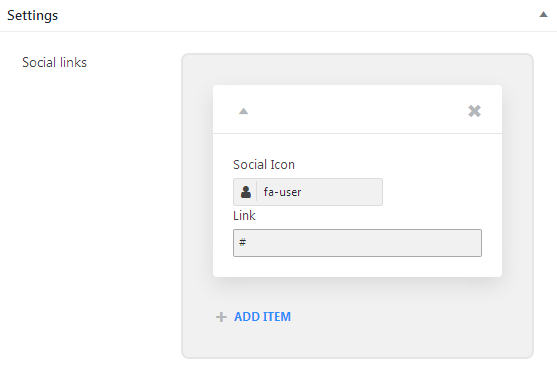
- Repeater - will help add the repeating content types for every item of the given type.
- After everything is set click Add Meta Box button to save the changes.
- You’ll see the new meta field in the list of fields available for the item to which it was added.