JetEngine
Working with Custom Taxonomies
This section contains information on how to add a new custom taxonomy and create a template for the custom taxonomy according to your project’s needs with Elementor live page builder.
From this video you can learn more about creating custom taxonomies with JetEngine.
Adding New Taxonomy Type
- Open WordPress Dashboard and locate JetEngine tab on the left. Navigate to JetEngine > Taxonomies in order to access the list of custom taxonomies already existing on your site. In the case there are none, the list will be empty.
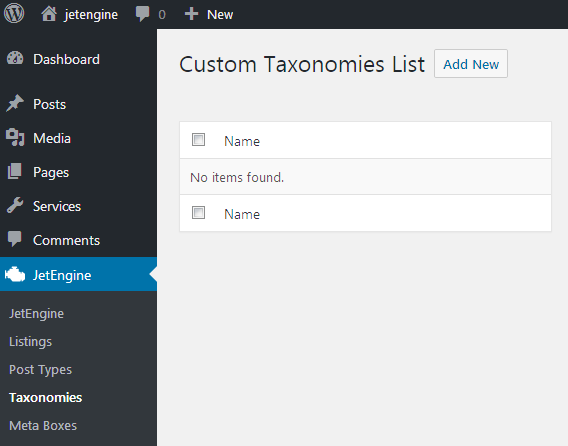
Click Add New button in order to create a new taxonomy for any post type of your choosing. You’ll be redirected to Add New Taxonomy page where you’ll have to specify the general information about the new custom taxonomy you’ll be adding.
General Information

- Slug - here you need to type in the slug that will be shown in the browser’s address bar when one filters the posts using this taxonomy. Please, pay attention, that the slug shouldn’t contain any spaces, you have to use only lowercase letters, numbers or hyphens.
- Name - fill in the name to apply for the taxonomy. It will be shown in the Dashboard as the title of the Taxonomy block (e.g., the default taxonomies are Categories and Tags, but you can add your own ones).
- Post Type - here you can set the post types for which you want to apply this taxonomy (e.g., Posts, Pages, Custom Posts of your choosing, etc.)
Labels
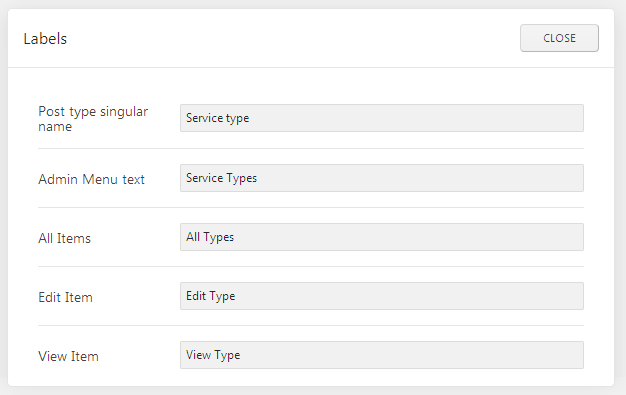
In this block you’ll be able to customize the label names for the options available for the new custom post type. You’ll be able to set your own labels instead of the default ones. Click Edit button to start editing the labels.
- Singular name - here you can customize the singular taxonomy name label for the newly created taxonomy (e.g., Service type, Team, Portfolio Topic, etc.)
- Admin menu text - here you can change the way the custom taxonomy type title would be displayed on the Dashboard.
- All Items - here you can change the label that will be shown instead of the default All Items/tags.
- Edit Item - here you can define the label that is shown on the page where you can edit the new taxonomy description, thumbnail, etc.
- View Item - here you can change the label that will be shown instead of the default View Item/tag.
- New Item - here you can define the label that is shown on the page where you can add and edit the taxonomies content.
- Update Item - here you can define the label that is shown on the page where you can edit the new taxonomies content.
- New Item Name - here you can change the title that will be shown on the page where you can add a new taxonomy ad the Add New Taxonomy title label.
- Search for Items - here you can customize the text to be shown on Search button (e.g., Search tags / Search topics, etc).
- Parent Item Text - here you can set the text label that will be displayed instead of Parent Item label text.
- The popular Items text - here you can set the text that will be displayed instead of the Popular Items text label.
- Separate items with commas text - here you can predefine the text to display it instead of the one that recommends to separate the tags with commas.
- The add or remove items text - here you can select the text to display instead of Add or remove tag label.
- The choose from most used text - here you can set your own text label to display instead of the text that recommends to choose from the most used tags.
- Not found label- here you can set the label to be displayed instead of Not Found text when the taxonomy is not found on the site.
Settings
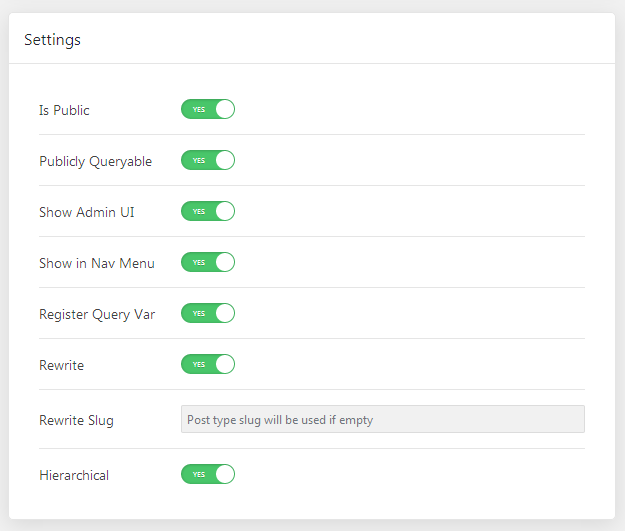
Here you can change the key settings for the new taxonomy type that you’re creating. Use the controls to change the settings according to your needs.
- Is Public - here you can make the taxonomy visible to all website visitors.
- Publicly Queryable - enable this option to make the taxonomy being seen on frontend and allow it for being queried (if the option is inactive you won’t be able to view the taxonomy).
- Show Admin UI - enable this option to be able to access this taxonomy from Dashboard Admin panel.
- Show in Nav Menu - enable this option to able to access this taxonomy from Dashboard on backend from Nav menu.
Show in Rest API (allow Gutenberg Editor) - enable this option to use Gutenberg editor for your custom post type.
- Register Query Var - enable this option to be able to query the taxonomy using different criterias and one link.
- Rewrite - enable this option in the case you want to be able to rewrite the taxonomy.
- Rewrite Slug - here you can apply your custom slug for this taxonomy.
- Hierarchical - in the case you want to be able to create subitems, just enable this option.
Meta Fields
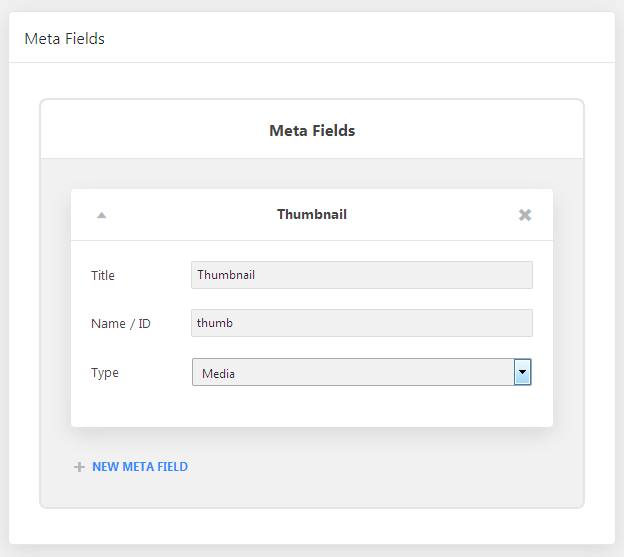
In this block you’ll be able to create additional meta fields to show and fill in for the custom taxonomy.
- To create a new meta field click + New Meta Field option.
- In the newly opened block input these kinds of information:
- Title - here you should type in the title that will be shown for the meta field;
- Name / ID - here you have to provide an ID for the meta field that will be recognized with Elementor widgets when you select the needed meta field to display;
- Type - here you have to specify the type of content that will be available for adding with this meta field.
- There are such kinds of possible content available for the meta field:
- Text - will perfectly fit if you want to add an extra field with custom text to the taxonomies.
- Date - will help display the date set for the taxonomy as a meta field. You can also save the date as a timestamp to allow to query taxonomies by it.
- Time - allows to add the time marker for the taxonomy.
- Datetime- provides the convenient way to add time and date to the taxonomy. You can also save it as a timestamp.
- Textarea - use this content type to add the text area to the taxonomy.
- WYSIWYG - use this content type to add the basic editor in the custom field.
- Switcher - allows displaying switcher for the taxonomy.
- Checkbox - adds the checkboxes for the taxonomies.
- Iconpicker - the tool provides ability to select the icons for displaying them for the taxonomy.
- Media - will help add the images for the taxonomy.
- Gallery - will help add and display the gallery of multiple images for the term.
- Radio - allows to add the radio options for choosing when creating the taxonomy.
- Select - use this content type to add dropdown selector for the taxonomy.
- Colorpicker - will add a colorpicker tool for the taxonomy.
- Repeater - will help add the repeating content types for every taxonomy of the given type.
- After everything is set click Add Taxonomy button to save the changes.
Creating Custom Taxonomy Type Template
From this block you’ll learn how to create a template for custom taxonomy using Elementor and special widgets to display dynamic content.
- First, let’s navigate to JetEngine > Listings in WordPress Dashboard. Here you’ll see Listing Items block with all the listings that were already created.
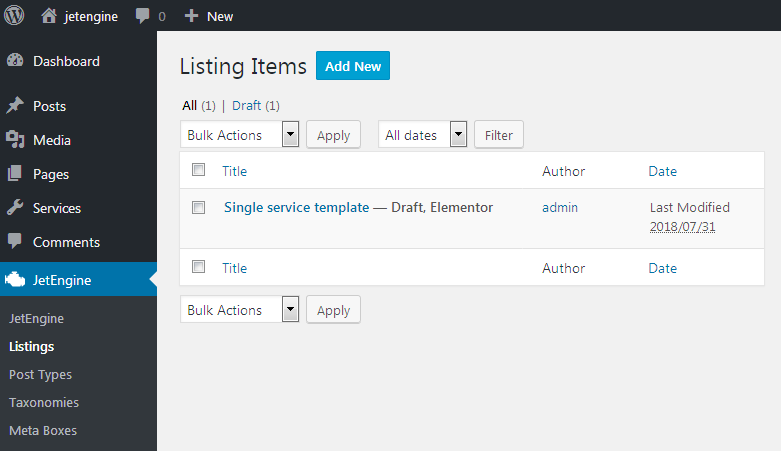
- Click Add New button to create a new listing.
- A Listing Setup Item block will appear. Here you’ll have to select:
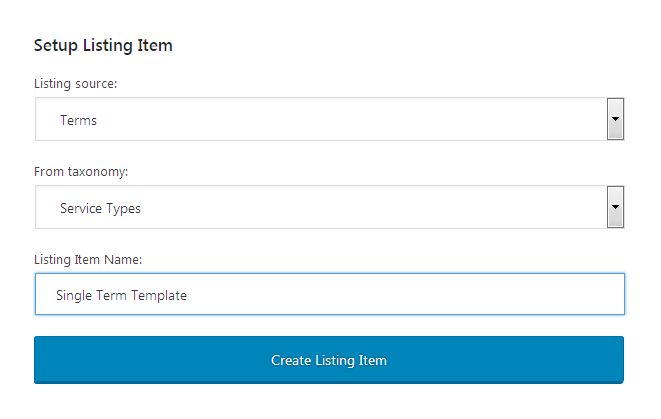
- Listing source - here you can choose, if you want to create a listing template for the custom post type or for the term (in other words, the custom taxonomy). In order to create a template for the taxonomy let’s select Terms listing source.
- From taxonomy - here you need to specify the taxonomy for which you need to set the template. Just select the title of the taxonomy you’ve created).
- Listing Item Name - here you can input the title for the new listing template.
Click Create Listing Item to proceed with creating a new template for the taxonomy.
When Elementor editor opens locate Listing Elements block on the left in the sidebar where all the widgets are usually located. Here you’ll see the set of the specific widgets made for displaying dynamic content.
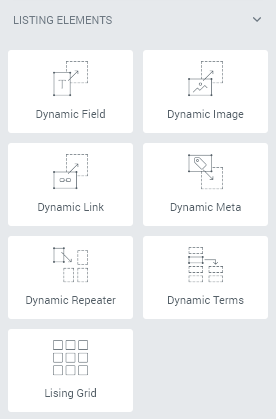
Just drag and drop them to add the dynamic meta fields content and terms/data, repeaters, dynamic images, links, meta information, terms, etc.
Please, note, that the fields will display dynamic content already added to the taxonomies, so you’ll have to add it before displaying it with the dynamic widgets.
Another important thing is that while working with dynamic content widgets you’ll see the content that was added to the latest post / taxonomy type displayed in Elementor. However, the same style settings, layouts and widgets will be applied to all the posts from the selected custom type, or taxonomies.
In the case the field remains empty (the information is missing for one of the fields in one of the posts), just disable it from being displayed using Hide if value is empty option.
Settings
In the case you want to access Listing Item Settings, just click Settings in the bottom left corner. The settings block that allows applying changes in Listing item settings will open.
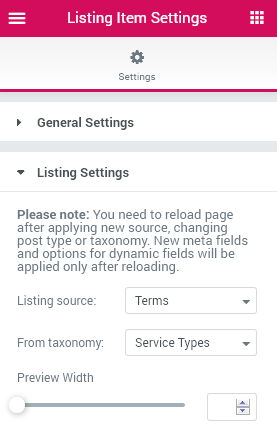
General Setting
Here you can change the title and the status for the listing template you’re currently editing.
Listing Settings
- Listing Source - here you can change the source of the listing from which the data will be pulled (posts or terms).
- From post type / taxonomy - here you can select for which post type of taxonomy you’ll apply this listing template.
- Preview Width - to make the width of the listing wider or narrower just use the control to set its width in px.