Shopify Documentation
Main Blocks Customization
With multiple options you are able to modify the template to your needs. You can edit font family, font color and size, theme color scheme, banner and slider images, etc.
Blog Articles
This functionality enables you to display a number of blog posts from a certain blog (articles) in a grid with image, title, author name, publication date and READ MORE button.
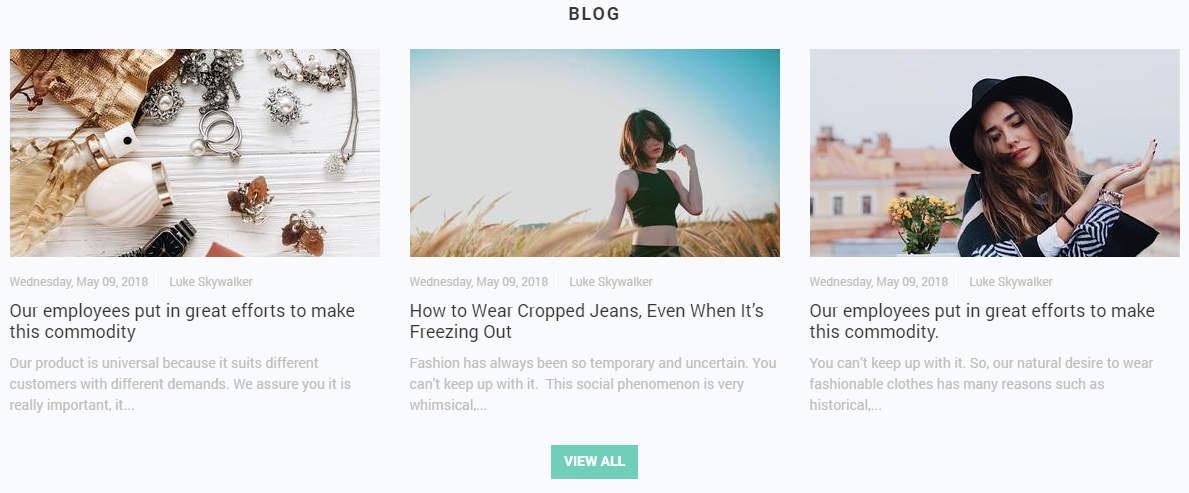
Let's review the Blog Articles block configuration:
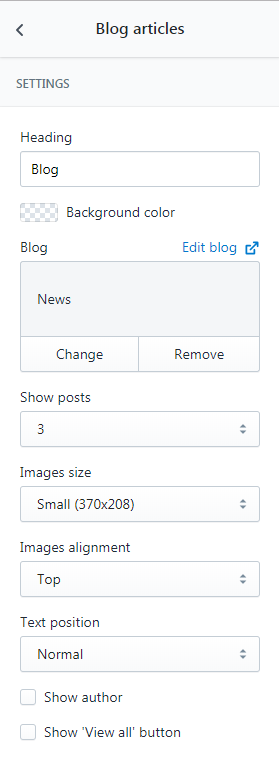
- Heading — add the title of the section;
- Blog — choose the collection of blog post you want to display;
- Show posts — set a number of article to show (3/6/9);
- Images size — select a suitable article image size from the option dropdown (Small/Medium/Large);
- Images alignment — select a suitable article images alignment from the option dropdown (Top/Middle/Bottom);
- Text position — select a suitable text positionfrom the option dropdown (Normal/Overlay);
- Show author — tick to show the author;
- Show 'View all' button — tick to show the View all button.
.png)
- Heading — Featured posts;
- Blog — Blog;
- Show posts — 3;
- Images size — Small (370x208);
- Images alignment — Bottom;
- Text position — Normal;
- Show author — Yes;
- Show 'View all' button — No.
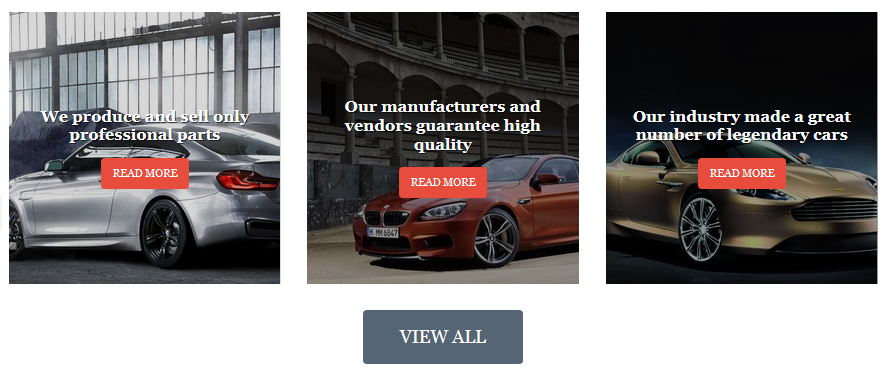
- Heading — Our Blog;
- Blog — Blog;
- Show posts — 3;
- Images size — Medium (370x370);
- Images alignment — Bottom;
- Text position — Overlay;
- Show author — No;
- Show 'View all' button — Yes.
The main sections on your Theme settings page
General
In this section you can upload your logo image and favicon (the icon that shows up in the address bar of the browser) for your online store. There are also options of enabling/disabling the logo on your checkout page and the copyright text in the footer area.
Typography
The section where you can change the typography settings, such as font family, font size and color. You can modify the following settings:
- The main font style of your store pages
- Text links
- Titles
- Product names
- Product descriptions
- Product price
Attention! The font size should be set in pixels (for example, 12px), colors in octal format (for example, #aabbcc, you can also select the color from the available palette).
Colors
Theme color scheme settings. The colors must be specified in hexadecimal format (for example, #aabbcc). Also, it is possible to select a color from a palette provided.
Layout & content
Basic content display settings. You can configure the display of the products list on the home page and on the category page, control the layout of the side columns (sidebars) and their contents.
Gradients (optional)
In this section you can edit gradients (if they are available in your theme). We use linear vertical gradients in our themes. You can modify them by changing the top and bottom color markers.
Layout & content settings
The main settings of your content management. You can do the following:
- Select the main navigation of the store (shown in the upper horizontal menu)
- Control the sidebars
- Enable the list of products on the front and category pages
Megamenu
Our templates include the Megamenu widget which helps to build a powerful and functional main menu of your store. The widget has many options that are available in the corresponding section. Menu includes 6 Items, each of which is configured in the corresponding sub-section. One can add a label with the text (Item badge) to each item:
- the usual custom link, without submenu.
- product catalog. One can set a link to a list of all products, the control of the dropdown submenu with the list of categories (Collections) is also available. Categories to display are selected by user.
- blog. Blog is chosen by the user, the option to enable/disable the drop-down sub-menu with the list of the latest entries is also available.
- special products. One can set the category of products to display, the option to enable/disable the drop-down sub-menu with the list of the latest entries is also available.
- the usual custom links, submenu is not included.
Slider (optional)
This section contains the settings of the slider located on the front page (if the slider is included in your template design). You can enable/disable the slider, change images, edit description and links assigned to the slides.
Attention! To preserve the aesthetic appeal of the theme it is recommended using the image dimensions shown next to the Upload button.
Custom blocks
In this section you can manage banners, blocks of links, social icons options and other content available in your theme. It is not required to have programming skills in order to edit these blocks – configuration is done in easy steps like adding text, selecting icons and uploading images.
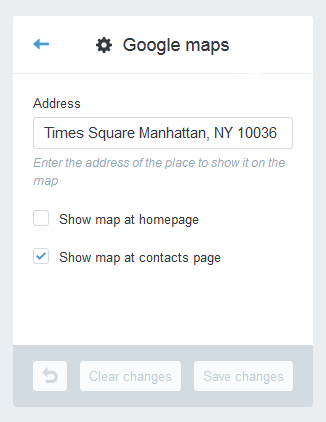
Google maps
This section contains the settings which control the display of Google maps on the pages of the store.
Basic settings:
Address. Set the mailing address of the desired object, and the widget will display this place on the map with a marker.
Function of map to display. You can enable or disable the display of the map on the home page or contact page.
Olark chat
Our Shopify templates include widget to display Olark-chat. One can manage widget settings in the corresponding section.
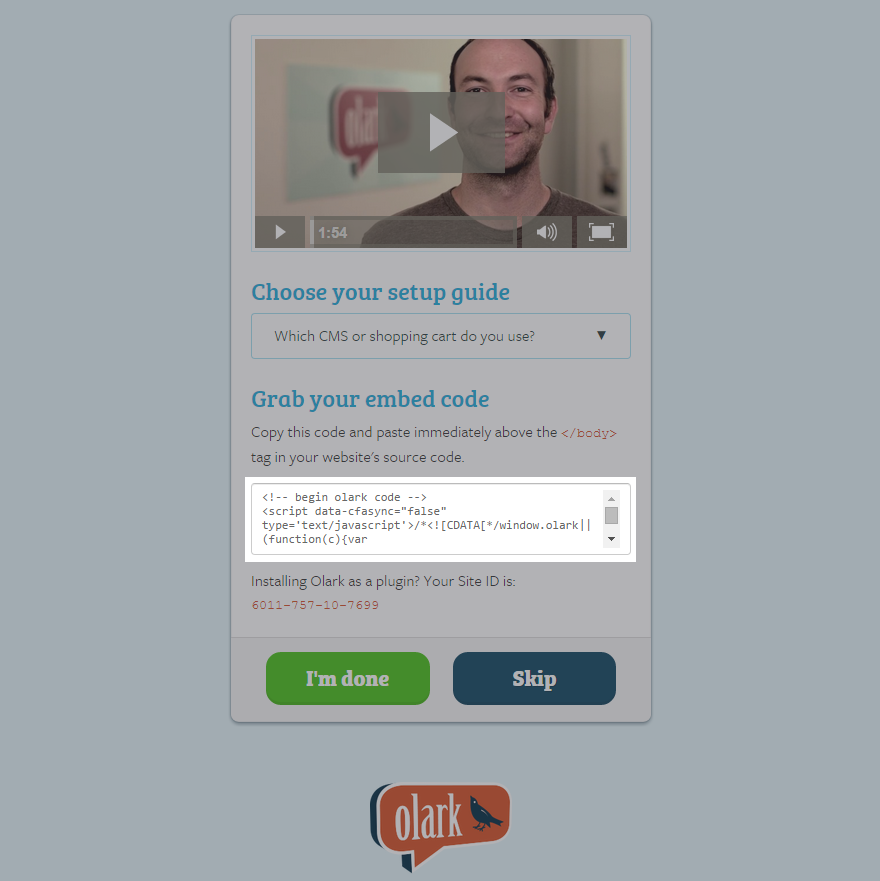
In order to add Olark-chat to the pages of your store, follow these steps:
Create an account on the official Olark website.
You can get a free trial 6-month bronze package. To do this, follow the link and fill in your registration data.
Get the chat code for your store.
Copy this code to your clipboard.
In the Shopify template settings open Olark chat. Check the box Enable widget and insert the chat code in the field Chat code.
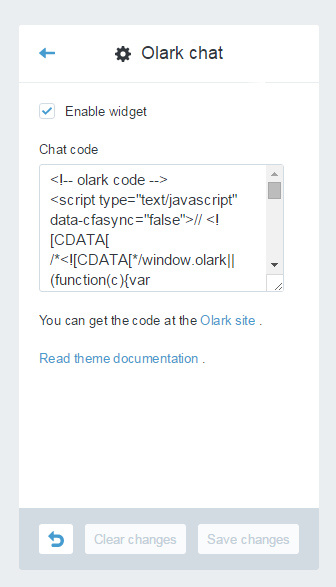
Click Publish changes button at the top right.
Additional Information:
Money options
If you want to use several currencies in your online store, you can manage them in this section. You should select Show currency selector and add three-letter currency codes (ISO 4217 standard) in the field Currencies you wish to support.
Newsletter options
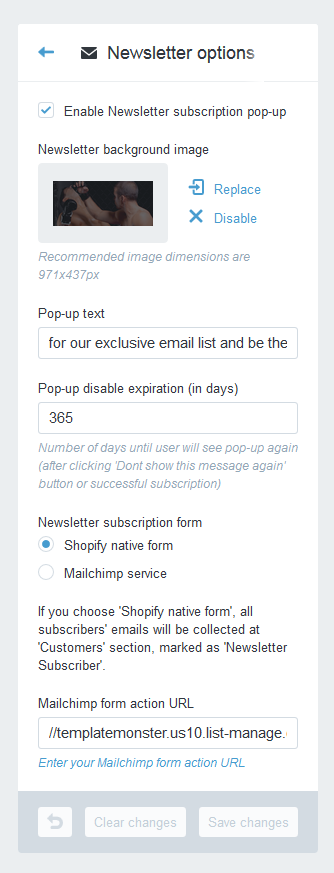
This section presents the settings for the newsletter subscription forms. Here you can configure the pop-up message that prompts you to subscribe (Newsletter pop-up). There many options for the detailed configuration where you can change the background image and text to meet your needs.
Also, you can select the form of subscription:
- Built-in Shopify form. If you select this option, all subscribers' e-mails will be collected in the section Customers marked as Newsletter Subscriber.
- Mailchimp form integration. To work with mailing lists, you can use the Mailchimp service, it is enough to get a subscription form and input it in the Mailchimp form action URL field.
Mailing list (optional)
This section contains mail settings.
Payment methods
In this section you can manage the logos of the payment systems that show up on the checkout page. You can enable/disable these logos to meet your needs.
Cookies Policy
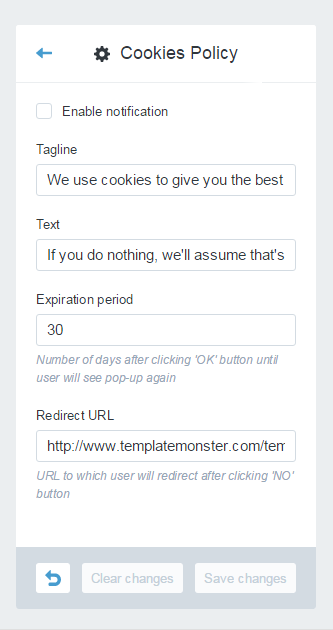
There is a built-in widget in our templates to display information about the use of Cookie Law. Widget can be managed in the Cookies Policy section:
You can enable/disable the widget, edit text, the period during which the message will not be displayed (by pressing OK button), as well as redirection link in case of user’s refusal (by pressing NO button).
Checkout
This section presents the appearance settings for the order page. You can customize the banner, logo, page title, as well as the buttons color.
Additional Layouts
Managing additional layouts of the pages. You can navigate to Themes > Template Editor > Layouts to add, remove or edit the layout of the pages.
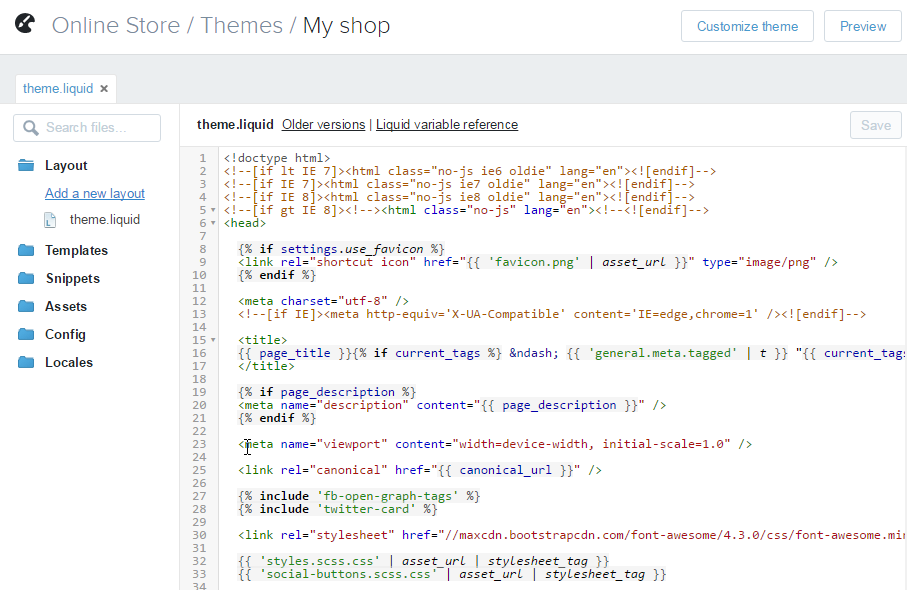
Template Editor
If you click this option, the online editor of the template will show up. You can edit layout files (files with extension .liquid), scripts (javascript), styles (css) and settings file (settings.html).
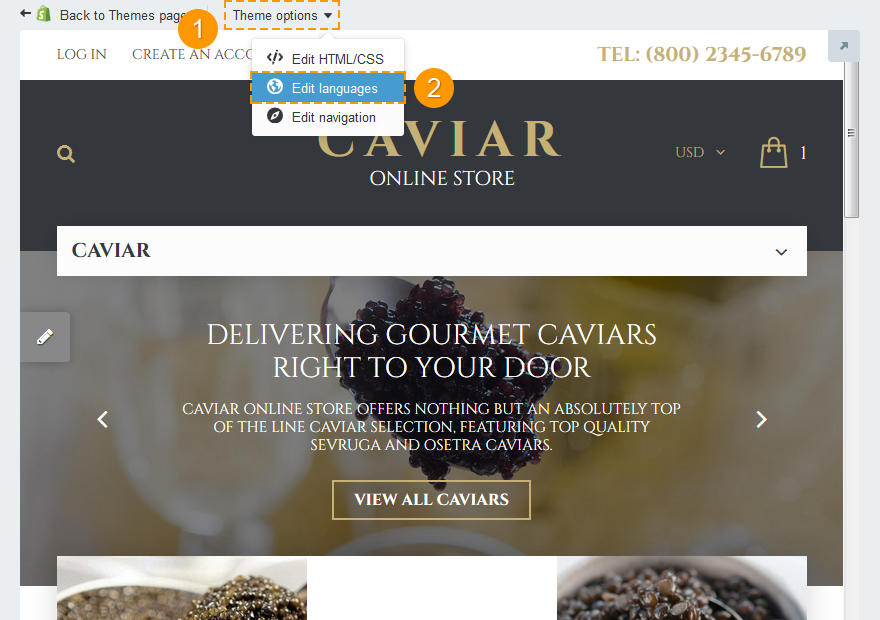
Language settings
- On the template settings page, please click the Theme options link.
- Select Edit HTML/CSS in the drop-down.
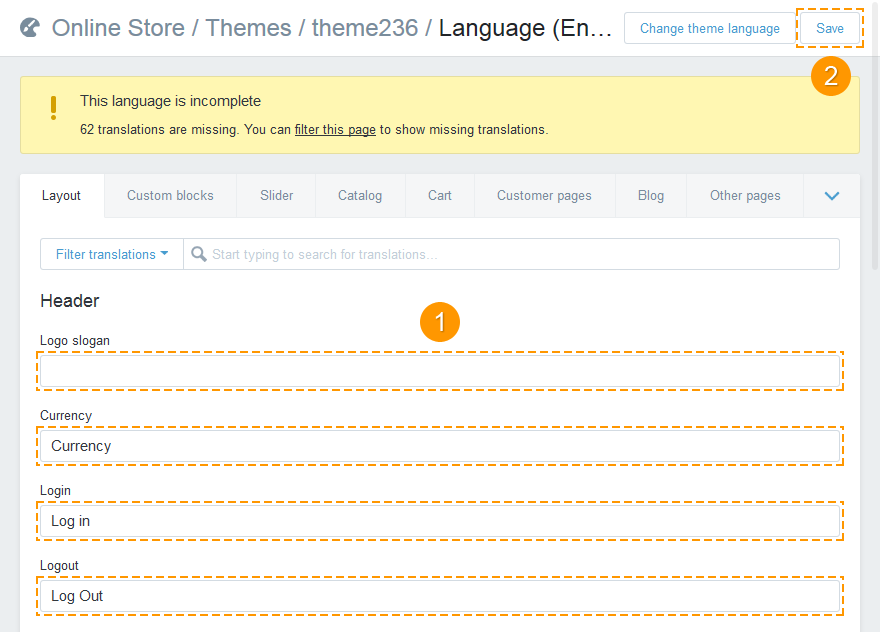
On the new page, you will see the theme language settings editor:

In this editor you can set up and edit translations for all the theme text. Our templates come with ready translations for 5 languages: English (enabled by default), German, French, Spanish, and Russian.
Template text translation
To translate template text, please complete the following steps:
- Enter translations into text fields;
- Press the Save button at the top right of the page.
To switch the template language:
- Press the Change theme language button.
- Select the language in the drop-down;
- Press the Save button.
Attention! Text of banners, sliders, and other configurable blocks can be also translated to other languages. Your store pages will display the text that is entered on language editor pages (instead of the text that is entered in template settings)!!!
Store content (products, categories, blog, text pages, etc.) is not a part of the template and cannot be translated with the help of template language settings editor. To translate this content, please use the corresponding apps or translate it manually.