Vini Documentation

TM Extensions Settings
Ajax Wishlist
In order to configure this module, you should navigate to Magento admin panel and choose the Stores > Configuration section in the left side menu.
Then choose the TemplateMonster > Ajax Wishlist item on the new page on the left side.
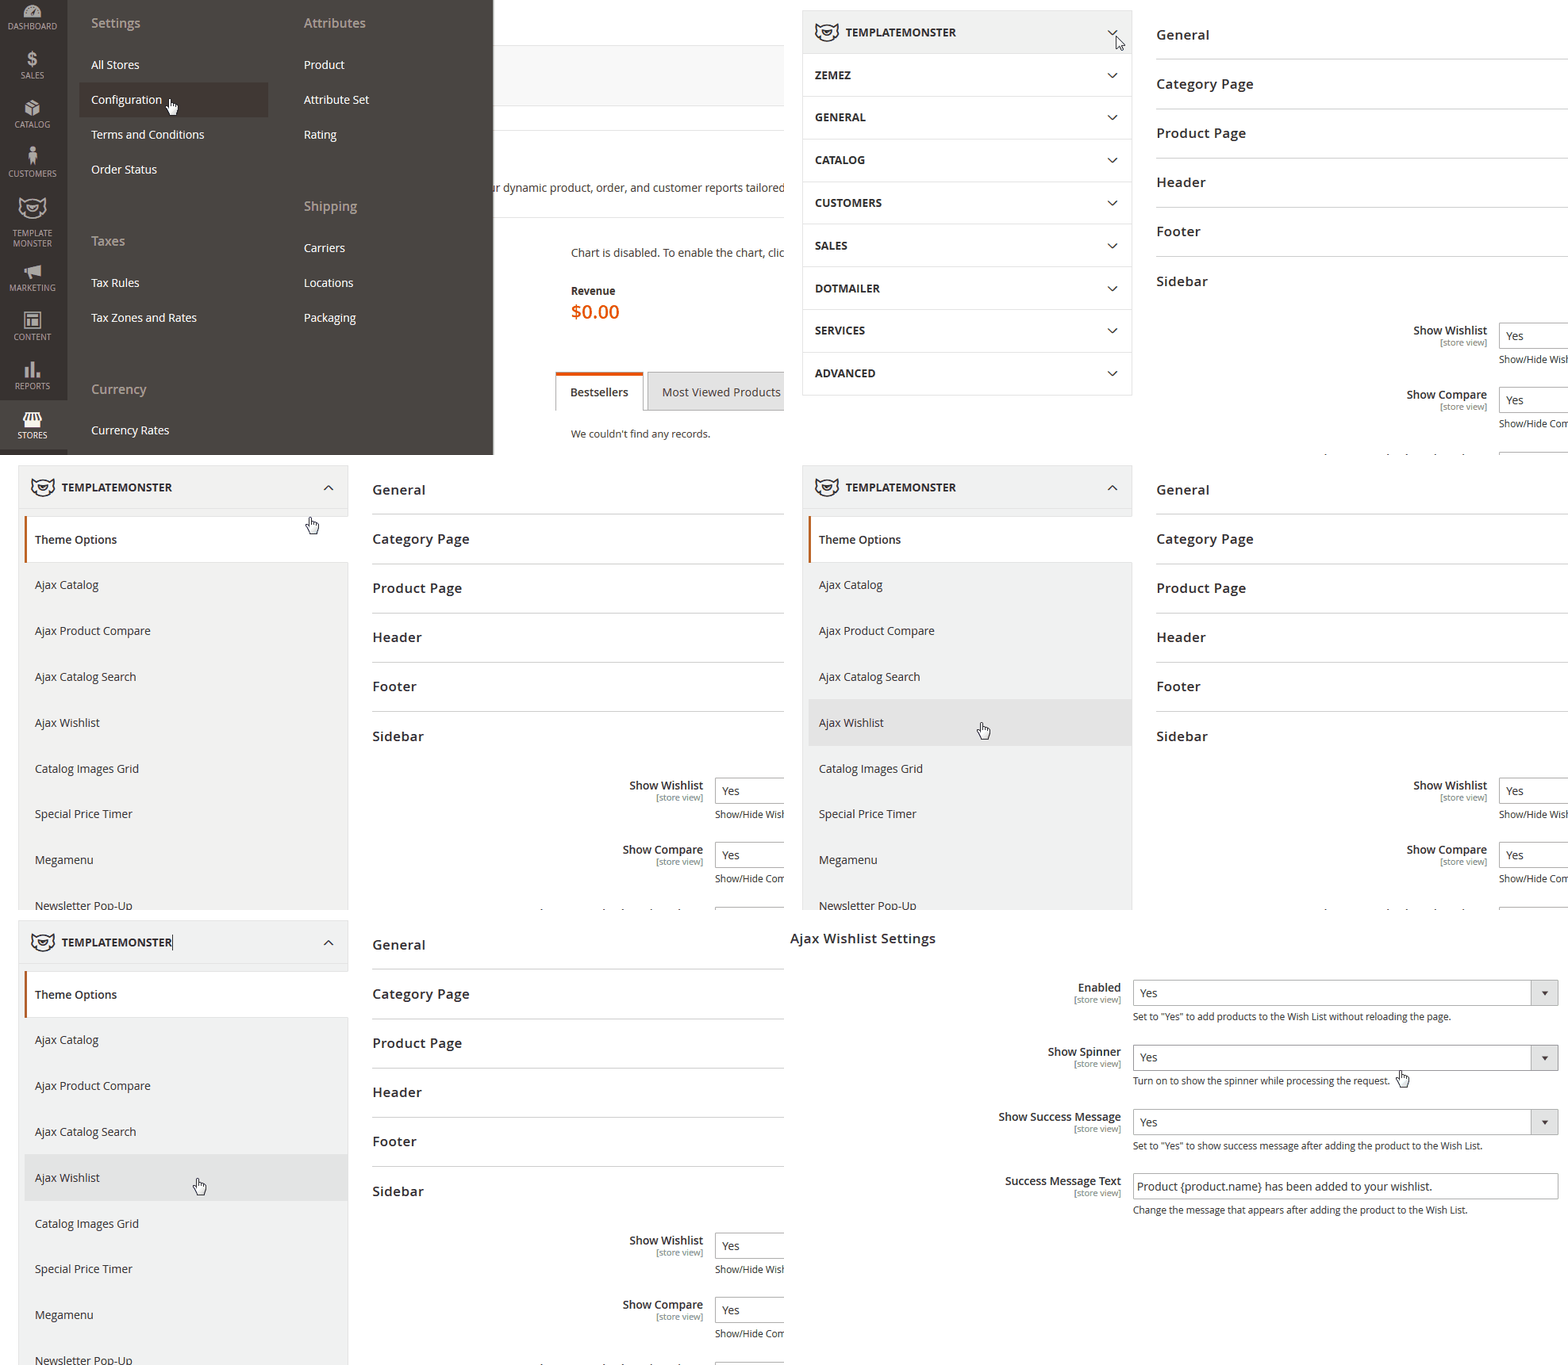
Check the tutorial on How to Manage Ajax Wishlist Extension.
Useful Tutorials:
Catalog Ajax
Quick and easy selection among the variety of products contributes to making a positive decision on purchasing in your online shop. Ajax Catalog module that provides this possibility is the most popular module among the online shops based on various platforms. It allows you to find and filter the products you need according to the selected parameters quickly and easily without reloading the page.
In order to configure this module, navigate to Stores > Settings > Configuration section.

Then navigate to TemplateMonster > Catalog Ajax in the left side menu to go to the module settings interface.
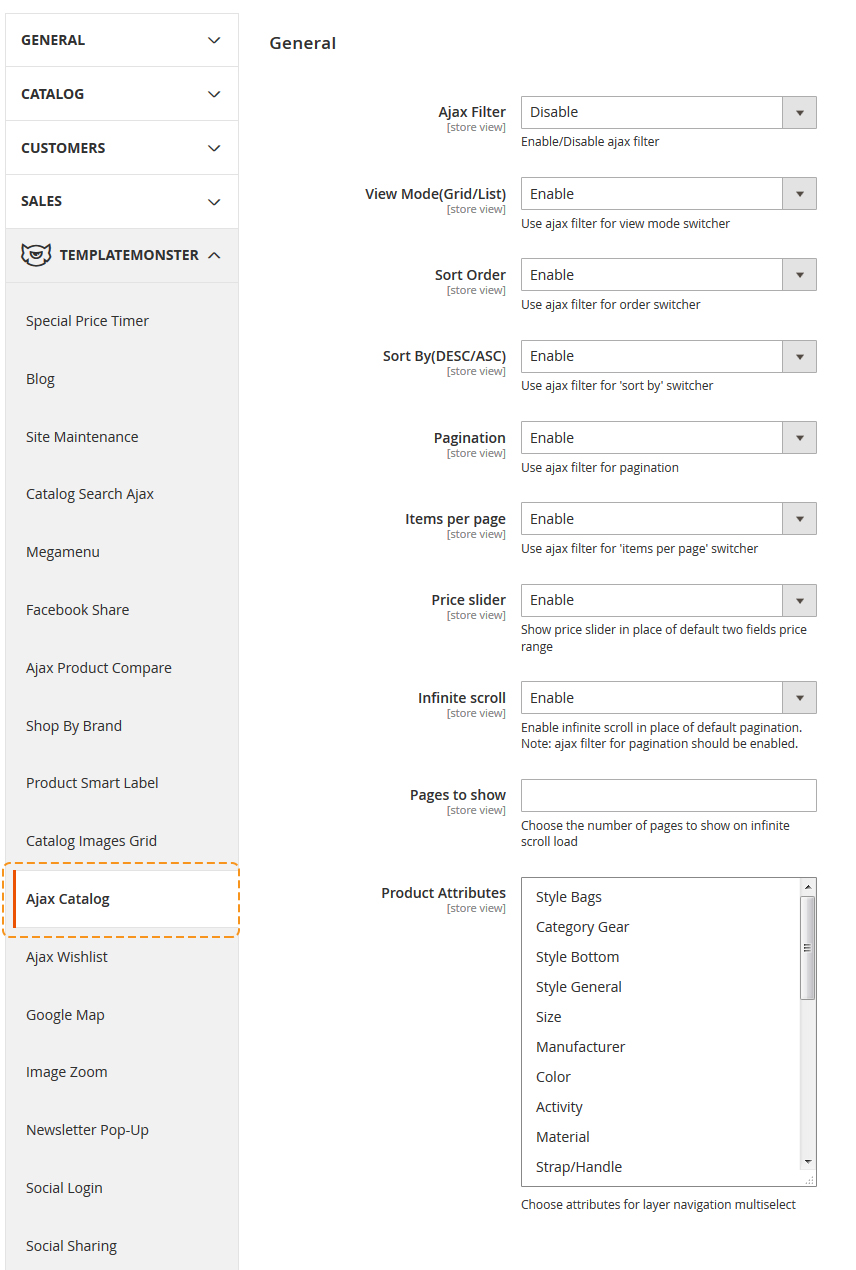
Let's review module options:
| Layer filter | - | the option enables AJAX filter by attributes and parameters located in the standard shop filters column. |
| View mode (1) (grid/list) | - | products display layout. This option allows you to specify products layout for listing pages without reloading them. |
| List Order | - | sorting parameters. It allows you to define the sorting parameter without reloading the page. |
| Sort by (2) (desc/asc) | - | products ordering. You can sort items without reloading the main page. |
| Pagination (3) | - | listing pagination. If your listing includes more than one page with products, this option allows to switch between the inner pages without reloading the main page. |
| Show number items (4) | - | number of products displayed on the page. This option allows you to change the number of products displayed on the single listing page without reloading. |
| Product Attributes (5) | - | selected attributes is multiselected in layer navigation. |
Feel free to use all the options at once or just a few of them, it's up to you.
Frontend:
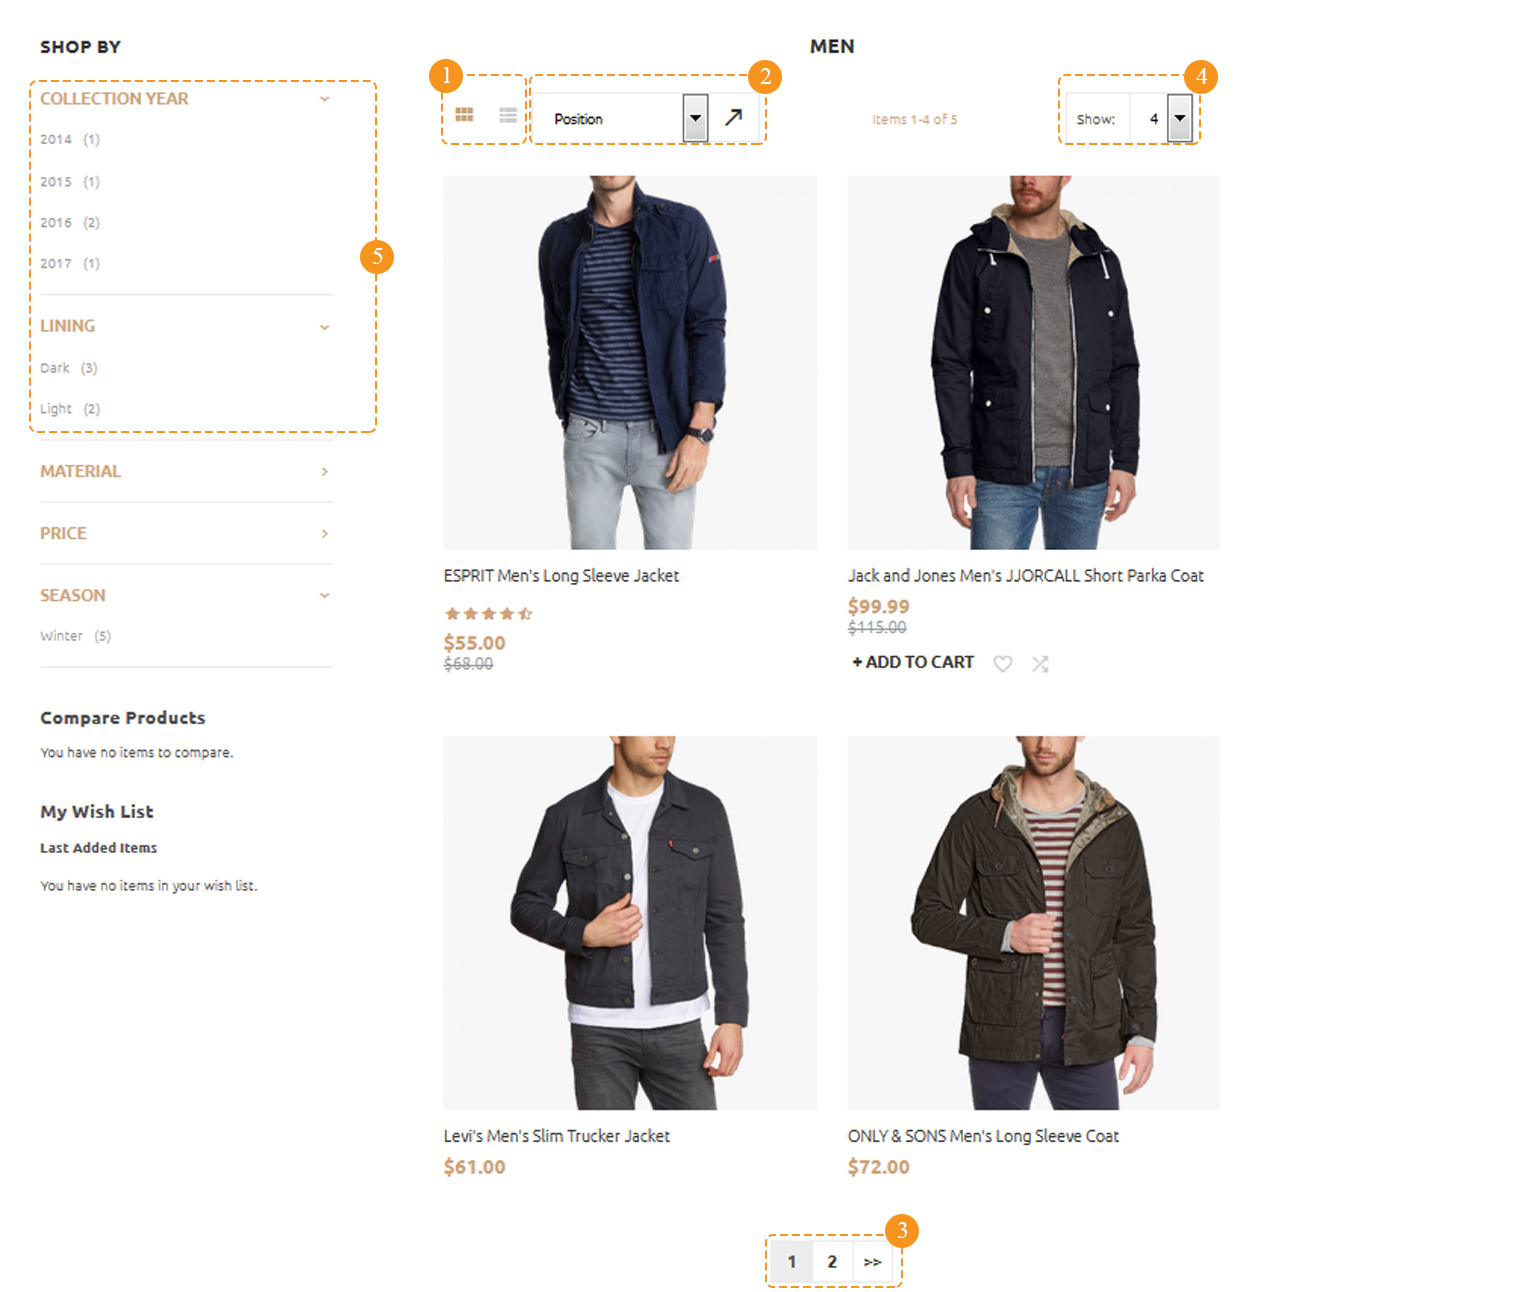
- View Mode(Grid/List) (1) — Enabled;
- Sort By(DESC/ASC) (2) — Enabled;
- Pagination (3) — Enabled;
- Show number items (4) — Enabled;
- Product Attributes (5) — Brand, Design, Themes, Color, Size.
GoogleMap
The given module allows you to embed the Google map to your Magento website. By default, module provides you with three maps: the map on the contact page, the map in the footer of other pages and the map on the Home page
All maps can be configured via Magento Admin Panel in Store > Configuration > Templatemonster > Google Map.
- General section allows you to enter the API key.
- Home page map settings section allows you to display the map on the home page.
- Contacts page map settings section allows you to display the map on the contacts page.
- Footer map settings section allows you to display the map in site footer.
Check the tutorial on How to Manage Google Map Extension.
Megamenu
TemplateMonster Megamenu module extends standard Magento menu functionality and allows you to configure subcategories multi-column display, add static blocks and products to the dropdown menu, as well as the flexibly customize its appearance in site admin panel.
Global configuration
In order to configure this module, you should navigate to Magento admin panel and choose the Stores > Configuration section in the left side menu.
Choose the TEMPLATEMONSTER > Megamenu in the left side menu to go to the module settings interface.

| Enable/Disable | - | you can enable or disable the module if needed; |
| Menu position | - | you can choose menu position here. |
| Topnav | - | displays menu in site header; |
| Sidebar | - | shows menu in sidebar. |
Attention!!! If you're going to display menu in sidebar, be sure to enable a layout with left or right column included. In case, you have one-column layout active for pages and Menu position:Sidebar option is enabled, no menu will appear at site.
Categories configuration
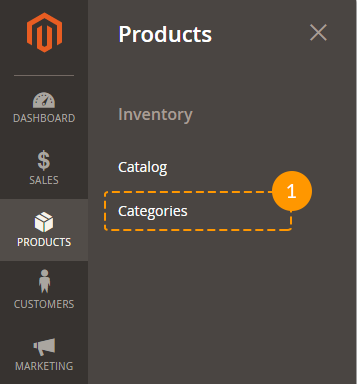
Megamenu block display can be configured on the 1st level category configuration page, that can be found in the Megamenu tab, at Products > Categories section.
You will see the Turn on Megamenu for this category option at the Megamenu tab. This option enabled Megamenu block for the selected category. After enabling this option, you will see the two fields and a widget with menu content settings.
Label option allows you to display the label [new, sale] for the top-level categories. This label has default styling, but its appearance can be changed by using Css class option. This option sets the class for current menu item's <li> и <a> tags, so you can easily create custom styling for your label by using the class.
Megamenu block content settings' widget allows you to define number of rows, columns, specify their width and lot of other settings.
In order to add a new row you need to use Add row button. Then you will see the empty field with Add column[s] and Remove row buttons.
Remove row - removes the row [field].
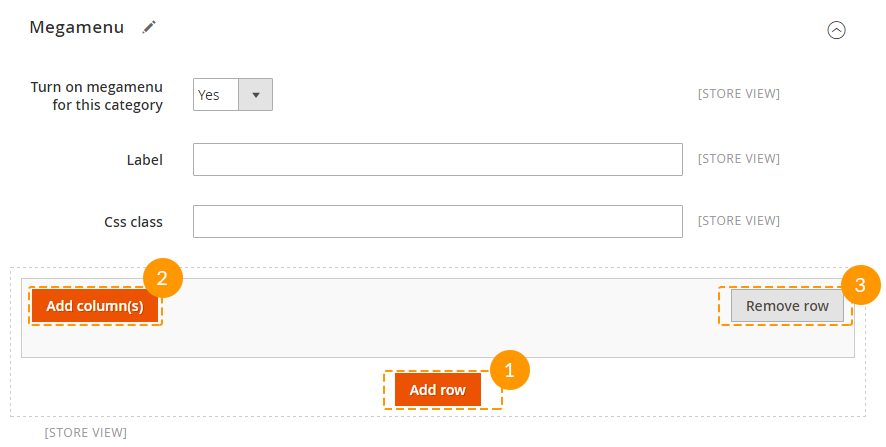
After pressing the Add column[s] button you'll see a pop-up window to select the width of the column you're going to add. The maximum width of the column is col-12 it stretches menu block to the full width of the container. So, if you need to display 4 columns in a row, you have to add 4 columns with the width parameter set to col-3.

Let's consider columns' settings.
- Set column width - column width. It can take values from col-1 to col-12.

- Enter specific class - custom css class of the column, so that you can further create styles for this column using css rules.

-
Add subcategory - subcategories dropdown for the parent category. This option allows you to select and display the subcategories you need. In order to do this, choose the subcategory among the list and press on the Add button. On the next step you will see this category listed at the Selected items field.

-
Select static block - static blocks dropdown list. You can show any of site static blocks in the dropdown menu same as the list of subcategories, if you have previously added it to the shop admin panel. In order to add a static block, choose it among the list and press on Add button. Static block title will be listed in the Selected items field.

-
Add product[s] - adding product to the menu. This option allows you to add any of site products to the menu. Product image, title and a price will be displayed in this case. After pressing on the button you'll see the pop-up list of products available for adding. After you add it to menu, it's title will be listed in the Selected items field.
-
Selected items - the field for sorting the items. It allows you to change the display order [sorting] of your column content. Drag&Drop interface allows you to reorder items by dragging them. If you do not want the product or static block to be displayed below, just drag it to the top to reach the required appearance. You can also remove some items here. Select the ones you need to remove and press on Remove selected button to do that.

Subcategories configuration
This module allows to add an image and a label to any products' subcategory. In order to configure the subcategory, open its page and navigate to the Megamenu tab. You'll see two options there: Category image and Label.
To add the subcategory image press on browse and choose an image from the clipart.As to the label adding, fill in the Label field.

Styles configuration
Product Ajax Compare
You can either enable or disable this module. In order to do this, navigate to the Magento admin panel and choose Stores > Configuration section in the left side menu.
Then choose the TemplateMonster > Ajax Product Compare item on the new page on the left side. Hire you can enable the module for you site.
Useful Tutorials:
