UrbanWear Documentation
Magento Theme Installation
If you already have a Magento store and want to apply the theme, follow the instruction below.
Install Theme on Live Store
To install the theme you only need to upload all the theme files (the app folder) to your server and then enable the theme in the admin panel.
-
- themeXXX
-
- app
You can find the theme requirements on the Theme Live-Demo page.
But to avoid unexpected problems after installation, you should first prepare your Magento. Please strictly follow the steps described in this guide:
- Step 1. Backup Magento files
- Step 2. Disable the cache
- Step 3. Upload the app folder
- Step 4. Unzip the app folder
- Step 5. Run the console
The detailed Magento update guide you will find on the Magento User Guide.
Template Configuration
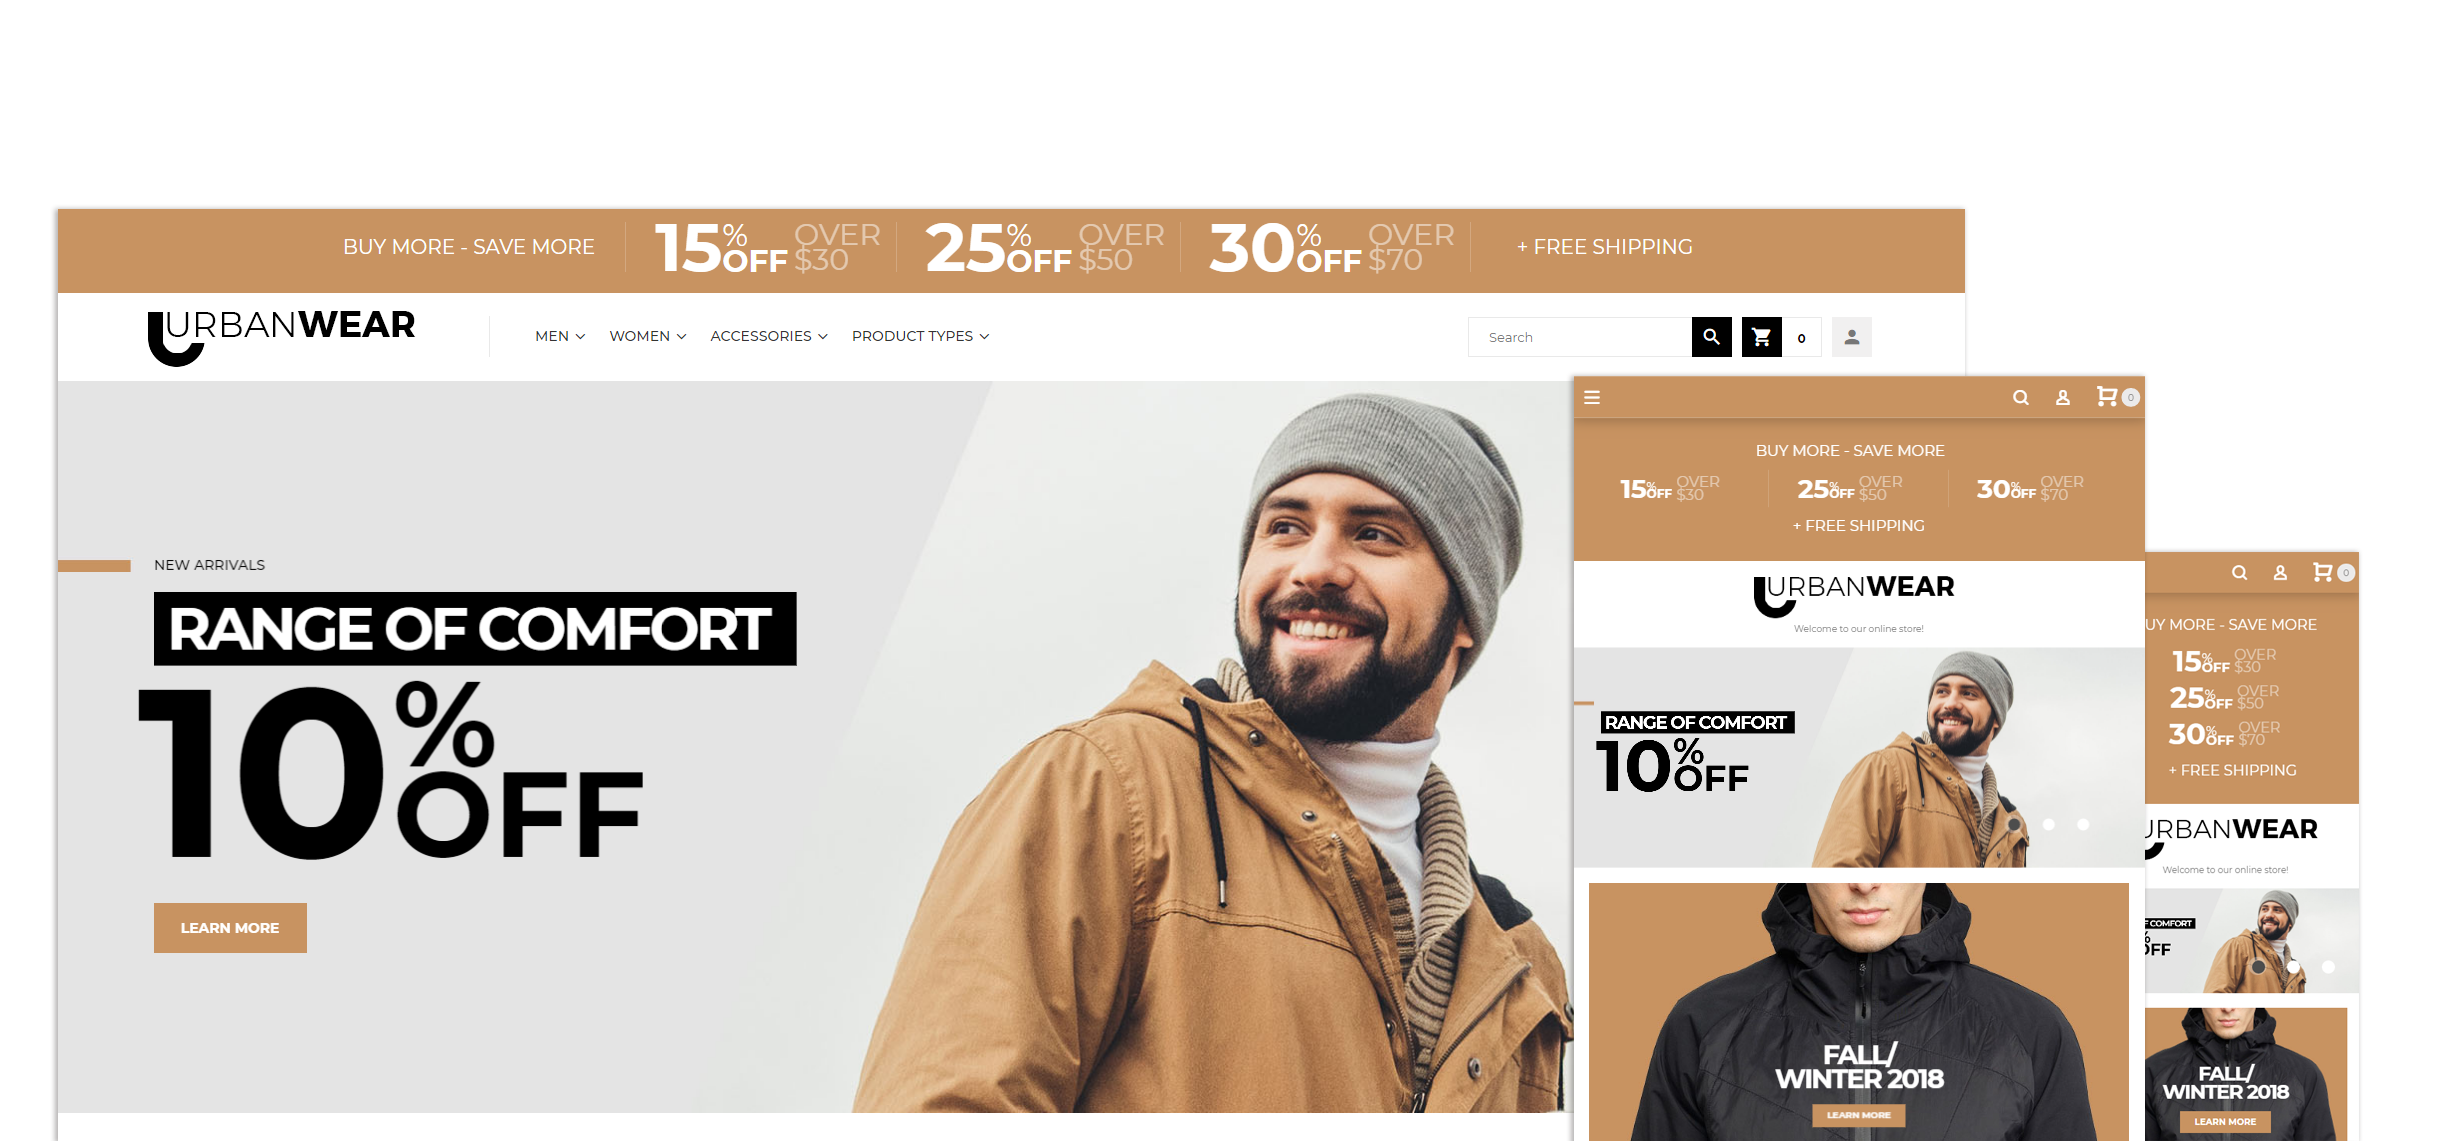
We are going to review template configuration options based on the example. We will configure it the same way as our Live Demo template, without affecting products data.
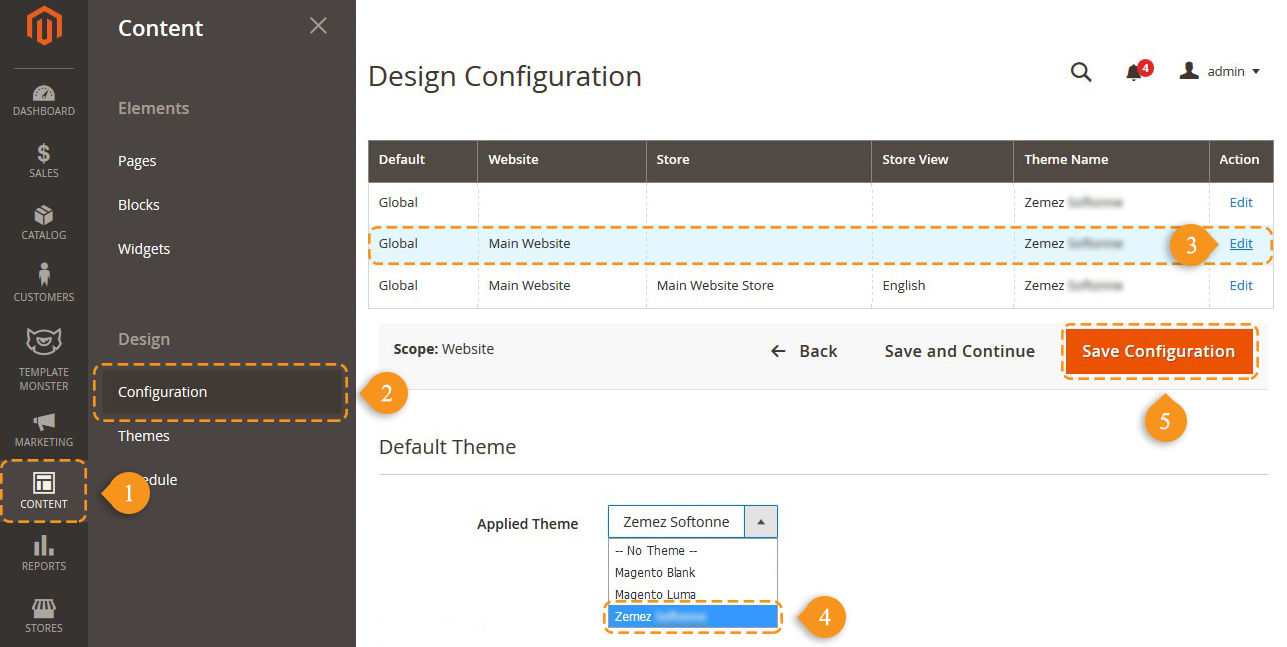
Activate the New Theme
Pages, static blocks and widgets import
In order to make your template look exactly like our Live Demo, you need to import the store pages, static blocks and widgets. Please follow the instructions below in order to import store pages, static blocks and widgets.
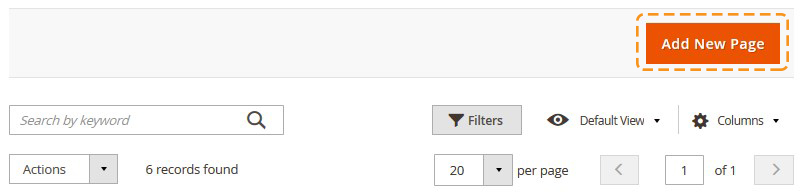
Pages Import
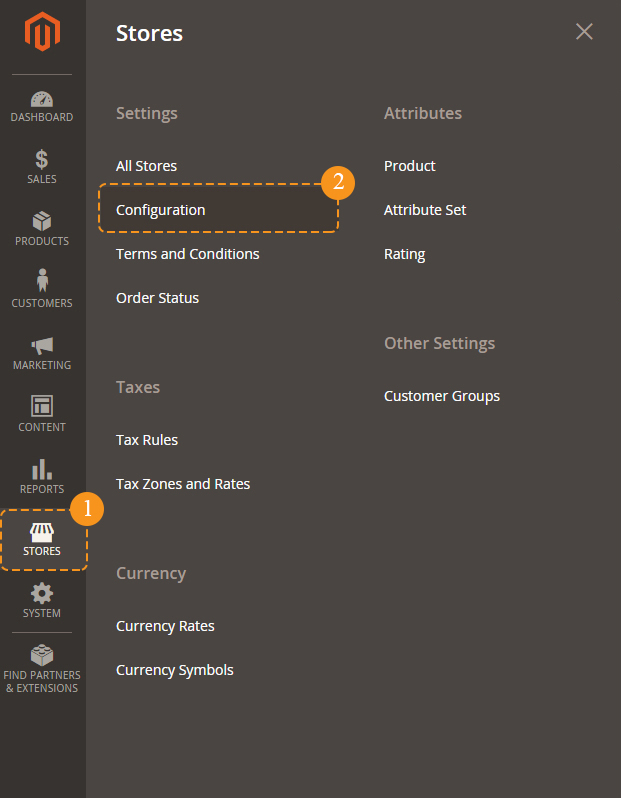
- Navigate to the Stores > Settings > Configuration section.
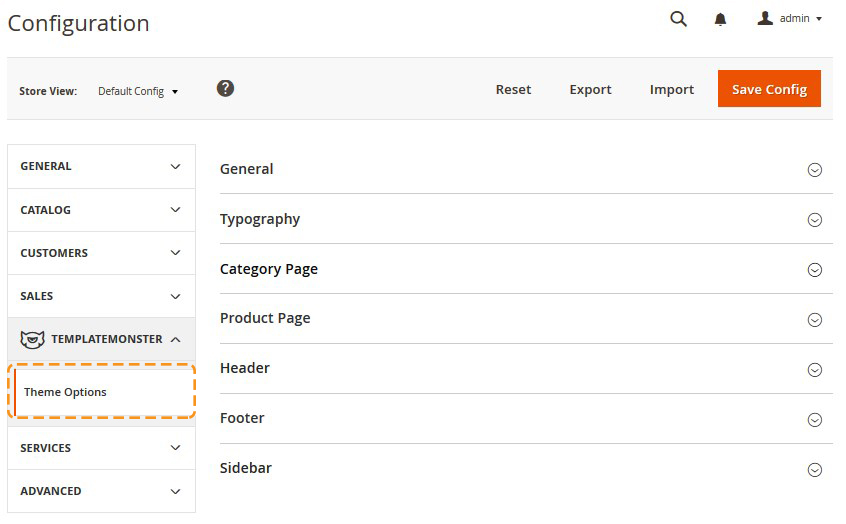
- Then choose the TEMPLATEMONSTER > Theme Options in the left side menu and you'll move to the module settings interface.
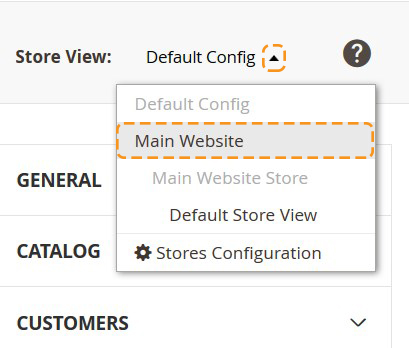
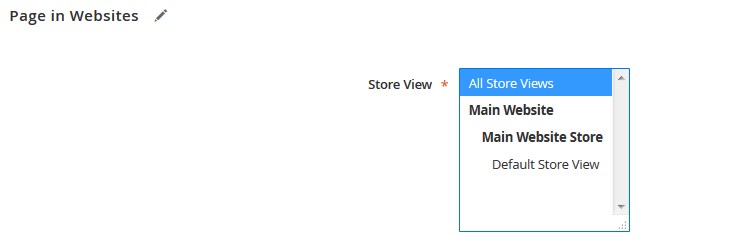
- Click on the Store View: Default Config. Select a Main Website from the option dropdown.
- Confirm the scope switching in the pop-up window. Press "OK" to confirm.
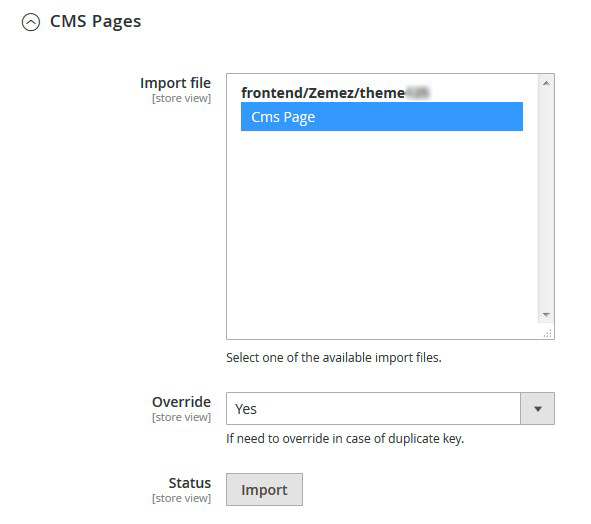
- Go to the Sample Data Installer tab > CMS pages.
- Select files you want to import. You need to select Cms Page.
- Set the Override option to "Yes" if you want to replace your store pages with new ones in case of duplicate key.
- Press the Import button.
- You will see the confirmation message. The message will inform you about the total number of imported pages.


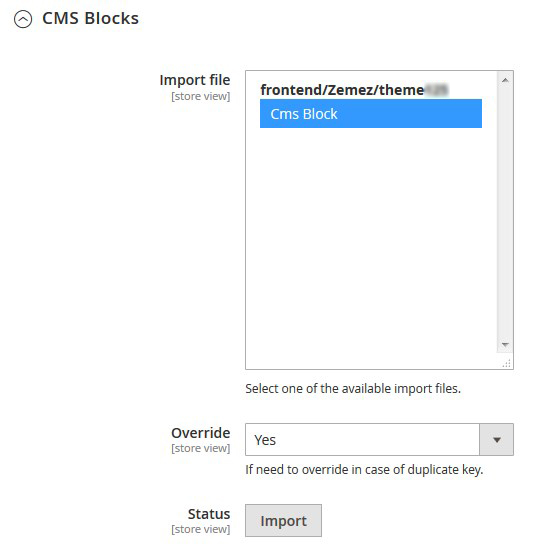
Static Blocks Import
When you are done with the pages import, you need to import the static blocks. The procedure is similar to the previous.
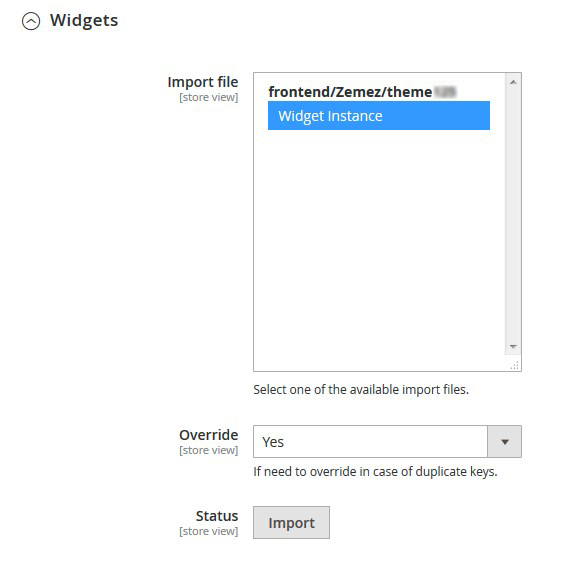
Widgets Import
Now you need to import the widgets. The procedure is almost the same as the previous one.
Remember to save the settings.

Pages Configuration
Navigate to the Content > Pages section in the admin panel of you shop.
Here you can find the list of all the store pages. The imported pages: Home page, About Us, Privacy and Cookie Policy, 404 Not Found, Enable Cookies should already be available.
You need to make pages visible on your site. If you want pages be available on each store view, you need open each page settings. In order to do this, press the edit button.
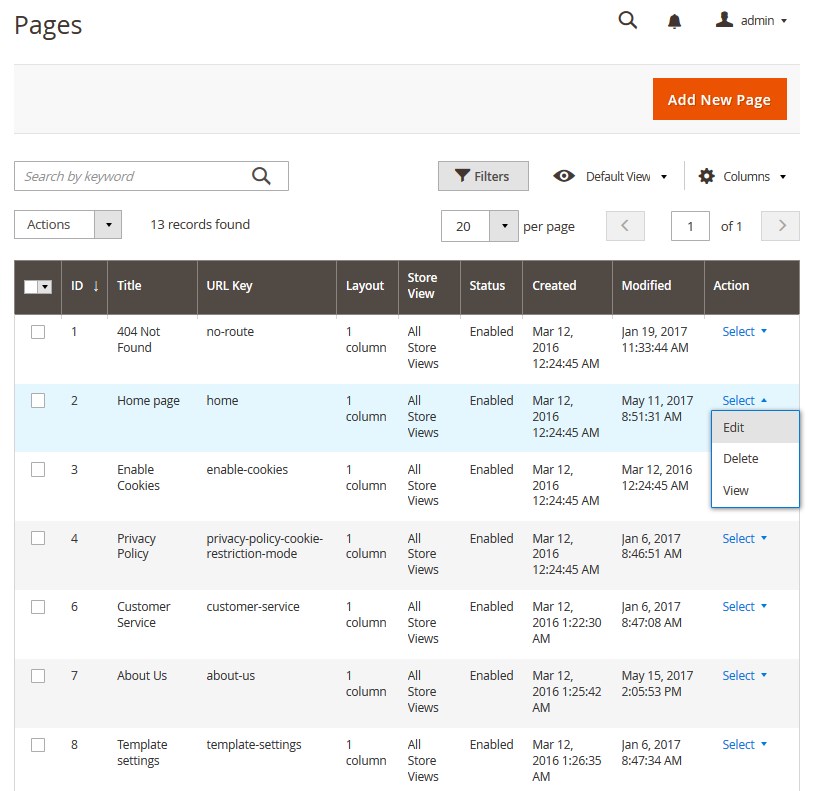
Remember to save the page.
Template Settings
Configuration of display static blocks/widgets on different layouts shown in the table below.
Pages Configuration
| 1. | 404 Not Found | sources\demo\pages\no-route.phtml | NA | 1 column |
| 2. | UrbanWear | sources\demo\pages\home.phtml | NA | 1 column |
| 3. | Enable Cookies | sources\demo\pages\enable-cookies.phtml | NA | 1 column |
| 4. | Privacy Policy | sources\demo\pages\privacy-policy-cookie-restriction-mode.phtml | NA | 1 column |
| 5. | Customer Service | sources\demo\pages\customer_service.phtml | NA | 1 column |
| 6. | About Us | sources\demo\pages\about_us.phtml | NA | 1 column |
| 7. | Template Settings | sources\demo\pages\template-settings.phtml | NA | 1 column |
| 8. | Shipping & Delivery | sources\demo\pages\shipping-delivery.phtml | NA | 1 column |
| 9. | FAQ | sources\demo\pages\faq.phtml | NA | 1 column |
| 10. | Support | sources\demo\pages\support.phtml | NA | 1 column |
| 11. | Guarantee | sources\demo\pages\guarantee.phtml | NA | 1 column |
| 12. | Secure Payment | sources\demo\pages\secure-payment.phtml | NA | 1 column |
| 13. | Terms & Conditions | sources\demo\pages\terms-conditions.phtml | NA | 1 column |
| 14. | Amp Home Page | sources\demo\pages\amp_homepage.phtml | NA | 1 column |
Static Blocks Configuration
| # | Block Name | Block Title | Identifier | Content |
|---|---|---|---|---|
| 1. | Footer column content 1 | Footer column content 1 | footer_column_content_1 | sources\demo\blocks\footer_col_1.phtml |
| 2. | Footer column content 2 | Footer column content 2 | footer_column_content_2 | sources\demo\blocks\footer_col_2.phtml |
| 3. | Footer column content 3 | Footer column content 3 | footer_column_content_3 | sources\demo\blocks\footer_col_3.phtml |
| 4. | AMP Footer Links | AMP Footer Links | amp_footer_links | sources\demo\blocks\amp_footer_links.phtml |
| 5. | Payment | Payment | payment_1 | sources\demo\blocks\payment_1.phtml |
| 6. | Banner-1 | Banner-1 | banner-1 | sources\demo\blocks\banner-1.phtml |
| 7. | Banner-2 | Banner-2 | banner-2 | sources\demo\blocks\banner-2.phtml |
| 8. | Footer Additional Info | Footer Additional Info | footer_add_info | sources\demo\blocks\footer_add_info.phtml |
| 9. | MM Banner | MM Banner | mm-banner | sources\demo\blocks\mm-banner.phtml |
| 10. | Top Banner | Top Banner | top-banner | sources\demo\blocks\top-banner.phtml |
| 11. | Amp Banner Big | Amp Banner Big | amp_banner_big | sources\demo\blocks\amp_banner_big.phtml |
Widgets Configuration
| # | Widget Name | Widget Type | Block Reference | Template / (Static Blocks) | Sort Order |
|---|---|---|---|---|---|
| 1. | MainSlider | FilmSlider | After Page Header | Custom Slider | 0 |
| 2. | Banner | CMS Static Block | Main Content Area | Banner CMS Static Block | 0 |
| 3. | Featured Products | Featured Products | Main Content Area | Products Grid / Custom Featured Products | 2 |
| 4. | Special Products | Featured Products | Main Content Area | Products Grid / Custom Featured Products | 3 |
| 5. | Banner 2 | CMS Static Block | Main Content Area | Banner CMS Static Block | 4 |
| 6. | Blog | Blog Latest Posts | Main Content Area | Post Grid / Custom Blog Posts | 5 |
| 7. | ShopByBrand | Shop by Brand | Main Content Area | Defaul Version | 6 |
| 8. | Catalog Image Grid | Catalog Image Grid | Main Content Area | Catalog Image Grid / Custom Categories + Thumbnail Images | 1 |
| 9. | TopBanner | CMS Static Block | Page Top | TopBanner CMS Static Block | 0 |