Covertati Documentation

Magento theme installation
Install theme on live store
If you already have a Magento store and want to apply the theme, follow the instruction below. To install the theme you only need to upload all the theme files to your server and then enable the theme in the admin panel. But to avoid unexpected problems after installation, you should first prepare your Magento. Please strictly follow the steps described in this guide:
- First of all, please make sure your Magento installation version meets the template requirements. The detailed Magento update guide you will find on the site Magento Wiki.
- It is recommended to install the theme on a test server before you install it on a live store.
- Backup Magento files and the store database.
- Disable all cache systems which you have in your Magento
- Disable Merge & Minify JavaScript Files in Stores > Configuration > Advanced > Developer > JavaScript Settings and Merge & Minify CSS Files in Stores > Configuration > Advanced > Developer > CSS Settings. You can enable this feature after installation..
- Copy the content of the archive [app folder] to the root folder of your online shop. After copying run the console and navigate to the root shop folder.
- Run the following commands in the command line, one by one:
- bin/magento setup:upgrade
- bin/magento index:reindex
- bin/magento cache:clean
- Then follow the instructions for setting up the theme.
Important: creating backup before installation of any themes or extensions in Magento is extremely important, especially if you are working on a live store.
Important: when developing your Magento store, in order to be able to see changes immediately, you should completely disable the cache. You can enable it after you finish configuring your store.
Attention!!!
Template configuration
We will configure it the same way as in our Live Demo template, without affecting your products data. The theme configuration process will be shown based on the default Magento store with the sample data.After the theme installation, no difference will appear on your site frontend.
Activate the new theme
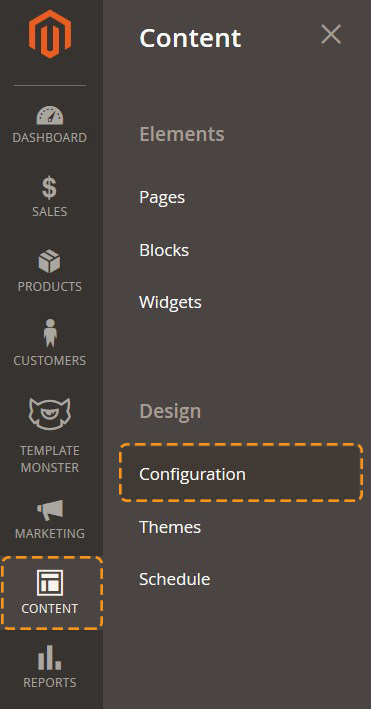
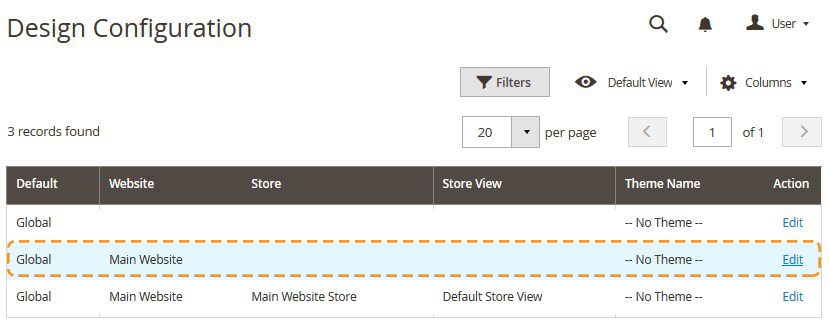
In the Default Theme section select the required theme in the Applied Theme option drop-down list and, then click Save Configuration button.

Activate the color scheme
In order to activate the color scheme, navigate to the Stores > Settings > Configuration section.
Then choose the TEMPLATEMONSTER > Theme Options in the left side menu and you'll move to the module settings interface.

Click on the Store View: Default Config. Select a Main Website from the option dropdown.

Confirm the scope switching in the pop-up window. Press "OK" to confirm.

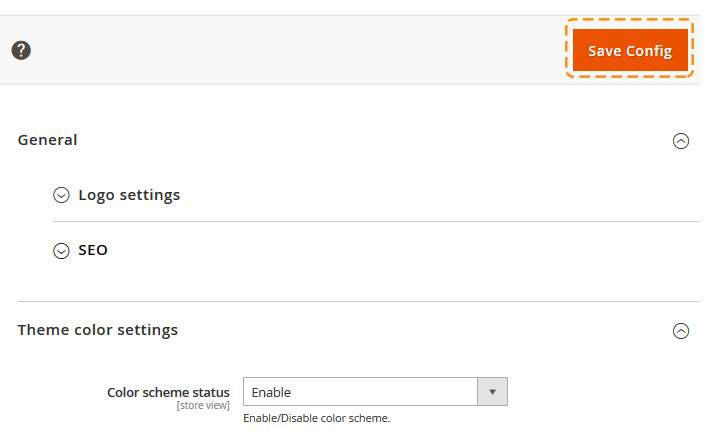
After that, you will see a new tab. The Theme color settings tab under the General one.
Go to the Theme color settings tab. Enable the color scheme. Select enable from the Color scheme status dropdown.

Select the desired color scheme from the Color scheme dropdown.
Remember to save the settings.
Logo configuration
Please follow these steps when setting up logo image included into the theme package [you can view it on the Live Demo page].

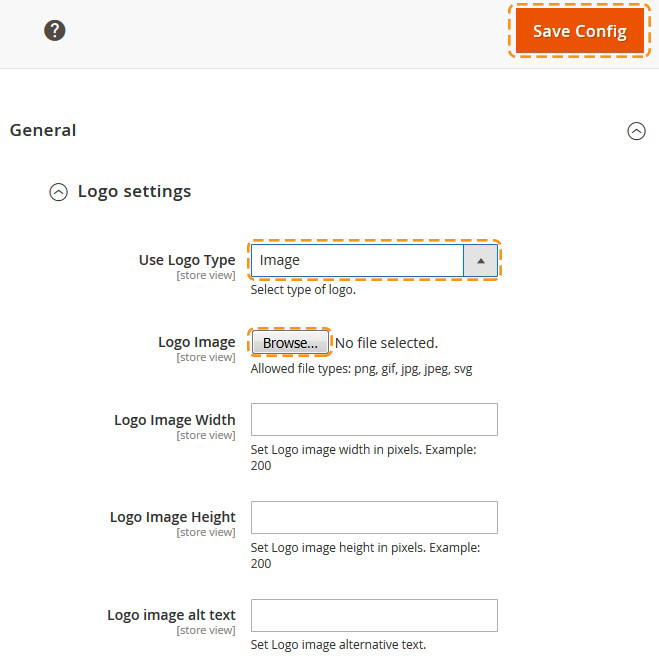
You can use the text Logo type.
The Theme Options module features will be described later in the TM Extensions Settings chapter.
Pages, static blocks and widgets import
In order to make your template look exactly like our Live Demo, you need to import the store pages, static blocks and widgets. Please follow the instructions below in order to import store pages, static blocks and widgets.
- Navigate to Stores > Settings > Configuration section.
- Then choose the TEMPLATEMONSTER > Theme Options in the left side menu and you'll move to the module settings interface.
- Click on the Store View: Default Config. Select a Main Website from the option dropdown.
- Confirm the scope switching in the pop-up window. Press "OK" to confirm.
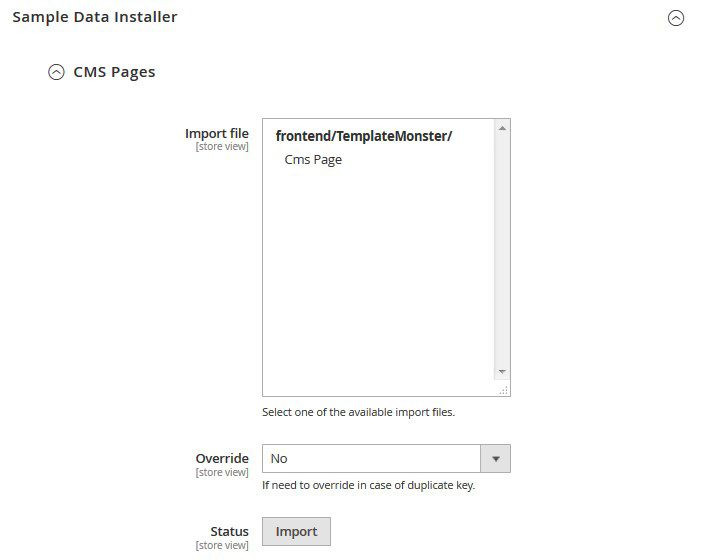
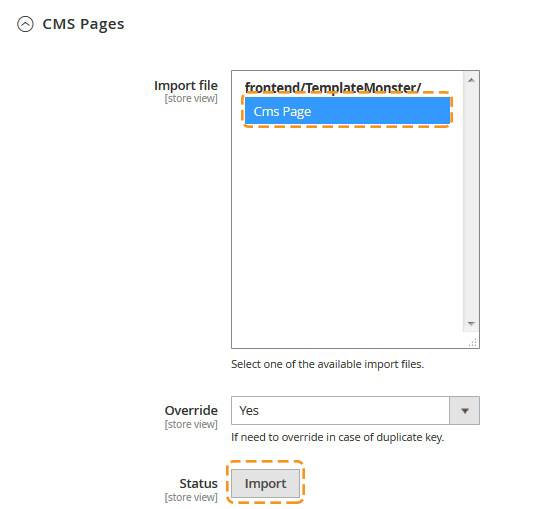
- Go to the Sample Data Installer tab > CMS pages.
- Select files you want to import. You need to select Cms Page.
- Set the Override option to "Yes" if you want to replace your store pages with new ones in case of duplicate key.
- Press the Import button.
- You will see the confirmation message. The message will inform you about the total number of imported pages.
Pages Import



Static blocks Import
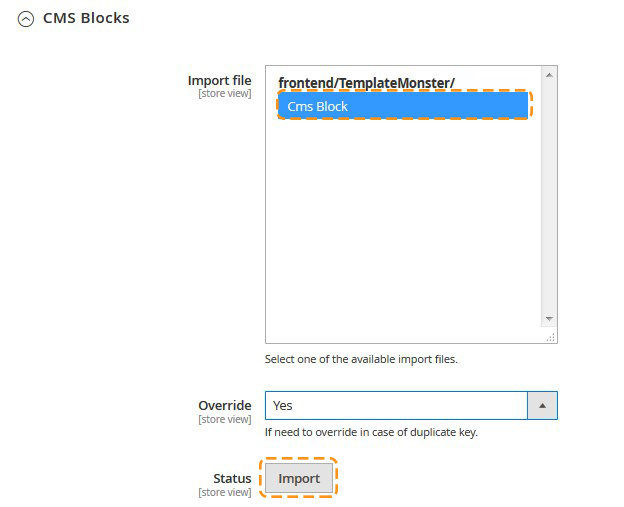
When you are done with the pages import, you need to import the static blocks. The procedure is similar to the previous.


Widgets Import
Now you need to import the widgets. The procedure is almost the same as the previous one.


Remember to save the settings.
Pages configuration
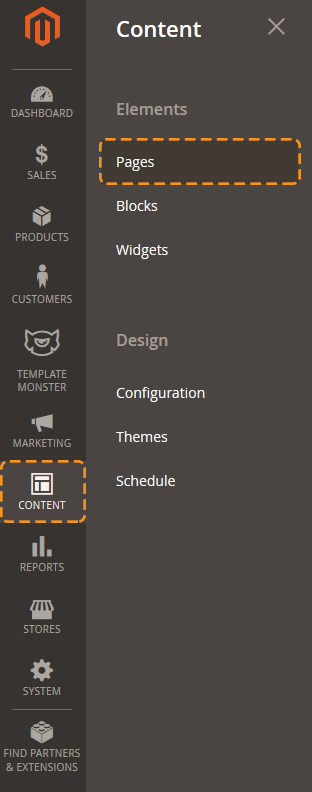
Navigate to the Content > Pages section in the admin panel of you shop.
Here you can find the list of all the store pages. The imported pages: Home page, About Us, Privacy and Cookie Policy, 404 Not Found, Enable Cookies should already be available. You need to make pages visible on your site. If you want pages be available on each store view, you need open each page settings. In order to do this, press the edit button.
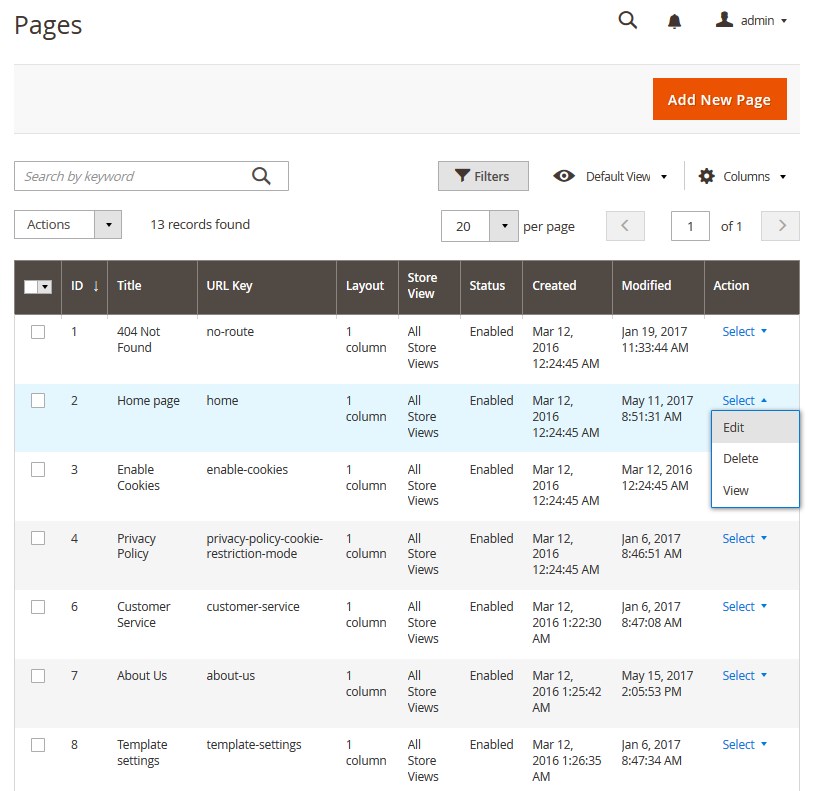
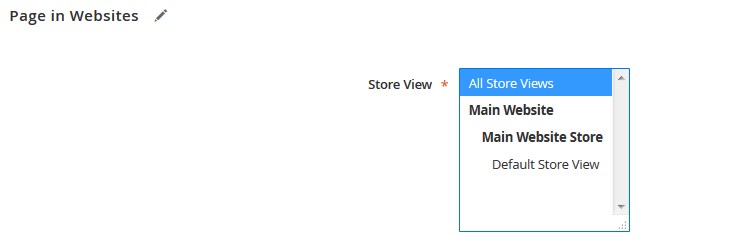

Remember to save the page.
Widgets Configuration
Then you need to set the widgets in an appropriate way. Navigate to Content > Widgets.
Due to the FilmSlider module complex structure, you can NOT import the one. To make widget appear on your website, you have to create a NEW FilmSlider * widgets.
* See TM Extensions Settings > FilmSlider.
CMS Static Block widget type configuration
Banner Big 1 widget

To configure the Banner Big 1 widget, navigate to Content > Widgets. Click the widget title to open the setting interface.
Navigate to Widgets Options tab. Press the Select Block button.
Select the Banner Big 1 static block for this widget. You can use the search field to simplify the process.
You also can change the block content. In order to do this, go to the Content > Blocks section. Select Edit from the Action option dropdown. You will see CMS block settings interface. Now, you're able to edit the block content in the content field. Full HTML support is provided. Remember to save the settings.
Save the settings.
Banners widget

To configure the Banners widget, navigate to Content > Widgets. Click the widget title to open the setting interface.
Navigate to Widgets Options tab. Press the Select Block button.
Select the Banners static block for this widget. You can use the search field to simplify the process.
You also can change the block content. In order to do this, go to the Content > Blocks section. Select Edit from the Action option dropdown. You will see CMS block settings interface. Now, you're able to edit the block content in the content field. Full HTML support is provided. Remember to save the settings.
Save the settings.
How to change the banner image
Navigate to your Magento root folder on your server. Then, go to the app/design/frontend/TemplateMonster/theme065/web/images/media folder.
Find the image you want to replace. Remember the name of the image (e.g. banner-1.jpg).
Upload the new image in the media folder replacing the old one. The new image should have the same name and extension (e.g. banner-1.jpg).
Banners widget images:
- banner-1.jpg (left)
- banner-2.jpg (right)
Banner Big 1 widget image:
- banner-big-01.jpg
Banner Big 2 widget image:
- banner-big-02.jpg
Featured Products type widget
Top Sellings widget

To configure the Top Selling (Product Grid) widget, navigate to Content > Widgets. Click the widget title to open the setting interface.
Navigate to Widgets Options tab. Go to the Categories option. You need to select category (custom products) you want to display within the widget.
Save the settings.
Catalog Image Grid type widget
Catalog Image Grid widget
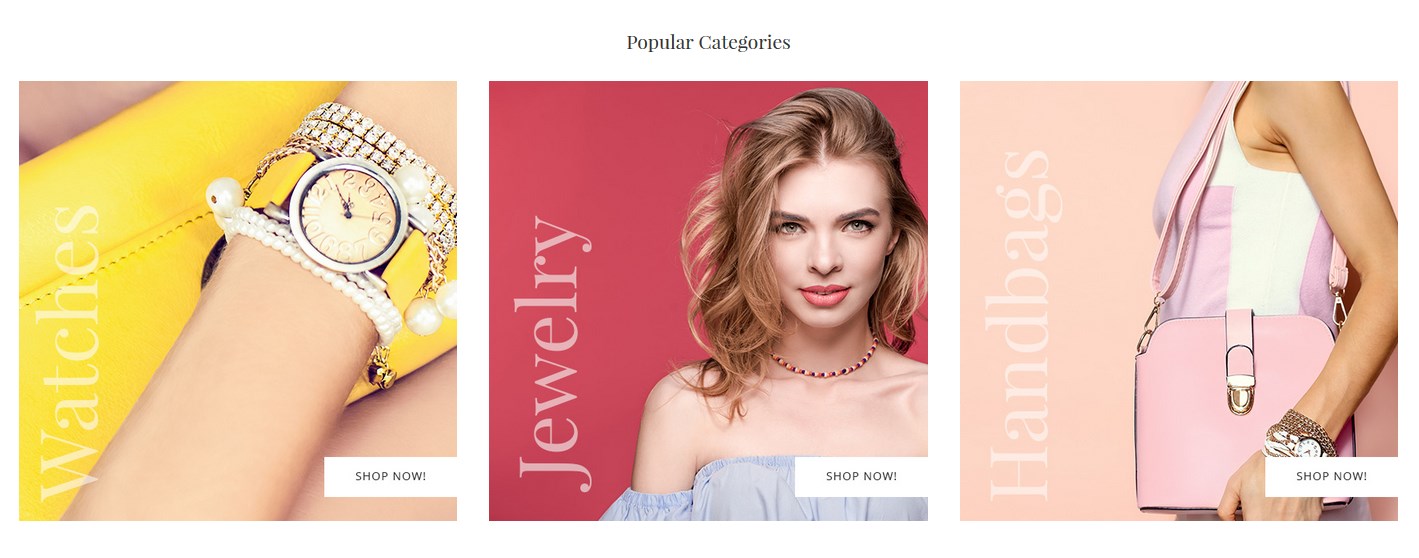
To configure the Catalog Image Grid widget (see Template Settings section), navigate to Content > Widgets. Click the widget title to open the setting interface.
Navigate to Widgets Options tab. Go to the Categories option. You need to select your category you want to display within the widget.
Save the settings.
Note, the main categories should have the Category Image.
Go to Products > Categories. Select the category you want to display within the widget. Navigate to the Content tab. Upload the category image.
Save the category settings.
Blog widget configuration
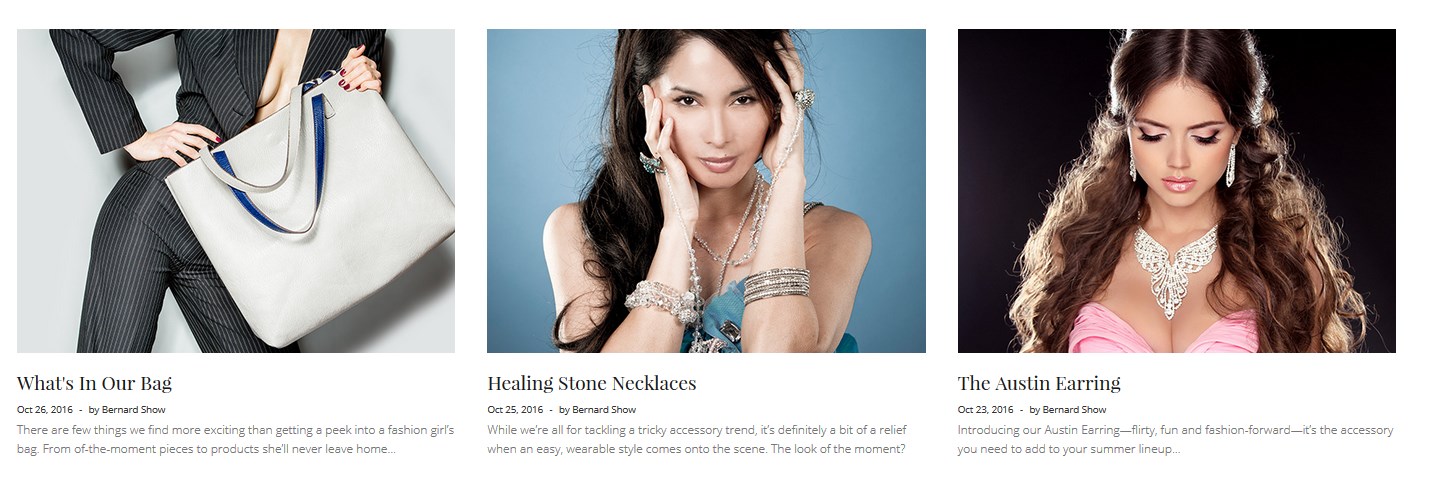
To configure the Blog theme1 widget you should create posts to display. See Blog module.
Template Settings
Configuration of display static blocks/widgets on different layouts shown in the table below.
Home pages configuration
| # | Page Name | Page HTML (Content tab) | Page XML (Design tab) | Layout |
|---|---|---|---|---|
| 1. | Home Page | sources\demo\pages\home.phtml | sources\demo\pages\home.xml | 2 columns-left |
| 2. | About Us | sources\demo\pages\about-us.phtml | NA | 1 column |
| 3. | Customer Service | sources\demo\pages\customer_service.phtml | NA | 1 column |
| 4. | Privacy Policy | sources\demo\pages\privacy_policy.phtml | NA | 1 column |
| 5. | 404 Not Found | sources\demo\pages\no-route.phtml | NA | 1 column |
| 6. | Template settings | sources\demo\pages\template-settings.phtml | NA | 1 column |
| 7. | Shipping & Delivery | sources\demo\pages\shipping-delivery.phtml | NA | 1 column |
| 8. | FAQ | sources\demo\pages\faq.phtml | NA | 1 column |
| 9. | Support | sources\demo\pages\support.phtml | NA | 1 column |
| 10. | Guarantee | sources\demo\pages\guarantee.phtml | NA | 1 column |
| 11. | Secure payment | sources\demo\pages\secure-payment.phtml | NA | 1 column |
| 12. | Terms & Conditions | sources\demo\pages\terms-conditions.phtml | NA | 1 column |
Static blocks configuration
| # | Block Name | Block Title | Identifier | Content |
|---|---|---|---|---|
| 1. | Footer column content 1 | Footer column content 1 | footer_col_1 | sources\demo\blocks\footer_col_1.phtml |
| 2. | Footer column content 2 | Footer column content 2 | footer_col_2 | sources\demo\blocks\footer_col_2.phtml |
| 3. | Footer column content 3 | Footer column content 3 | footer_col_3 | sources\demo\blocks\footer_col_3.phtml |
| 4. | Footer column content 4 | Footer column content 4 | footer_col_3 | sources\demo\blocks\footer_col_4.phtml |
| 5. | Contact Info Top Panel | Contact Info Top Panel | contact-info-top-panel | sources\demo\blocks\contact-info-top-panel.phtml |
| 6. | Payment | Payment | payment_1 | sources\demo\blocks\payment_1.phtml |
| 7. | Offers | Offers | offers | sources\demo\blocks\offers.phtml |
| 8. | Top Panel | Top Panel | top-panel-custom | sources\demo\blocks\top-panel-custom.phtml |
| 9. | Banner Big 2 | Banner Big 2 | banner_big_2 | sources\demo\blocks\banner_big_2.phtml |
| 10. | Banner Big 1 | Banner Big 1 | banner_big_1 | sources\demo\blocks\banner_big_1.phtml |
| 11. | Banners | Banners | banners | sources\demo\blocks\banners.phtml |
Widgets configuration
| # | Widget Name | Widget type | Content |
|---|---|---|---|
| 1. | Blog | Blog Latest Posts | Custom blog posts |
| 2. | Offers | CMS Static Block | Offers block |
| 3. | Slider | FilmSlider | Custom slides |
| 4. | Top Selling | Featured products | Featured products |
| 5. | On Sale | Featured products | Featured products |
| 6. | Banner Big 2 | CMS Static Block | Banner Big 2 block |
| 7. | Banner Big 1 | CMS Static Block | Banner Big 1 block |
| 8. | Catalog Image Grid | Catalog Image Grid | Custon categories |
| 9. | Banners | CMS Static Block | Banners block |

